Appliance faults, delay of game

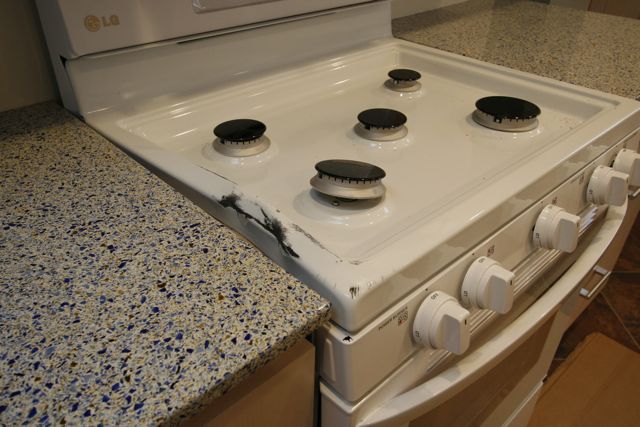
Unboxing the stove revealed factory or shipping damage.

Unboxing the stove revealed factory or shipping damage.

The kitchen had finally reached the stage where the appliances could be installed.  It would seem a straightforward task: move them into position and plug them in.  But as with so many other steps in this project, it did not go smoothly.

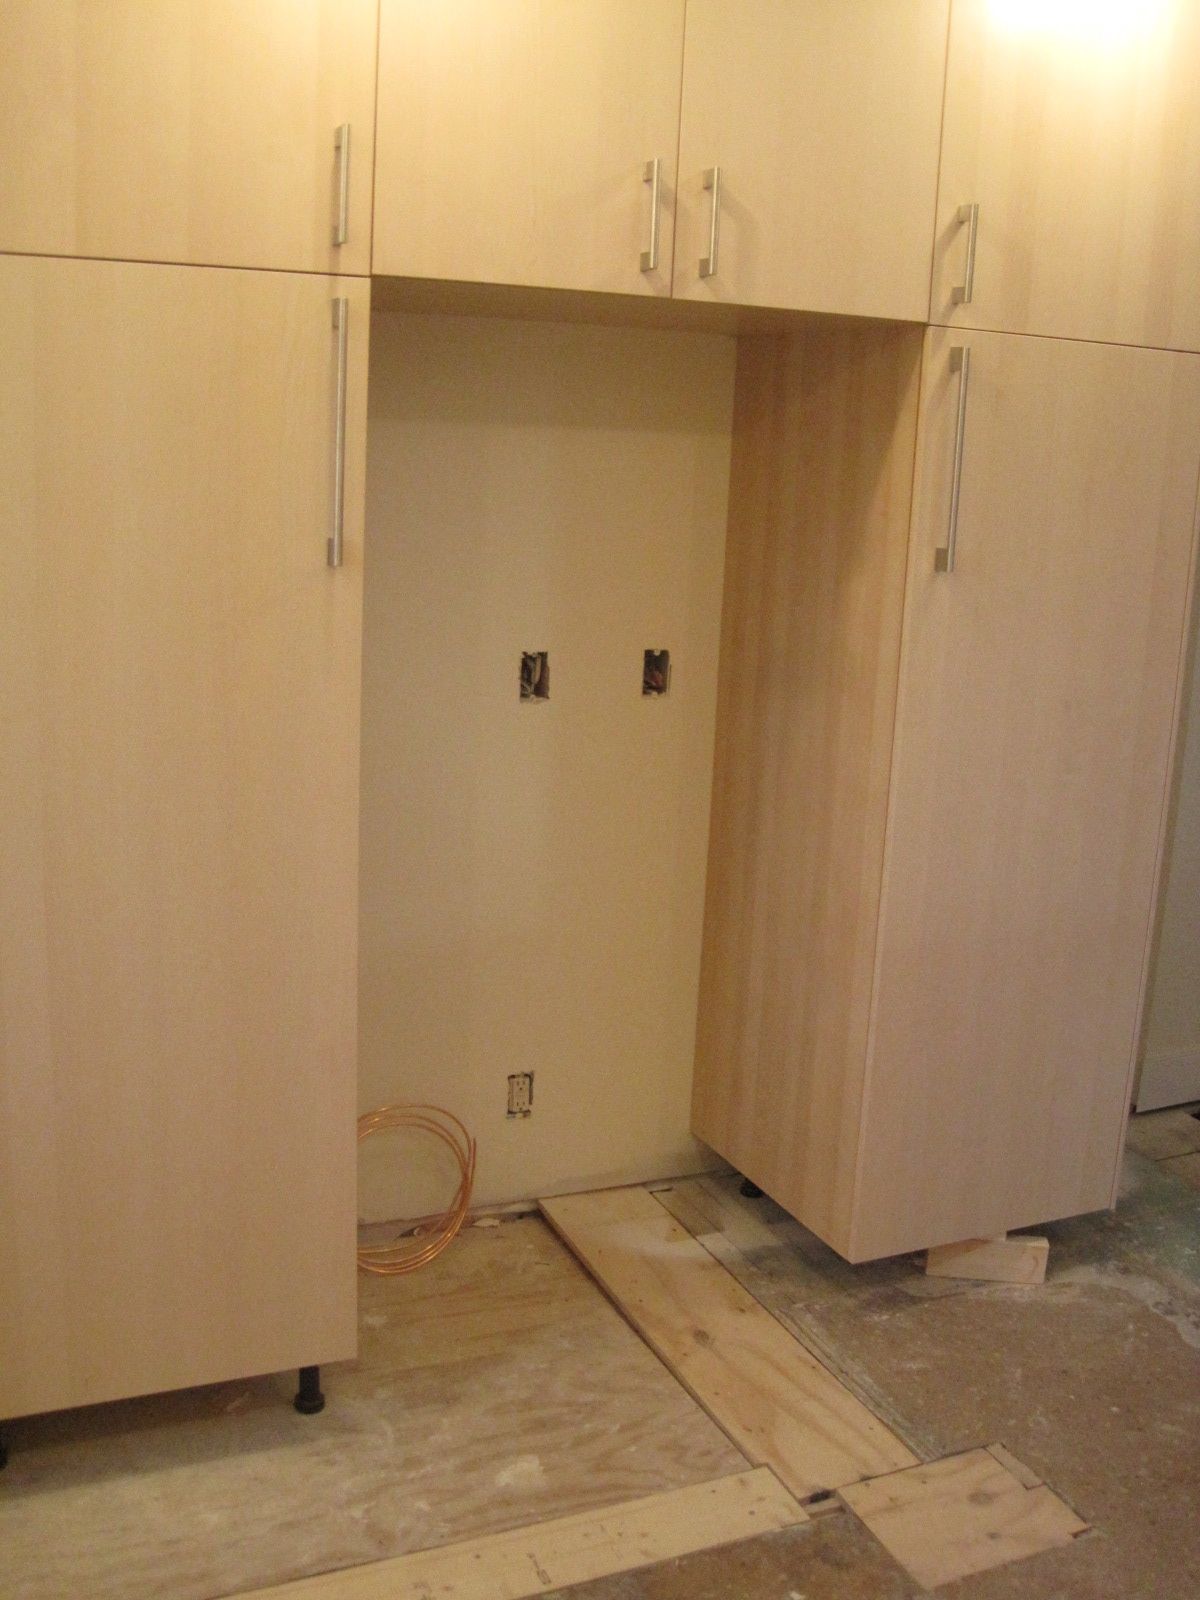
The first obstacle involved the space reserved for the refrigerator.  It was 36-inches wide.  The refrigerator was 35-3/4”, leaving 1/8-inch of clearance on each side.  For precision equipment, this would be plenty, but the 20-year old refrigerator was not that precise, and it was certainly not level.  This tolerance is less than one-tenth of a degree, and on this floor would be difficult to achieve.  The refrigerator stood listing to one side, just outside of its bay, waiting for the expertise to finesse it into position.

The other appliance setback was a little more severe.  We had ordered a new gas stove from Sears last fall during a promotional sale.  It was delivered in October, just as the remodeling work was building up.  It took residence in the living room and remained in its cardboard shipping carton, protecting it from the hazards of demolition, carpentry, and sheetrock installers.

Now those risks are over, and it was time to unpack and install it.  On opening however, it was discovered that even though the box and packaging was intact, the stove itself had been crushed as if by a forklift dropping it, or a robot packing actuator that had given it a goodbye pinch.  The side panel was deeply gouged and the top panel kinked and bent.  The white finish had been scarred to the steel.

Unfortunately, the delivery warrantee had run out, it was past three months.  Fortunately, Sears was interested in keeping customers, and arranged for a technician to come out to diagnose the problem and make recommendations for repair.  He did, and after comments about how often he had seen this type of damage, ordered replacement panels and scheduled a repair appointment.

In the ensuing week the panels arrived, each carefully packed in bubble wrap and crush proofing.  It didn’t help.  The replacement side panel was bent on two edges, clear damage even to casual observers.  A new side panel was ordered with instructions for overnight delivery.

The replacement for the replacement side panel looked ok, but when the technician arrived for the repair, it was clear that it too had been damaged, but in a more subtle way.  It was distorted and warped beyond the ability to mount to the stove frame.  In fact, the stove frame itself became suspect, as the burners did not seat evenly.  All that could be done is to order more parts and schedule another repair appointment.

All of this is related to one appliance in a remodeling project that has involved dozens of craftsmen.  There is finishing work to be done- trim pieces, plumbing hookups, paint touchup, installing cabinet shelves and hardware etc. but the painters won’t come back until the carpentry is finished, and the carpenters won’t come back until the plumbing and electrical is done, and the plumbers won’t come back until the appliances are ready.  I’ve seen this before—a chain of dependencies and the single point obstacle now is getting a functional stove.

In the meantime I will catch up on some blog entries.  There have been a number of recent events that deserve mention.  Stay tuned…

Posted in Uncategorized | Comments Off on Appliance faults, delay of game

Laundry room

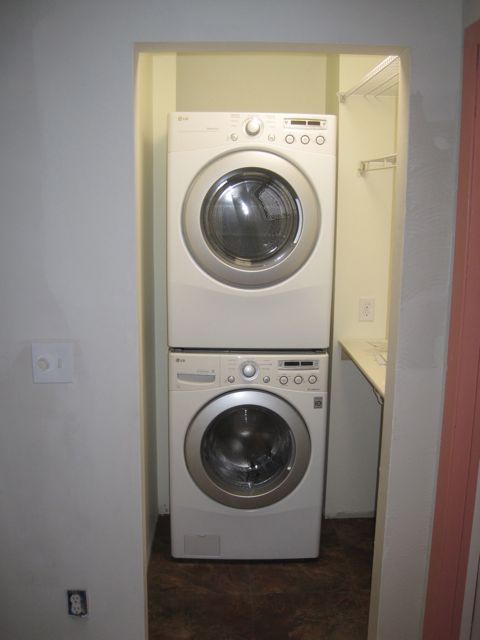
Washer and dryer stacked and inserted into space formerly occupied by a chimney.

Washer and dryer stacked and inserted into space formerly occupied by a chimney.

It was a “side project”, but since all the professional skills for carpentry, plumbing, venting, and electrical work were going to be applied to the upper floor kitchen and bath remodeling, it seemed like a good opportunity to extend them a little further and convert what had been an awkward closet wrapped around the chimney, into a useful room in which laundry could be cleaned and linens stored.

Modern washers and dryers are all front-loading rather than top loading, for energy and water conservation reasons.  This makes them candidates for stacking, and with the chimney now gone, they could (just) fit in the space.  This would create a laundry room on the main floor, in close proximity (immediately adjacent even!), to where the laundry gets generated!

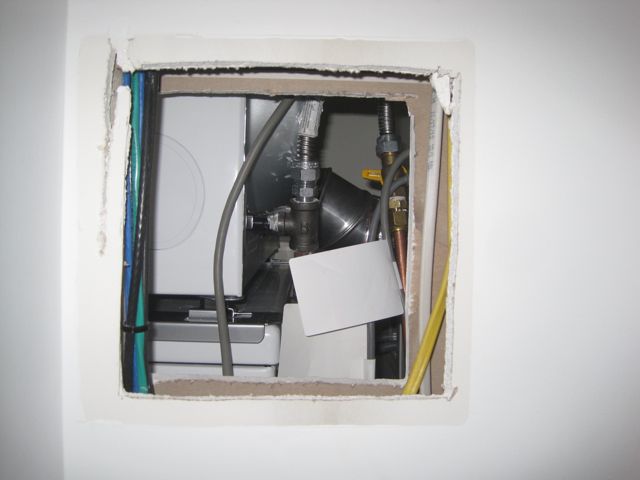
As usual, difficulties emerged.  The gas, plumbing, electrical and venting were installed on the back wall, but after stacking the units, there was no easy access to connect them up.  The room was just wide enough for the appliances to fit, but access to the hookups behind was restricted to a very small and restricted space over the top and behind.  This was a problem that could be solved by a child of five (“Quick, send for a child of five”), or maybe a trained monkey to climb behind and connect the hoses.  We had neither, but had anticipated the awkward positioning by cutting an access port through the side wall into the bedroom closet.  Were it not for this prescient action, we would be admiring a new but impotent laundry facility.  It was an awkward reach, but with adequate grunts and curses, the machines were connected.

A view into the access port from the bedroom closet.  Electrical, gas and venting can be seen in the tight space.

A view into the access port from the bedroom closet. Electrical, gas and venting can be seen in the tight space.

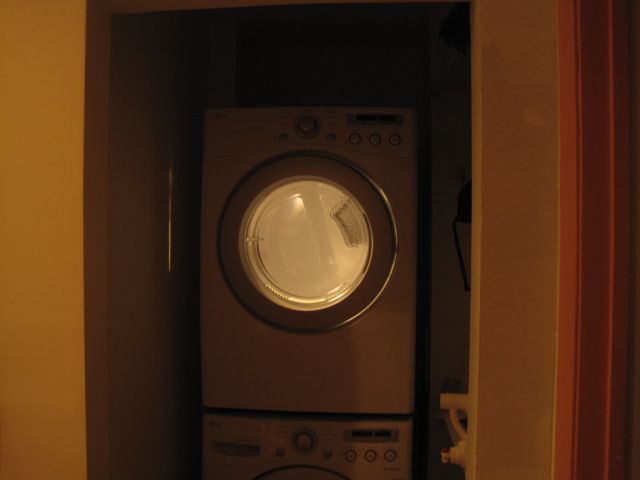
The new appliances are quite a pleasure to use.  They wash and spin in near silence, and when the cycle is done, they are so proud of their accomplishment that they sing a little tune.  Open the door, and interior lighting is provided to help inspect and remove the contents.  That last sock will no longer have any place to hide!

Interior lighting in the dryer!

Interior lighting in the dryer!

Posted in Uncategorized | 1 Comment

Sock Hop

This gallery contains 14 photos.

As mentioned previously, we had a unique opportunity to use the newly refinished floors in their furniture-free state.  Portia hosted a sock hop, a retro theme to show them off.  Here are a few photos; click on one to see … Continue reading

More Galleries | Comments Off on Sock Hop

Countertop Installation

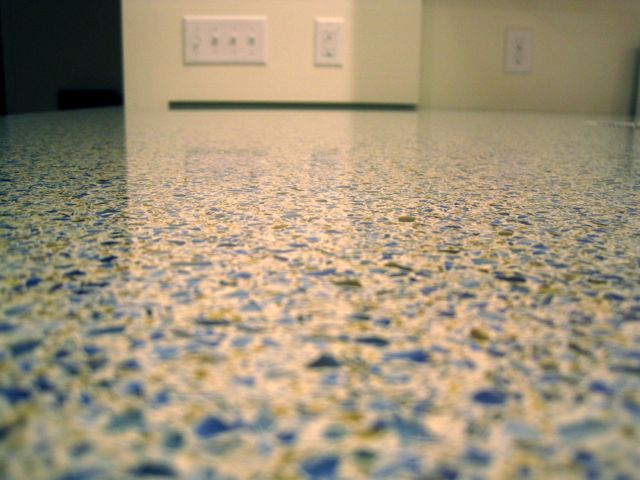
Recycled glass captured and polished to form the kitchen countertops in This Odd House.

Recycled glass, captured, sealed, and polished to form the kitchen countertops in This Odd House.

The casting and polishing of the countertop sections was completed, and the exact opening for the sink had been cut.  It was finally time for installation!

This is another challenging stage for the recycled glass material and it needed the skill and experience of Troy, another Rust non-Brother and his assistant to finesse the slabs into place, create invisible seams where they met, level and glue them.  Our design was a bit more challenging than usual in that there was a subfloor class plywood surface already on the cabinets.

The intent was to provide structural support for the peninsula under the skylight so that it could bear the weight of ladder and climber when access to the roof was needed and thereby prevent a fracture of the glass surface.  It may have been an unnecessary design precaution, and unfortunately the plywood ended up neither flat, nor smooth, nor level, making the glass mounting difficult.  In the end, adequate amounts of silicone adhesive provided a shock-mount under the glass slabs.

But before that final surface lockdown, many other installation steps had to occur, starting with getting the slabs from the delivery trailer, up to our second floor kitchen.  The slabs were heavy, and they were delicate.  They needed to get up the stairs without getting scratched or nicked, and preferably without making dings in the walls and floors along the way.

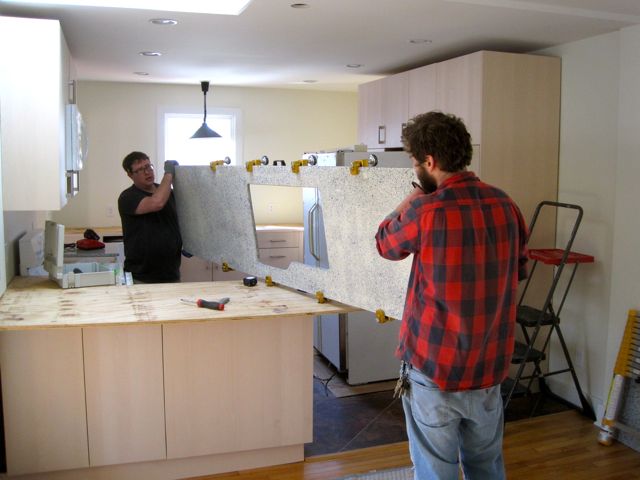
Specialized clamps that protected the finish were attached to them, and step by step, they were armstronged up to their home positions.

The largest slab is brought in to the kitchen.  The hole for the sink has already been made.  It will (remarkably) match the location of the sink.

The largest slab is brought in to the kitchen. The hole for the sink has already been made. It will (remarkably) match the actual location of the sink.

The sink was another installation challenge.  It was cast iron, over 75 pounds, and was to be “undermounted”.  It fit into the cabinet assigned for it and amazingly, when the countertop was positioned, butting up against the three constraint walls it had been carved to match, it somehow all lined up!

The finished result is beautiful to behold.  Photos do not capture it, so I guess we will have to invite everyone over to see it in person.

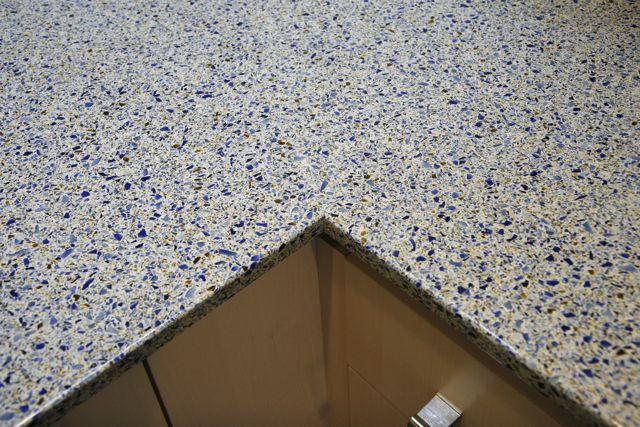
A corner section.  The seam is nearly invisible!

A corner section. The seam is nearly invisible!

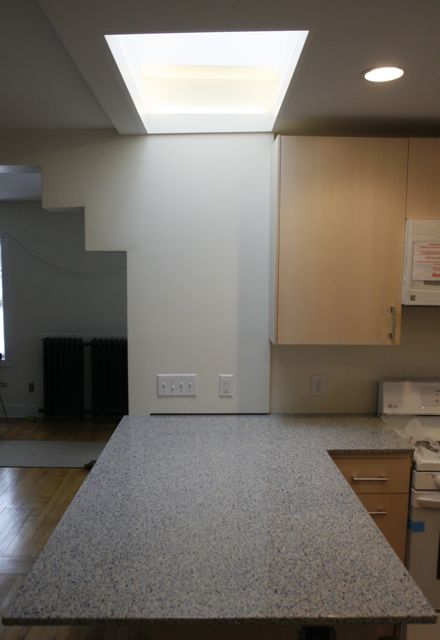
The peninsula countertop under the skylight.

The peninsula countertop under the skylight.

Posted in Uncategorized | 3 Comments

A visit to the countertop factory

The discs used by the robo-polisher in succession from coarse to ultra-fine in order to make a polished glass countertop.

The discs used by the robo-polisher in successive steps from coarse to ultra-fine in order to make a smooth glass countertop.

The kitchen is nearing completion and one of the final components is the countertop that will be installed on the cabinets.  We have selected a material, “recycled glass”, to provide this important work surface.  As one might expect, it comprises glass fragments from recycled glass containers, selected from various sources and mixed to obtain a particular color and texture appearance, and then sealed within a binder.  Some manufacturers use a concrete binder.  Our supplier, Rust Brothers, uses a class of epoxy having no volatiles (fumes).

Despite the source being recycled stuff, the material is fairly expensive, and the crafting and polishing adds to the total cost.  We wanted to make sure it will look and perform to the level expected of this expense, which is comparable to granite, quartz, and other engineered stone materials.  We ordered a sample of it to see it in the lighting and context of This Odd Kitchen alongside the Ikea cabinet and flooring colors.  We also conducted a customized stain test by applying the most likely things to spill on it:  coffee, wine, and hot sauce (it passed!).

There is a tricky orchestration that must happen to end up with a countertop that fits precisely, especially in a kitchen built around non-square walls.  The edges and features need to align, and the openings for sinks must be carefully created.  Before the slabs of material could be cast, an exact template of the countertops and walls had to be made.  Troy, one of the Rust Brothers (they aren’t really brothers) came out to build a template from strips of hardboard and hot glue.  Where the walls curved and waved, he carefully carved the template to match.   The angles and notches were set and cut to exactly mate with the features of the kitchen and cabinets.  He took the template back to the shop to be used in cutting and grinding the raw slabs that would be cast.

They refused to cut the hole for the sink from the manufacturers specifications; I think they had been burned before. They needed the actual physical sink before committing to that step, so that meant I needed to decide on one, obtain it, and deliver it to their shop.  It stressed me to think about this important aspect of the kitchen, but to avoid holding things up, I made a selection, and the eventual sink delivery turned out to be a great field trip!

We met Brady, one of the owners (still not a brother) who showed us where the material was cast, and how it was shaped and polished.  We saw our actual countertop sections, already polished, waiting for the final cutting.  Brady was an articulate and skilled artisan, someone who had developed sources of raw supplies beyond just glass, including walnut shells, cork, mother of pearl, and laminated paper, and had devised innovative methods and controls to make them into beautiful and useful materials.   He was justifiably proud of the techniques and the products that they created.

It was a pleasure to have him show his equipment and facilities to us.  Here are some of the photos of the place.

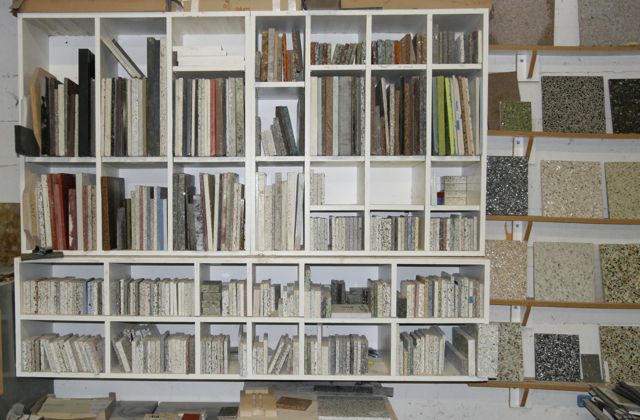
A sampling of the many items that Rust Brothers converts into countertops and other interior materials.

A sampling of the many items that Rust Brothers converts into countertops and other interior materials.

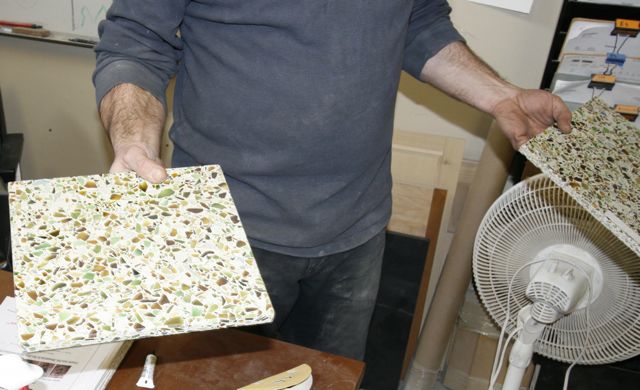
The "Hennepin" style of recycled glass.  The material comes from the recycled glass of Hennepin county, and the mix ratio between brown (beer) and green (wine) bottles, changes with the seasons!

The “Hennepin” style of recycled glass. The material comes from the recycled glass of Hennepin county, and the mix ratio between brown (beer) and green (wine) glass, changes with the seasons!

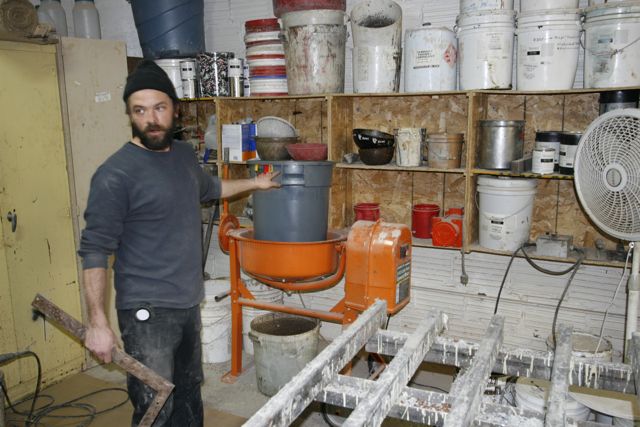
Brady in the casting room.  A mini-cement mixer combines the glass and resin.  The structure in front of him is a vibrating table to further blend the material and to evict bubbles.

Brady in the casting room. A mini-cement mixer combines the glass and resin. The structure in front of him is a vibrating table to further blend the material and to evict bubbles.

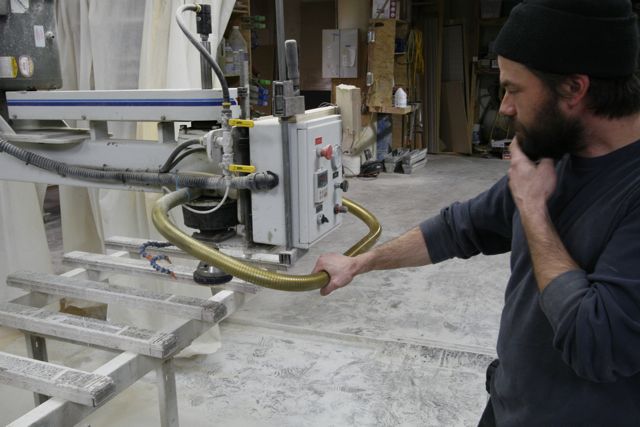
The head of the polishing machine.

The head of the polishing machine.

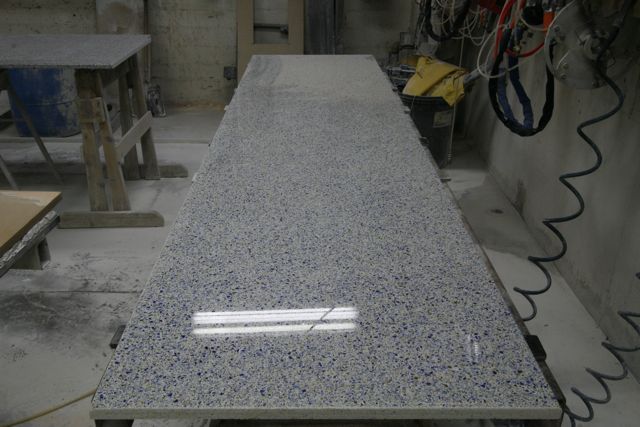
One of our slabs!  The fluorescent lights are reflected in its high gloss.

One of our slabs! The fluorescent lights are reflected in its high gloss.

Posted in Uncategorized | 1 Comment

More floor

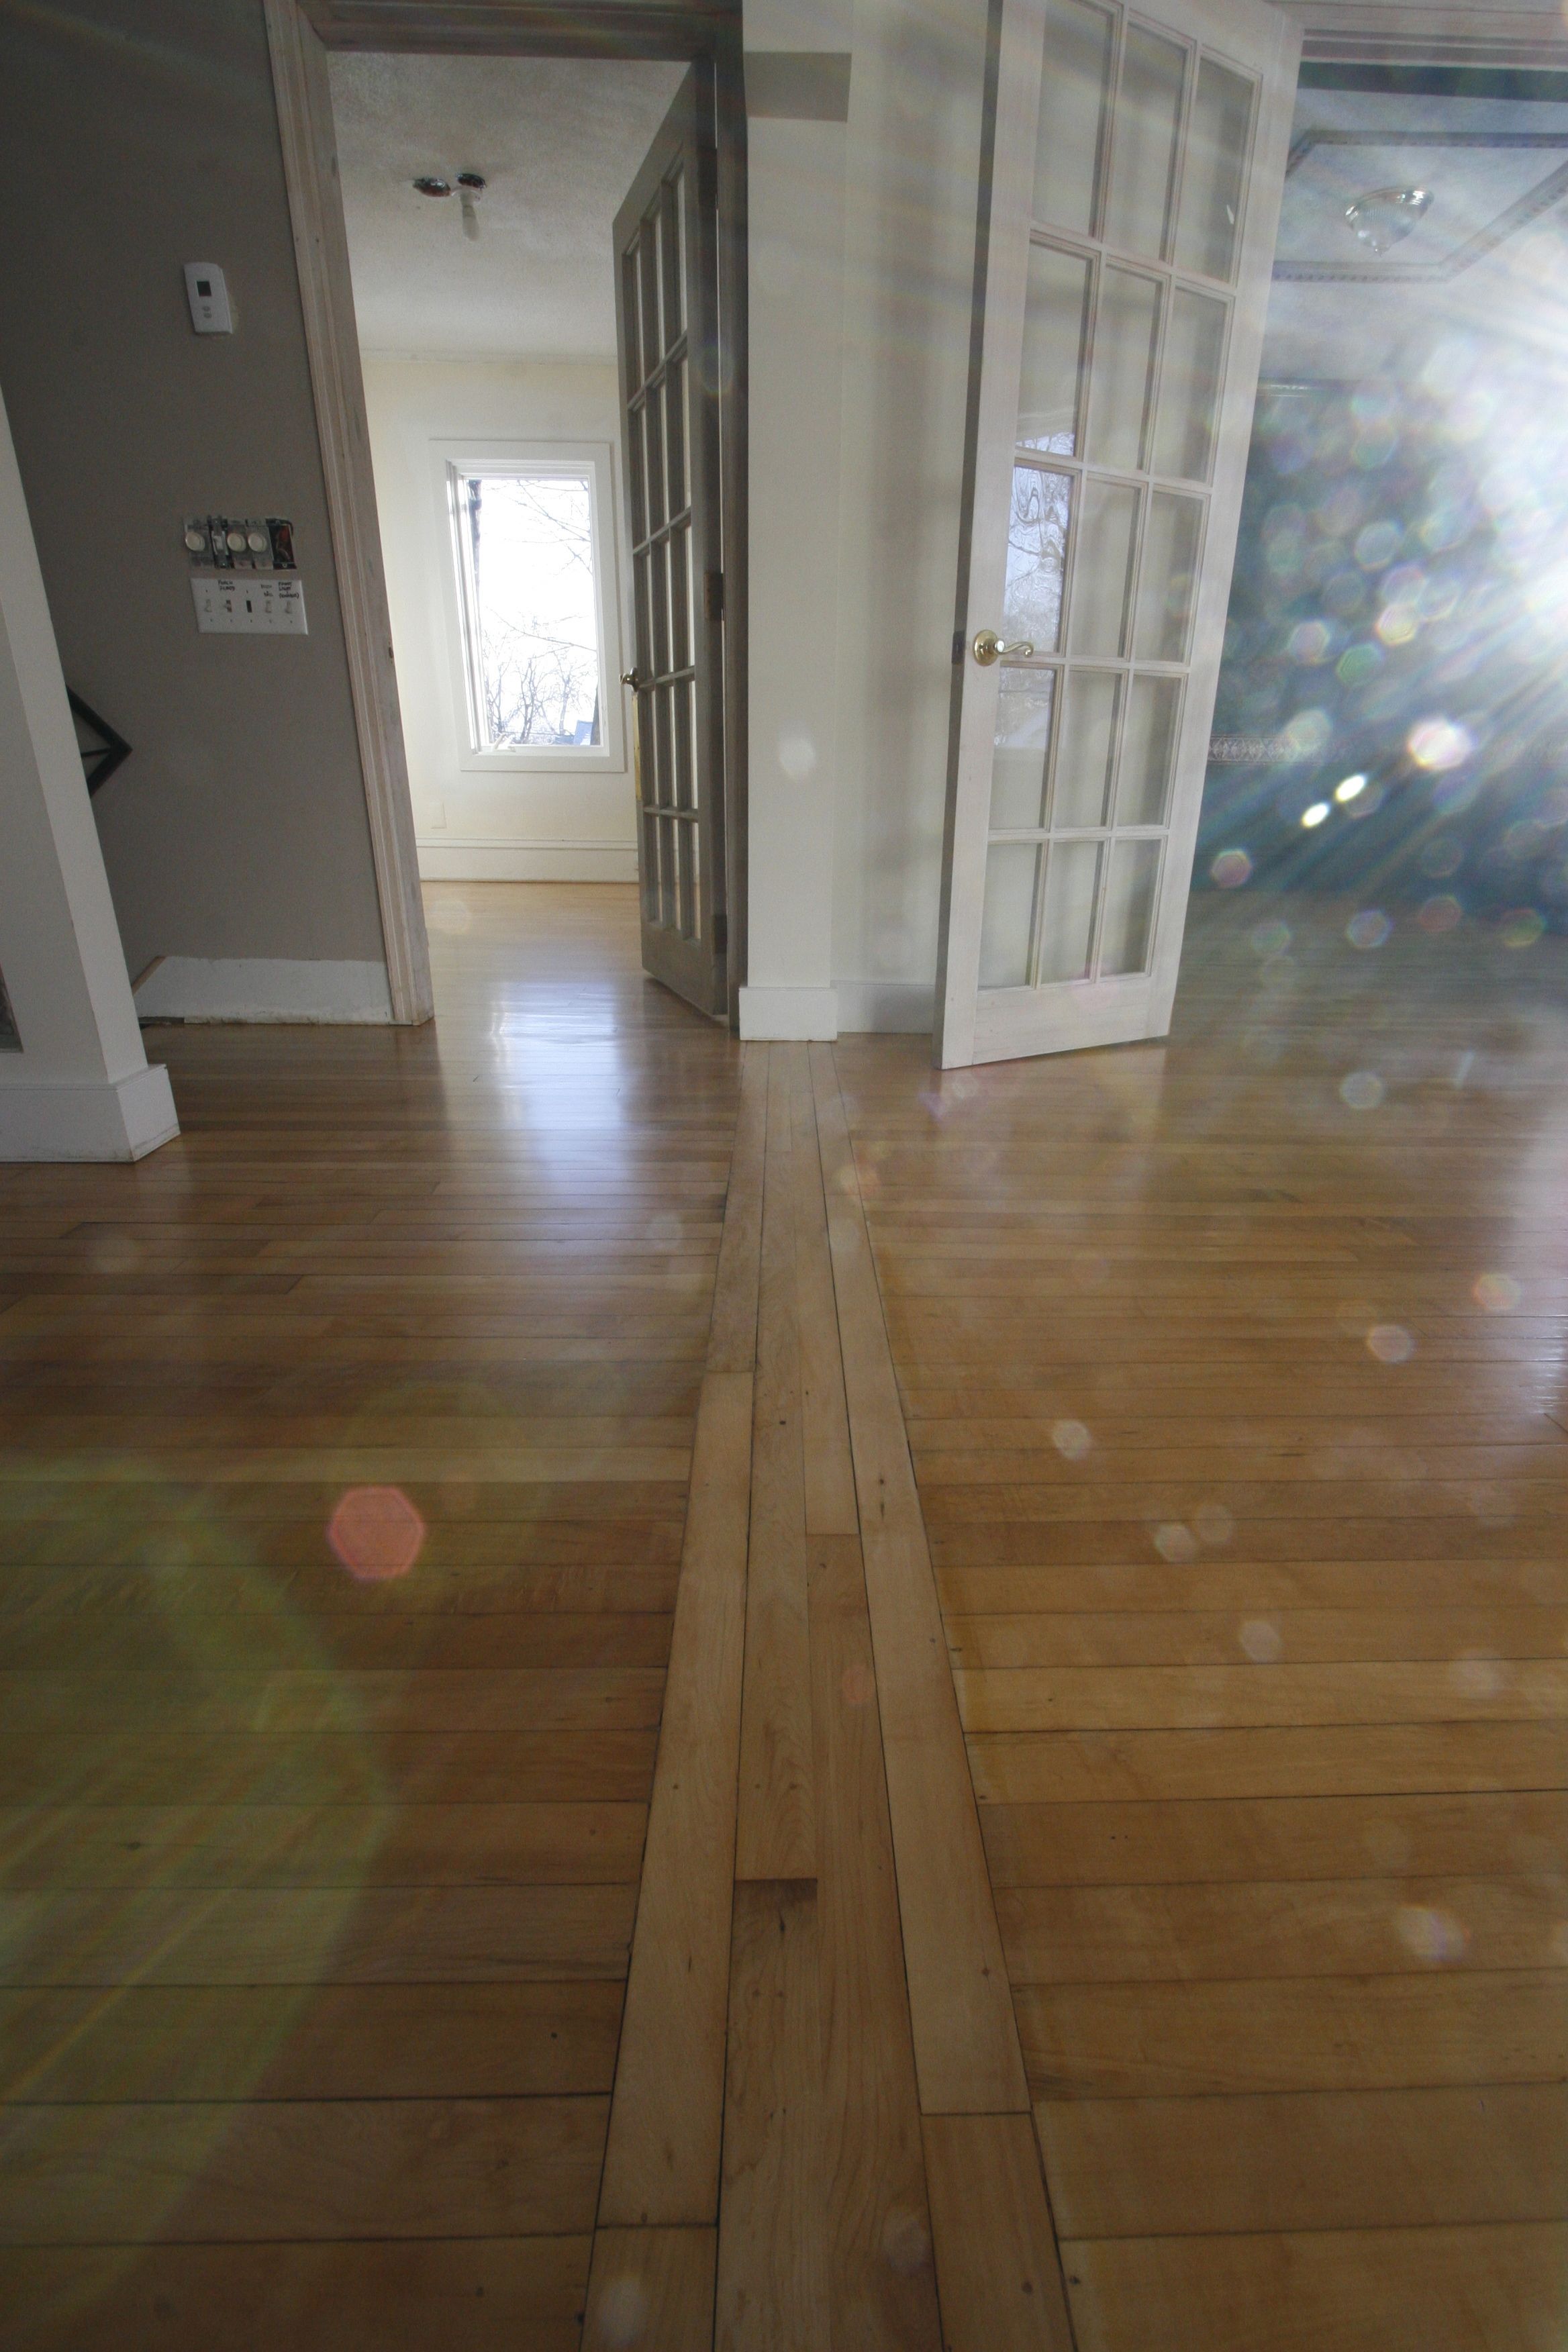
A newly refinished wood floor gleams in the morning light.

The flooring company that installed the vinyl tiles in the kitchen needed to know how the transition would be made to the existing wood floor (yet to be repaired and refinished).  When I suggested that they could provide a wooden strip of the right height and taper, they gave me a horrified look and declared “we don’t do wood”.

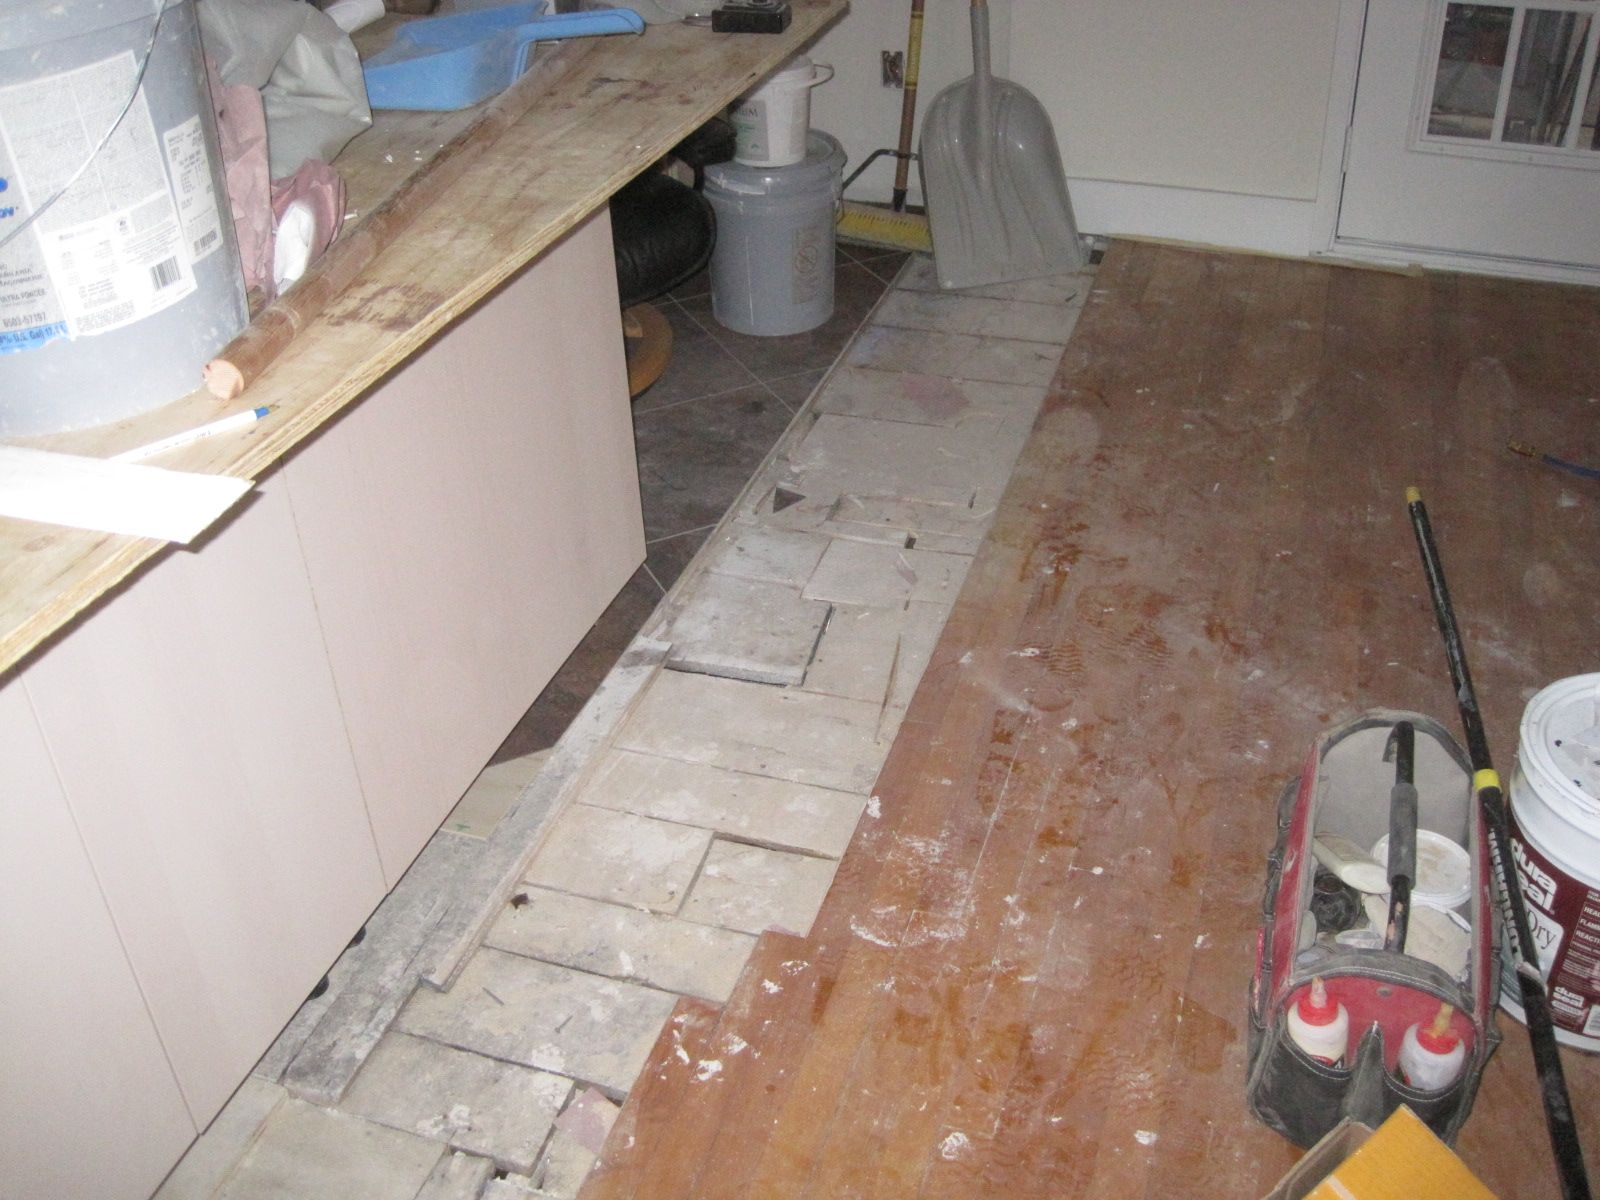
The no man's land between the kitchen vinyl floor and the maple floor to be restored.  Somehow, they will have to come together.
The no-man’s-land between the kitchen vinyl floor and the maple floor to be restored. Somehow, they will have to come together.

We decided that the vinyl tile would be laid beyond its natural boundaries so that it could be trimmed back if necessary when the wood flooring was restored.

The next week the wood flooring team arrived. I had spent quite some time finding a company that could do what I wanted.  My desires didn’t seem that outrageous to me.  The living room floor had been previously refinished.  It was glossy and beautiful, one of the features that attracted me to This Odd House.  But the floor under the radiators were painted white, a consequence I suspect, of the refinisher’s floor sanding machine not being able to get under them.

It could be that the previous owner who did the work rented the machine and it was the only tool available.  But I also found that even professional wood floor refinishing companies often did not have anything better, and would charge extra for having to deal with radiators.

I discovered that there was a tool for just exactly this purpose, the “long nose sander”, a kind of a duck-billed machine, and companies that wanted business in restoring old houses had this item in their floor sanding arsenal.

After interviewing several companies and confirming that they had such tools, I selected “Earl’s Floor Sanding”.  I was impressed with the knowledge and experience of the owner (Todd, there is no Earl), and the fact that he had a supply of maple floor boards that had been salvaged from houses of the same vintage.   He got my business.

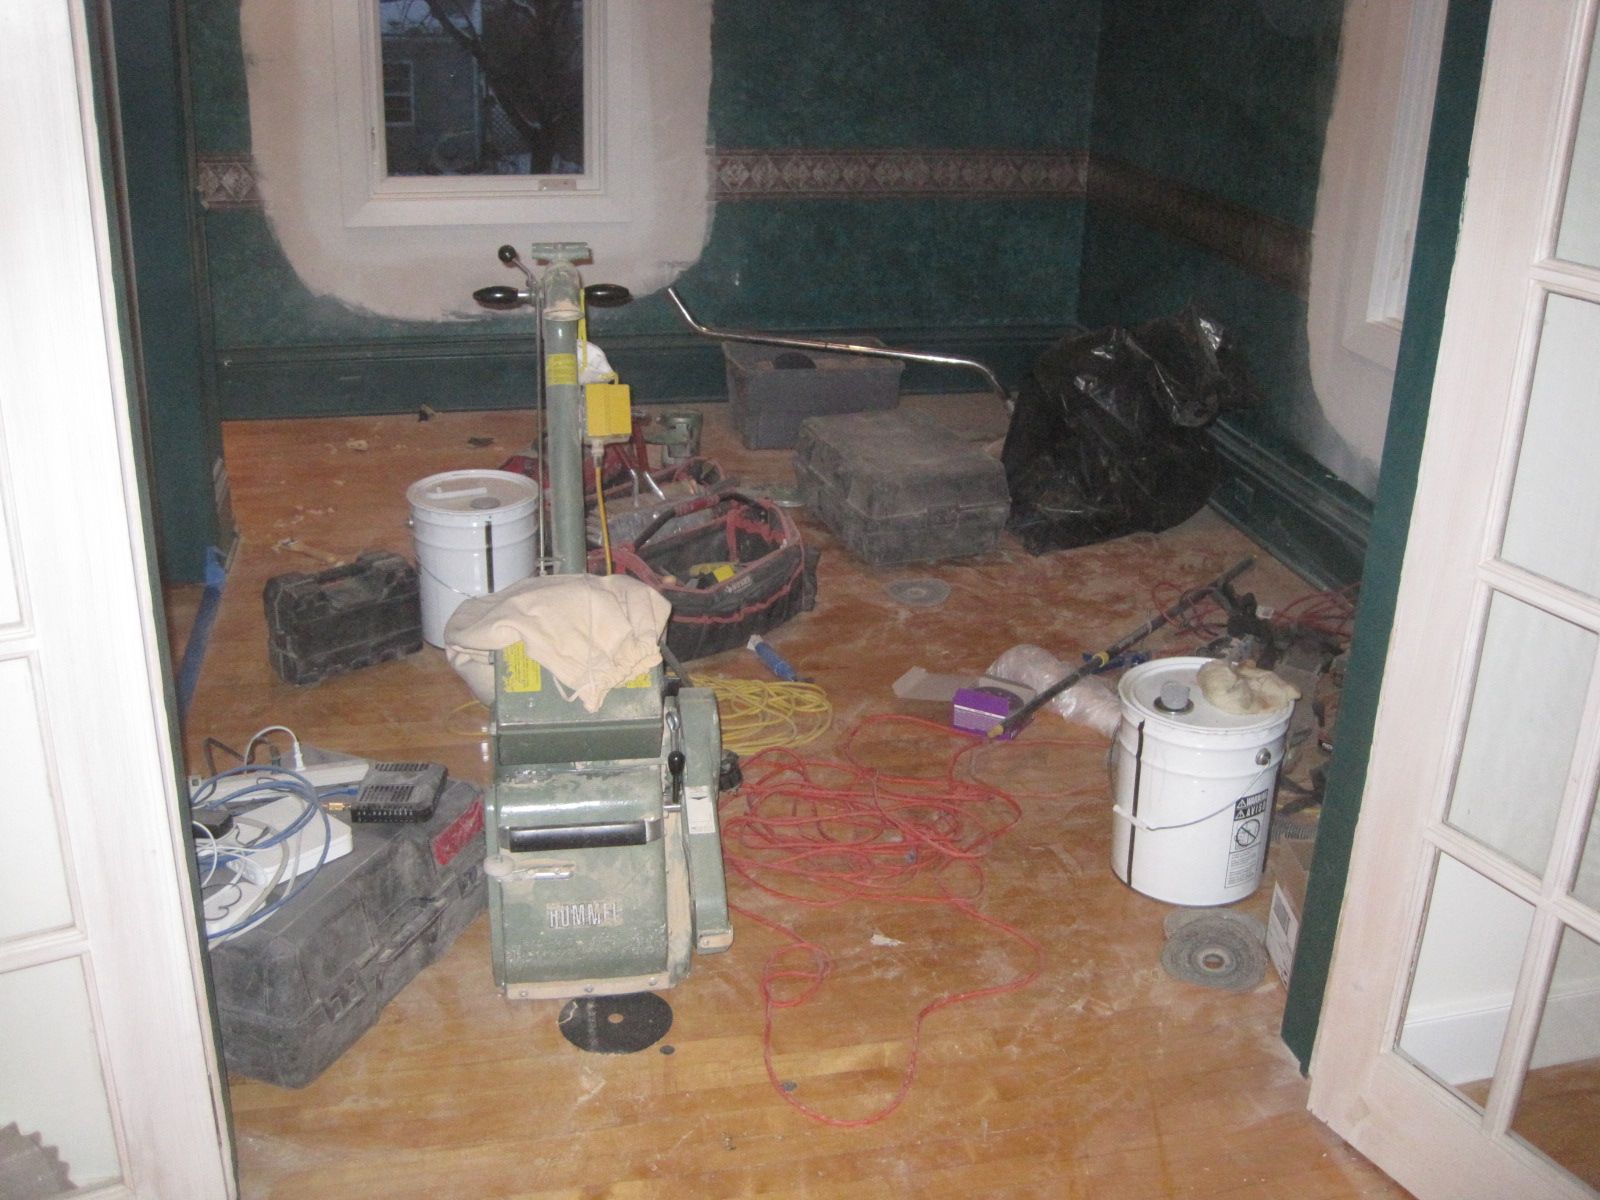
Some of the equipment used for restoring wood floors.

The rooms had been cleared, and all the furnishings shifted into the kitchen.  The first day was filled with the sounds of machines that extracted old boards, drilled, mitered and beveled them, cut new ones, then inlayed and resurfaced them.  Some of the equipment required 220V 50A power.  Lines were run to the basement to provide it.  The noise was tremendous, and the dust darkened the daylight.

Day two was more surface prep and the crafting of transition pieces.  A wood sealer was applied.  The interface between the vinyl tile floor and the wood floor would involve a 1/8” gap to be filled with some transitional material.  I proposed the grout that had been used between the tiles, but the wood flooring guy gave me a horrified look and said he knows nothing about grout and wouldn’t know how to apply it.  It became quite clear to me that there was absolutely no market overlap between these two flooring technologies.  He went off to the hardware store to procure some matching caulk, a material he knew and could apply with confidence.

Day three saw the first coat of varnish (polyurethane), an oil-based satin finish.  Satin finish is popular because it does not detract from the natural appearance of the wood, and it also hides scratches.  The existing finish in the living room was a striking high gloss.  It was popular at one time, and I liked it, but it is difficult for it to not record every abrasion and put it on full display.   I opted instead for an intermediate finish, semi-gloss.  It will still show reflections of the lighting, but with a nice diffuse glow.

It may never occur again that the floors will be as open and clear (until I move out or die I suppose), and since we may not move the furniture back in for another week, this is the time for a little dancing.  The panorama below shows the room in the morning light (a bit illusive, it is not nearly as big as the photo makes it look).

A 360 panorama showing the newly refinished wood floors. The ballroom is now open.
Posted in Uncategorized | 2 Comments

Flooring plans

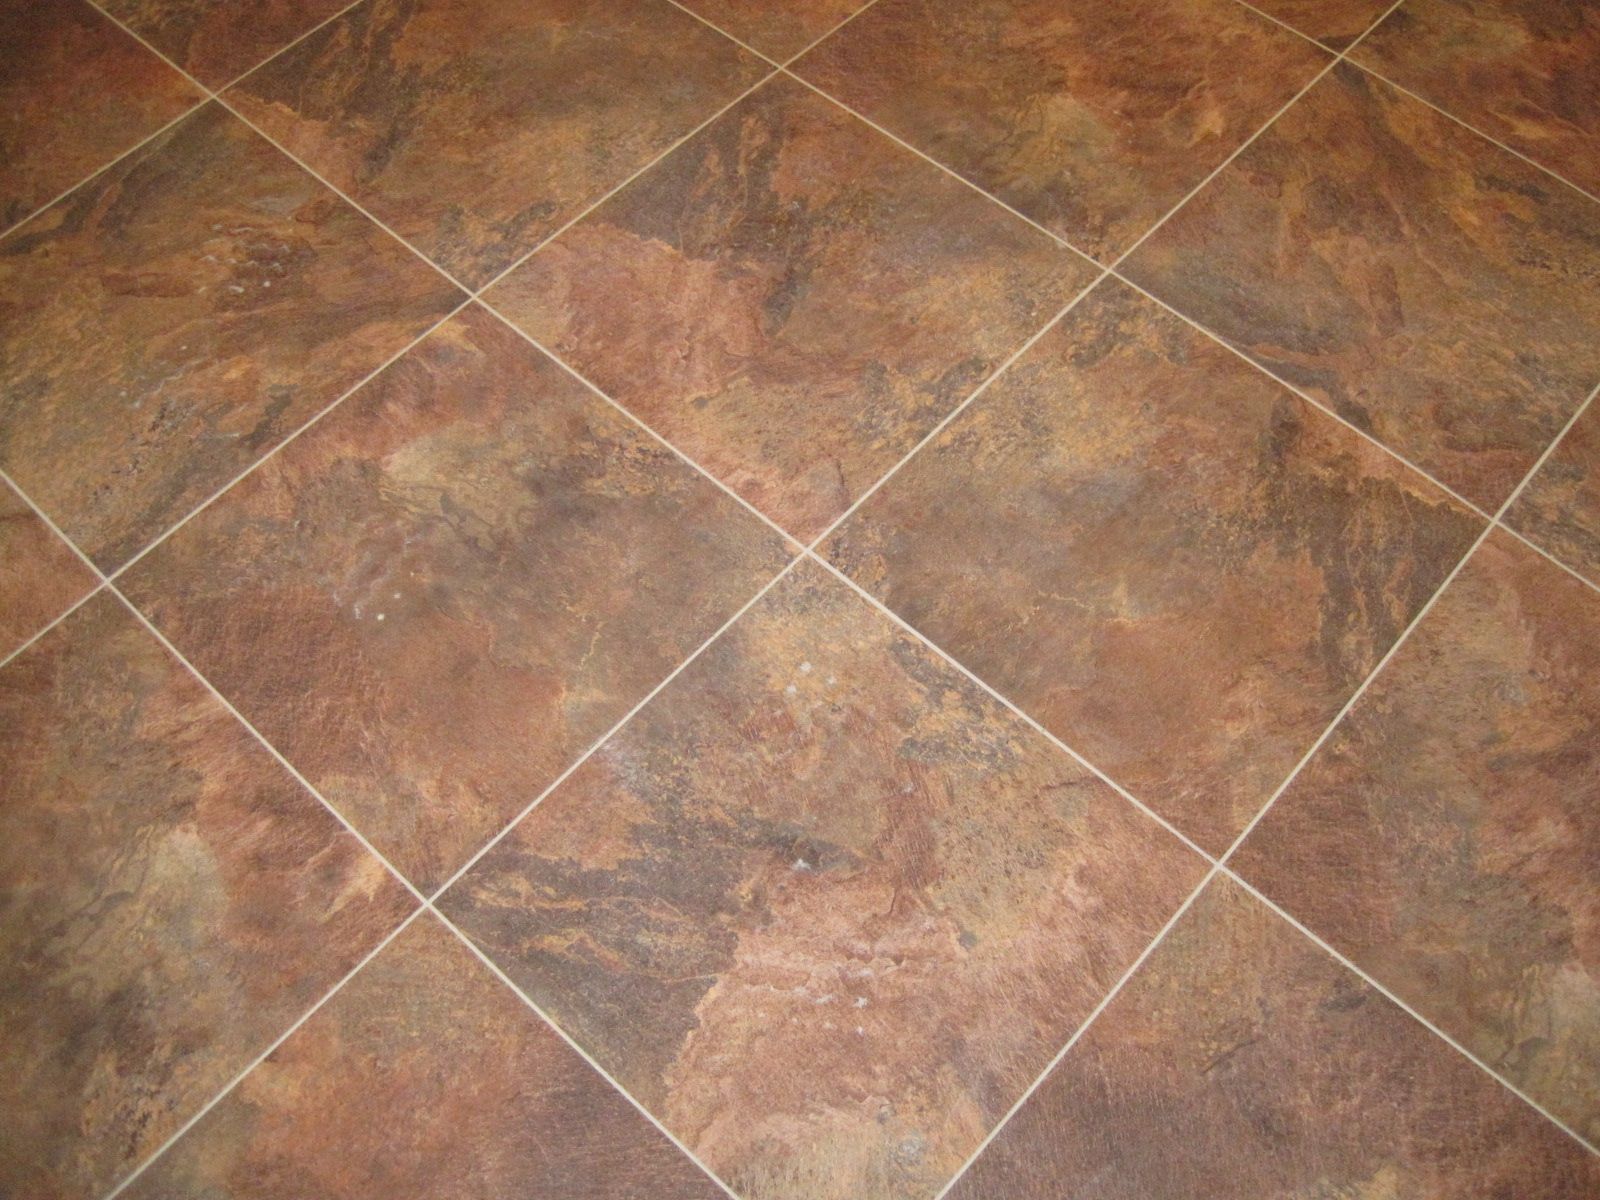
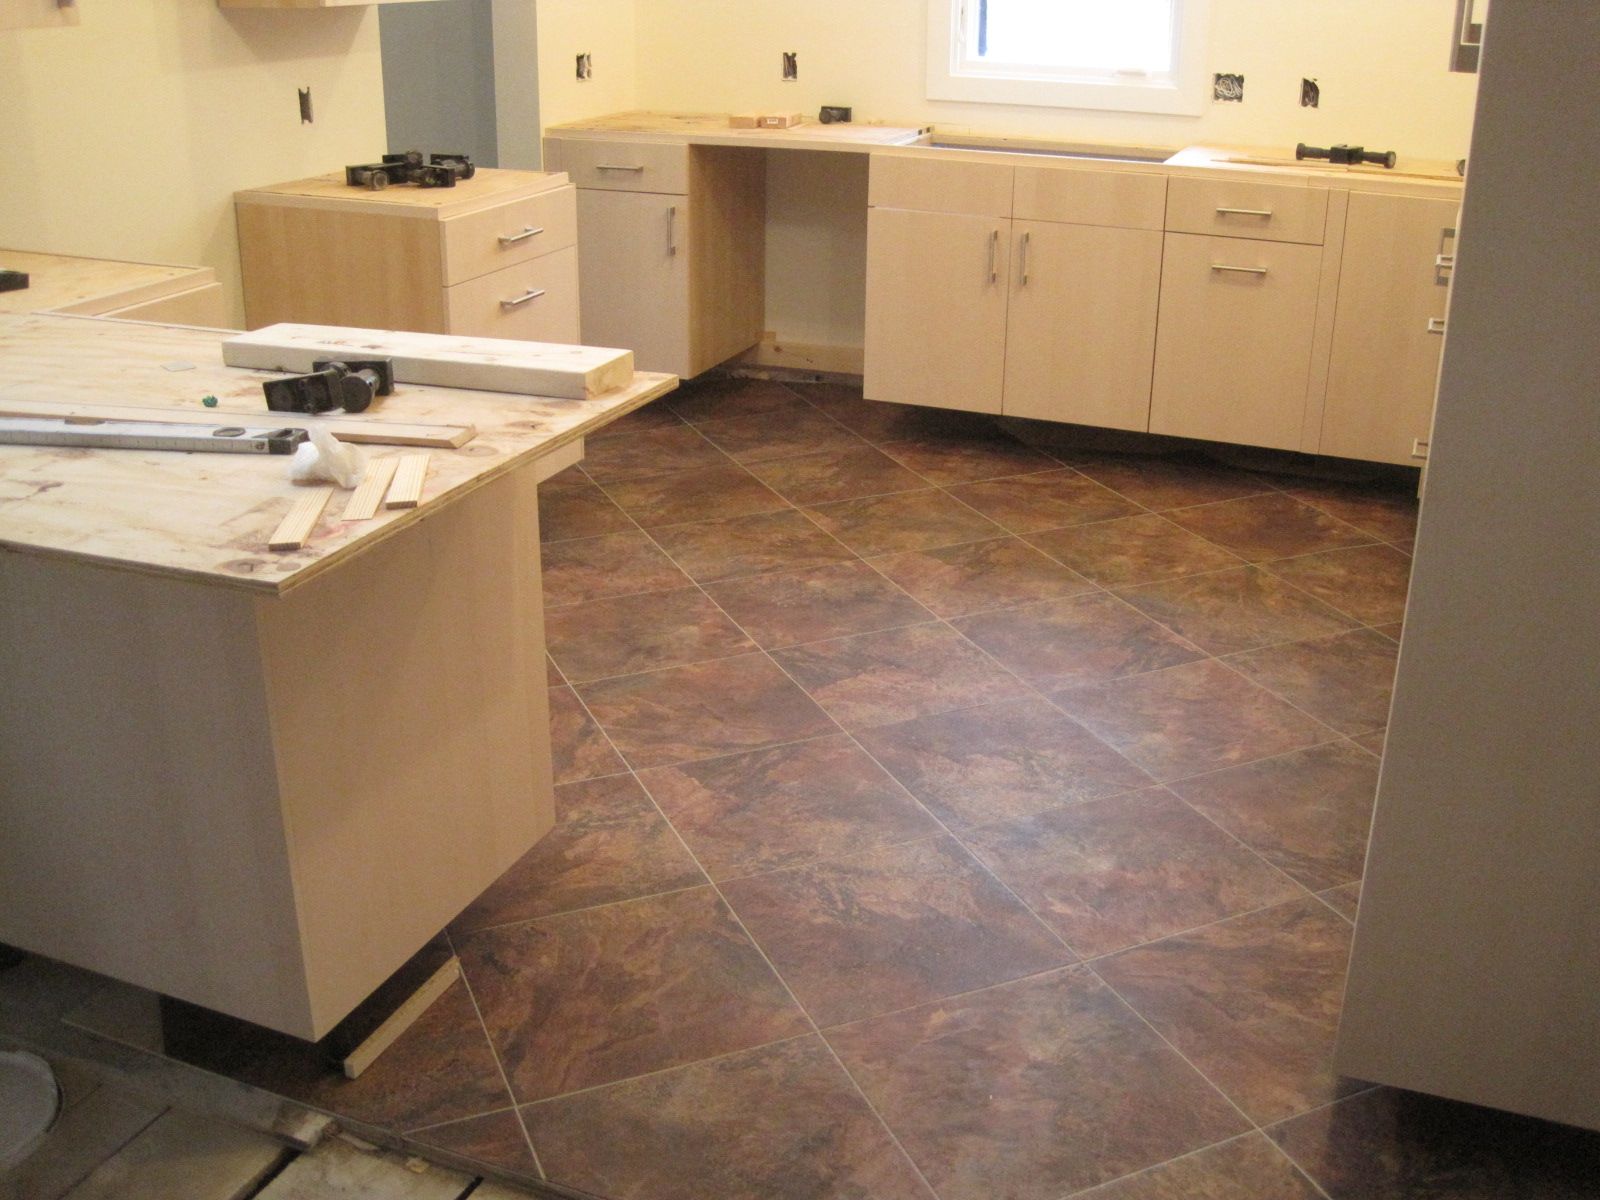
The kitchen flooring, a large vinyl tile with stone powder embedded.

The kitchen flooring, large vinyl tiles with stone powder embedded.

The ceiling has been leveled.  The cabinets have been installed so that the countertops will be level.  Now all we need is a level floor.

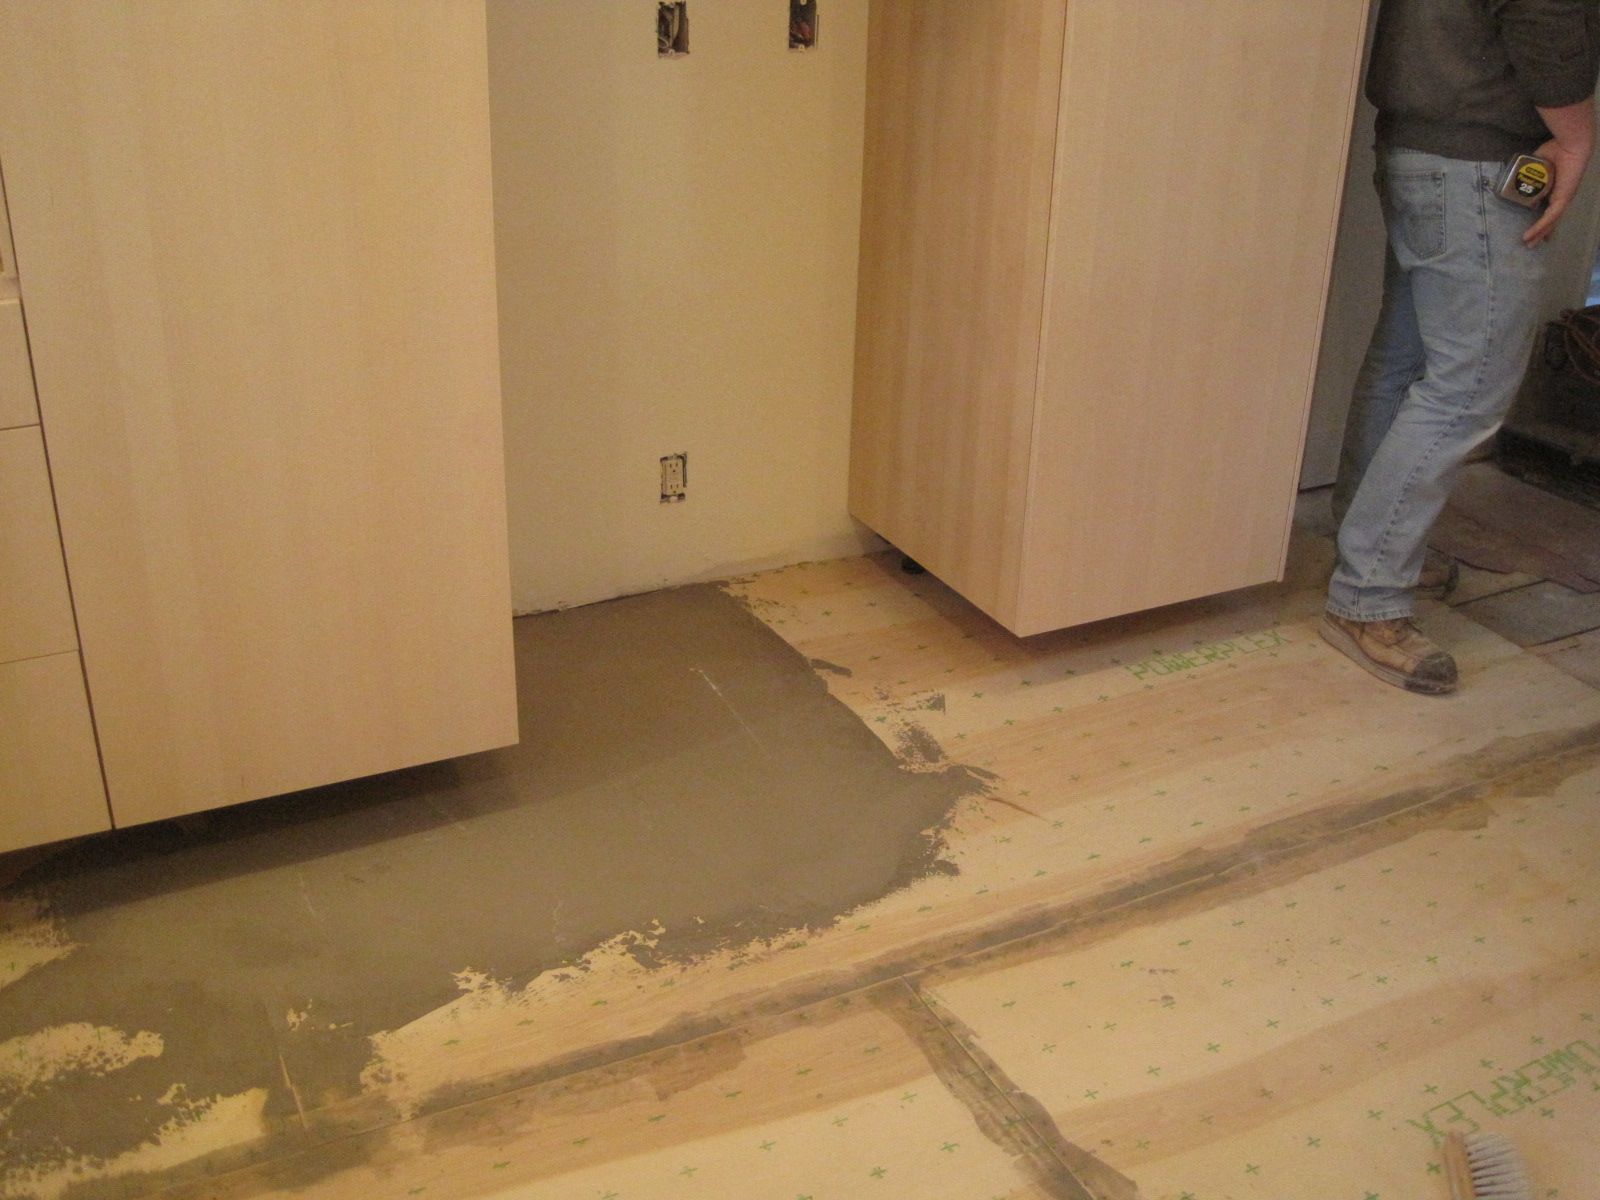
Unfortunately, the variation in the floor in This Odd House was such that the high point was 2-1/2 inches over the low point.  To level it would result in a 2-1/2 inch step from the dining room to the kitchen.

A kitchen floor that was level would be a highly desirable thing, yet an obstacle to stumble over on entry to the kitchen was not.  In the end it was decided that the floor should be “smoothed”, not leveled.  The vinyl tiles that had been selected needed a flat surface to adhere to, but it did not need to be absolute level.

Flooring was a decision that floated for some time.  At first I wanted the original maple flooring that was underneath everything.  It was there, but over the years had been covered by at least two layers of linoleum (incorporating asbestos and asbestos adhesives).  Deciding to keep those layers interred, I looked at natural materials to cover it like cork, or bamboo, or modern linoleum, a linseed oil and fiber based material.  Despite being “natural”, they end up being very expensive to obtain and install.  In the end, a vinyl tile that utilized embedded stone particles was selected.

Because the house is so non-square, the tiles were installed at a 45-degree angle, and because the floor was so non-flat, they were installed with a separation and a grout filling.  In the end, it looks beautiful despite the crooked room!

The refrigerator bay.  It will straddle the section between the original kitchen floor and the former pantry/former stairwell, whose floor was an abrupt 3/4-inch different.

The refrigerator bay. It will straddle the section between the original kitchen floor and the former pantry/former stairwell, whose floor was an abrupt 3/4-inch different.

The solution:  floor cement filler, troweled smooth, but not necessarily level.

The solution: floor filler, a cement troweled smooth, but not necessarily level.

The end result, a smooth, albeit not level, beautiful and functional floor to complement the cabinet and kitchen colors.

The end result: a smooth, albeit not level, beautiful and functional floor to complement the cabinet and kitchen colors.  Note that you have no idea how un-square and un-level the kitchen actually is!

Posted in Uncategorized | 1 Comment

Floor Plans

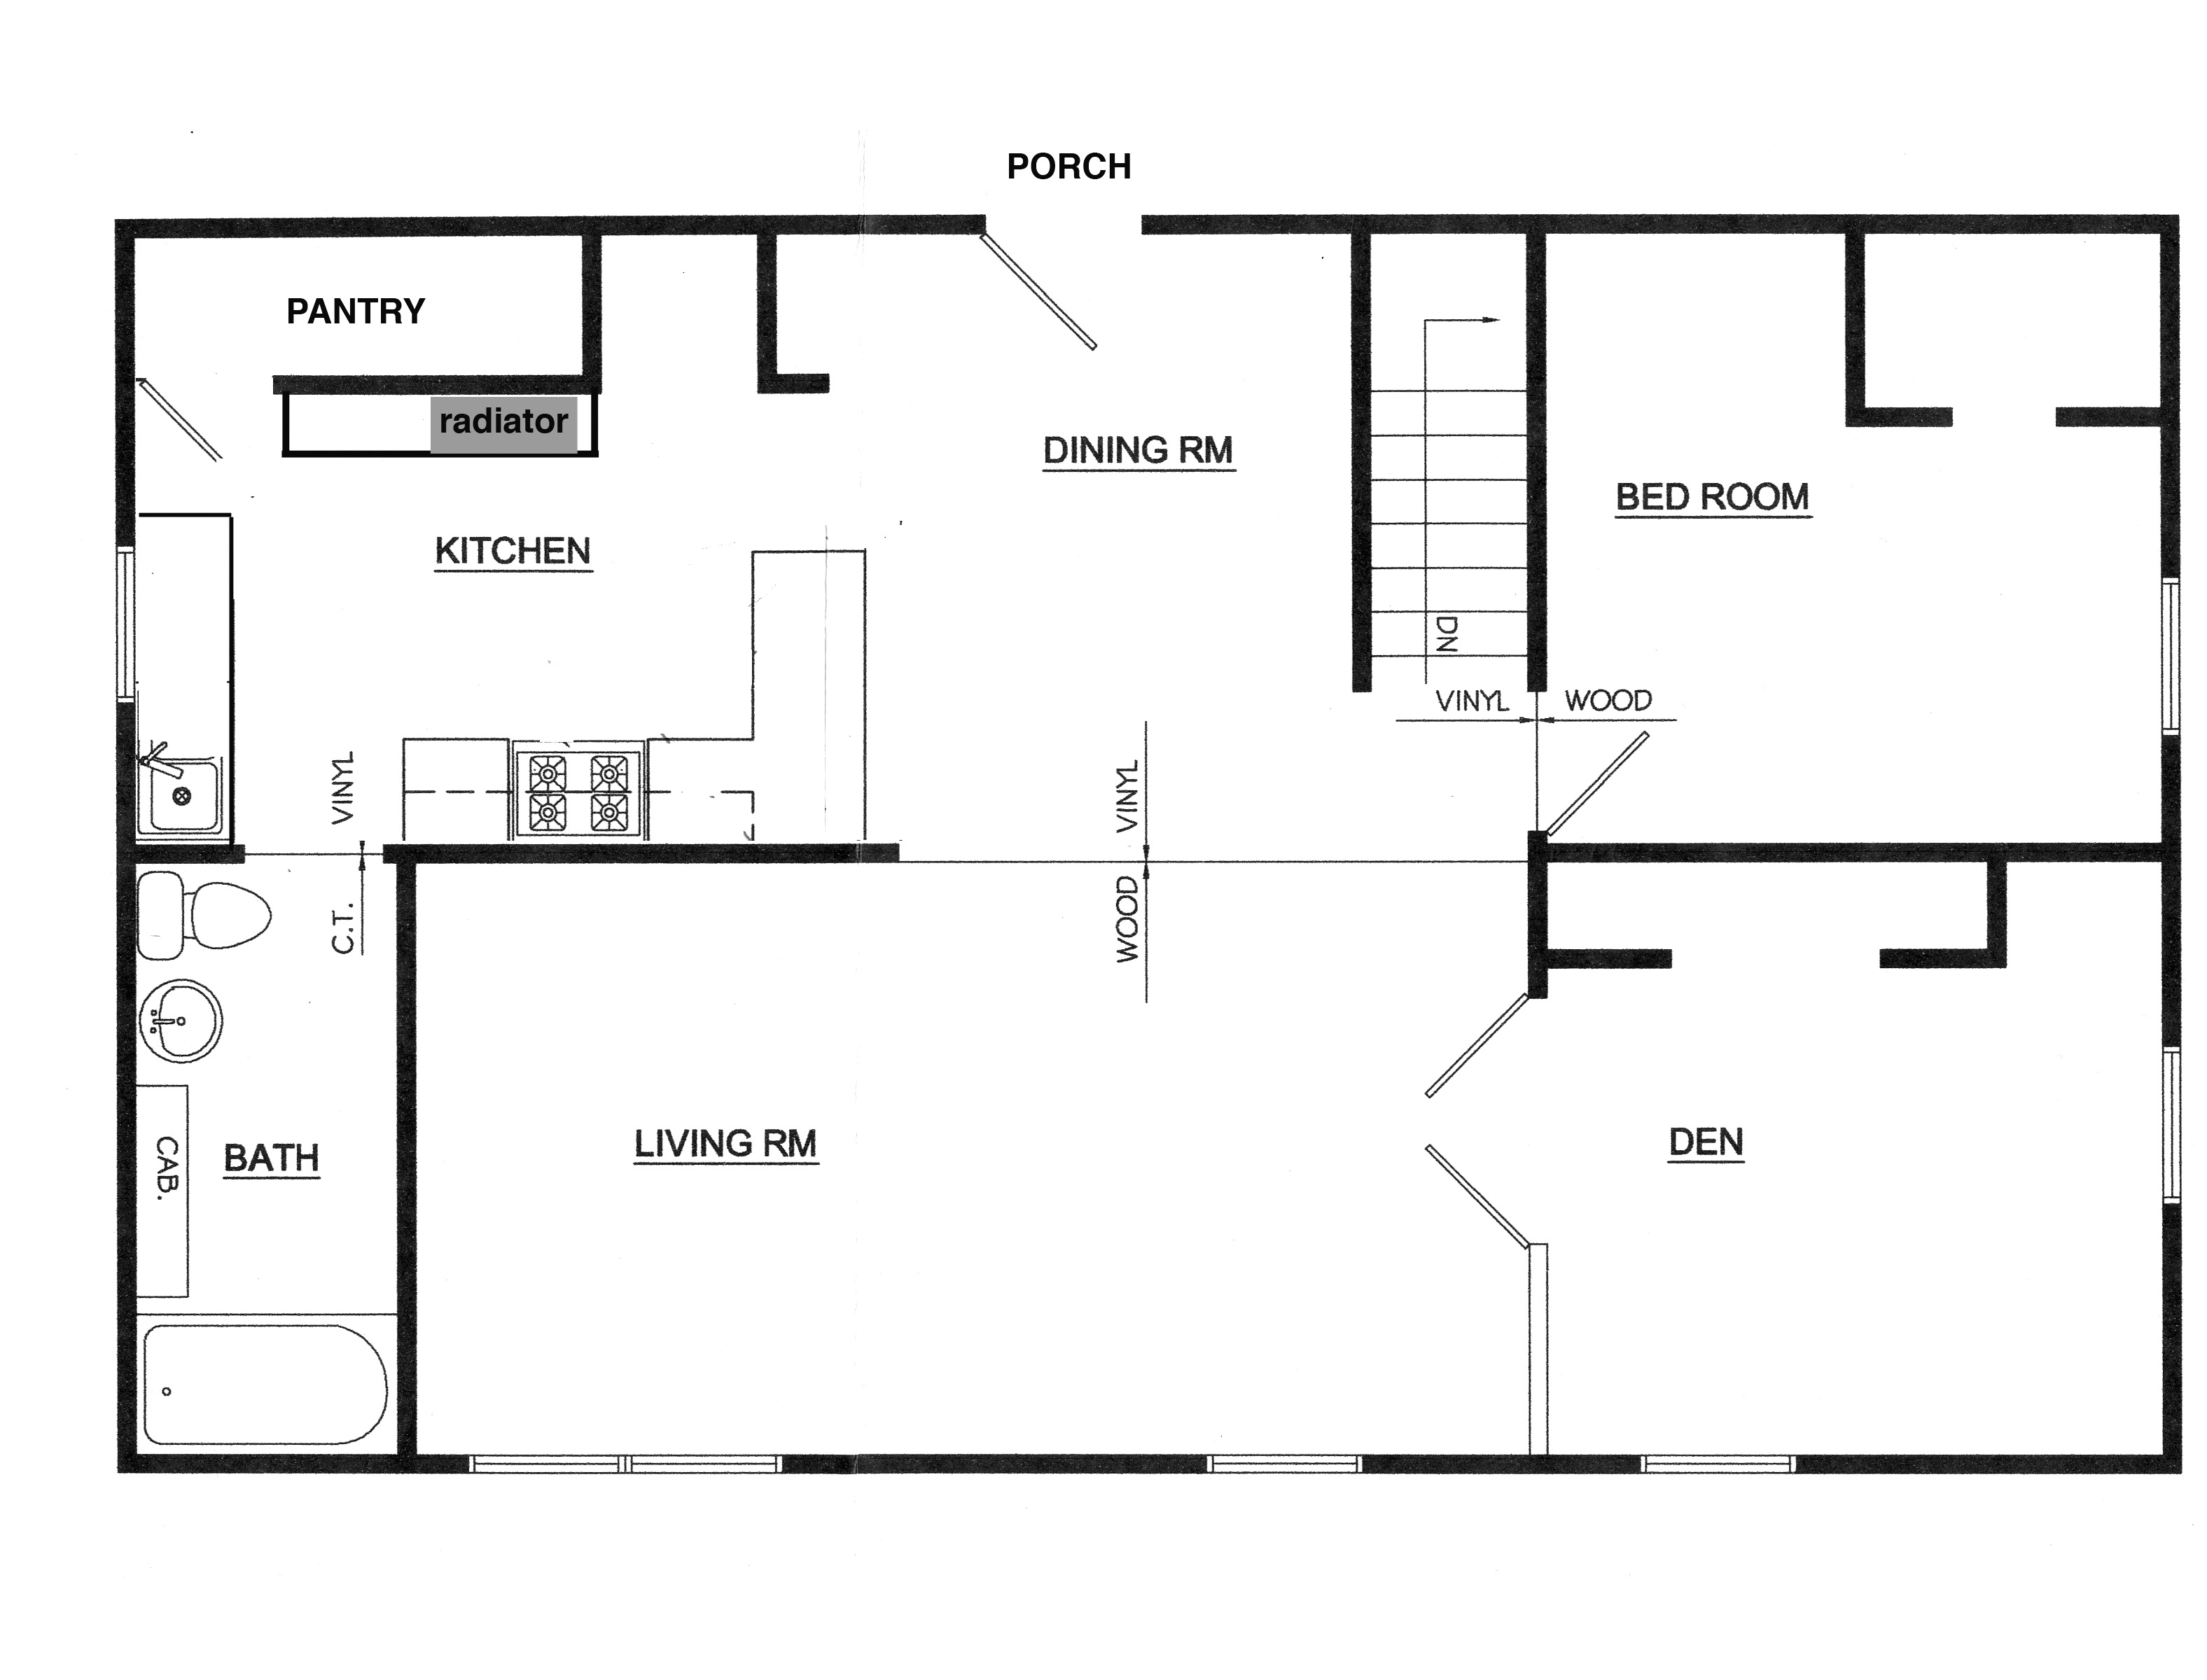
The second floor living area of This Odd House when I acquired it.

The second floor living area of This Odd House when I acquired it.

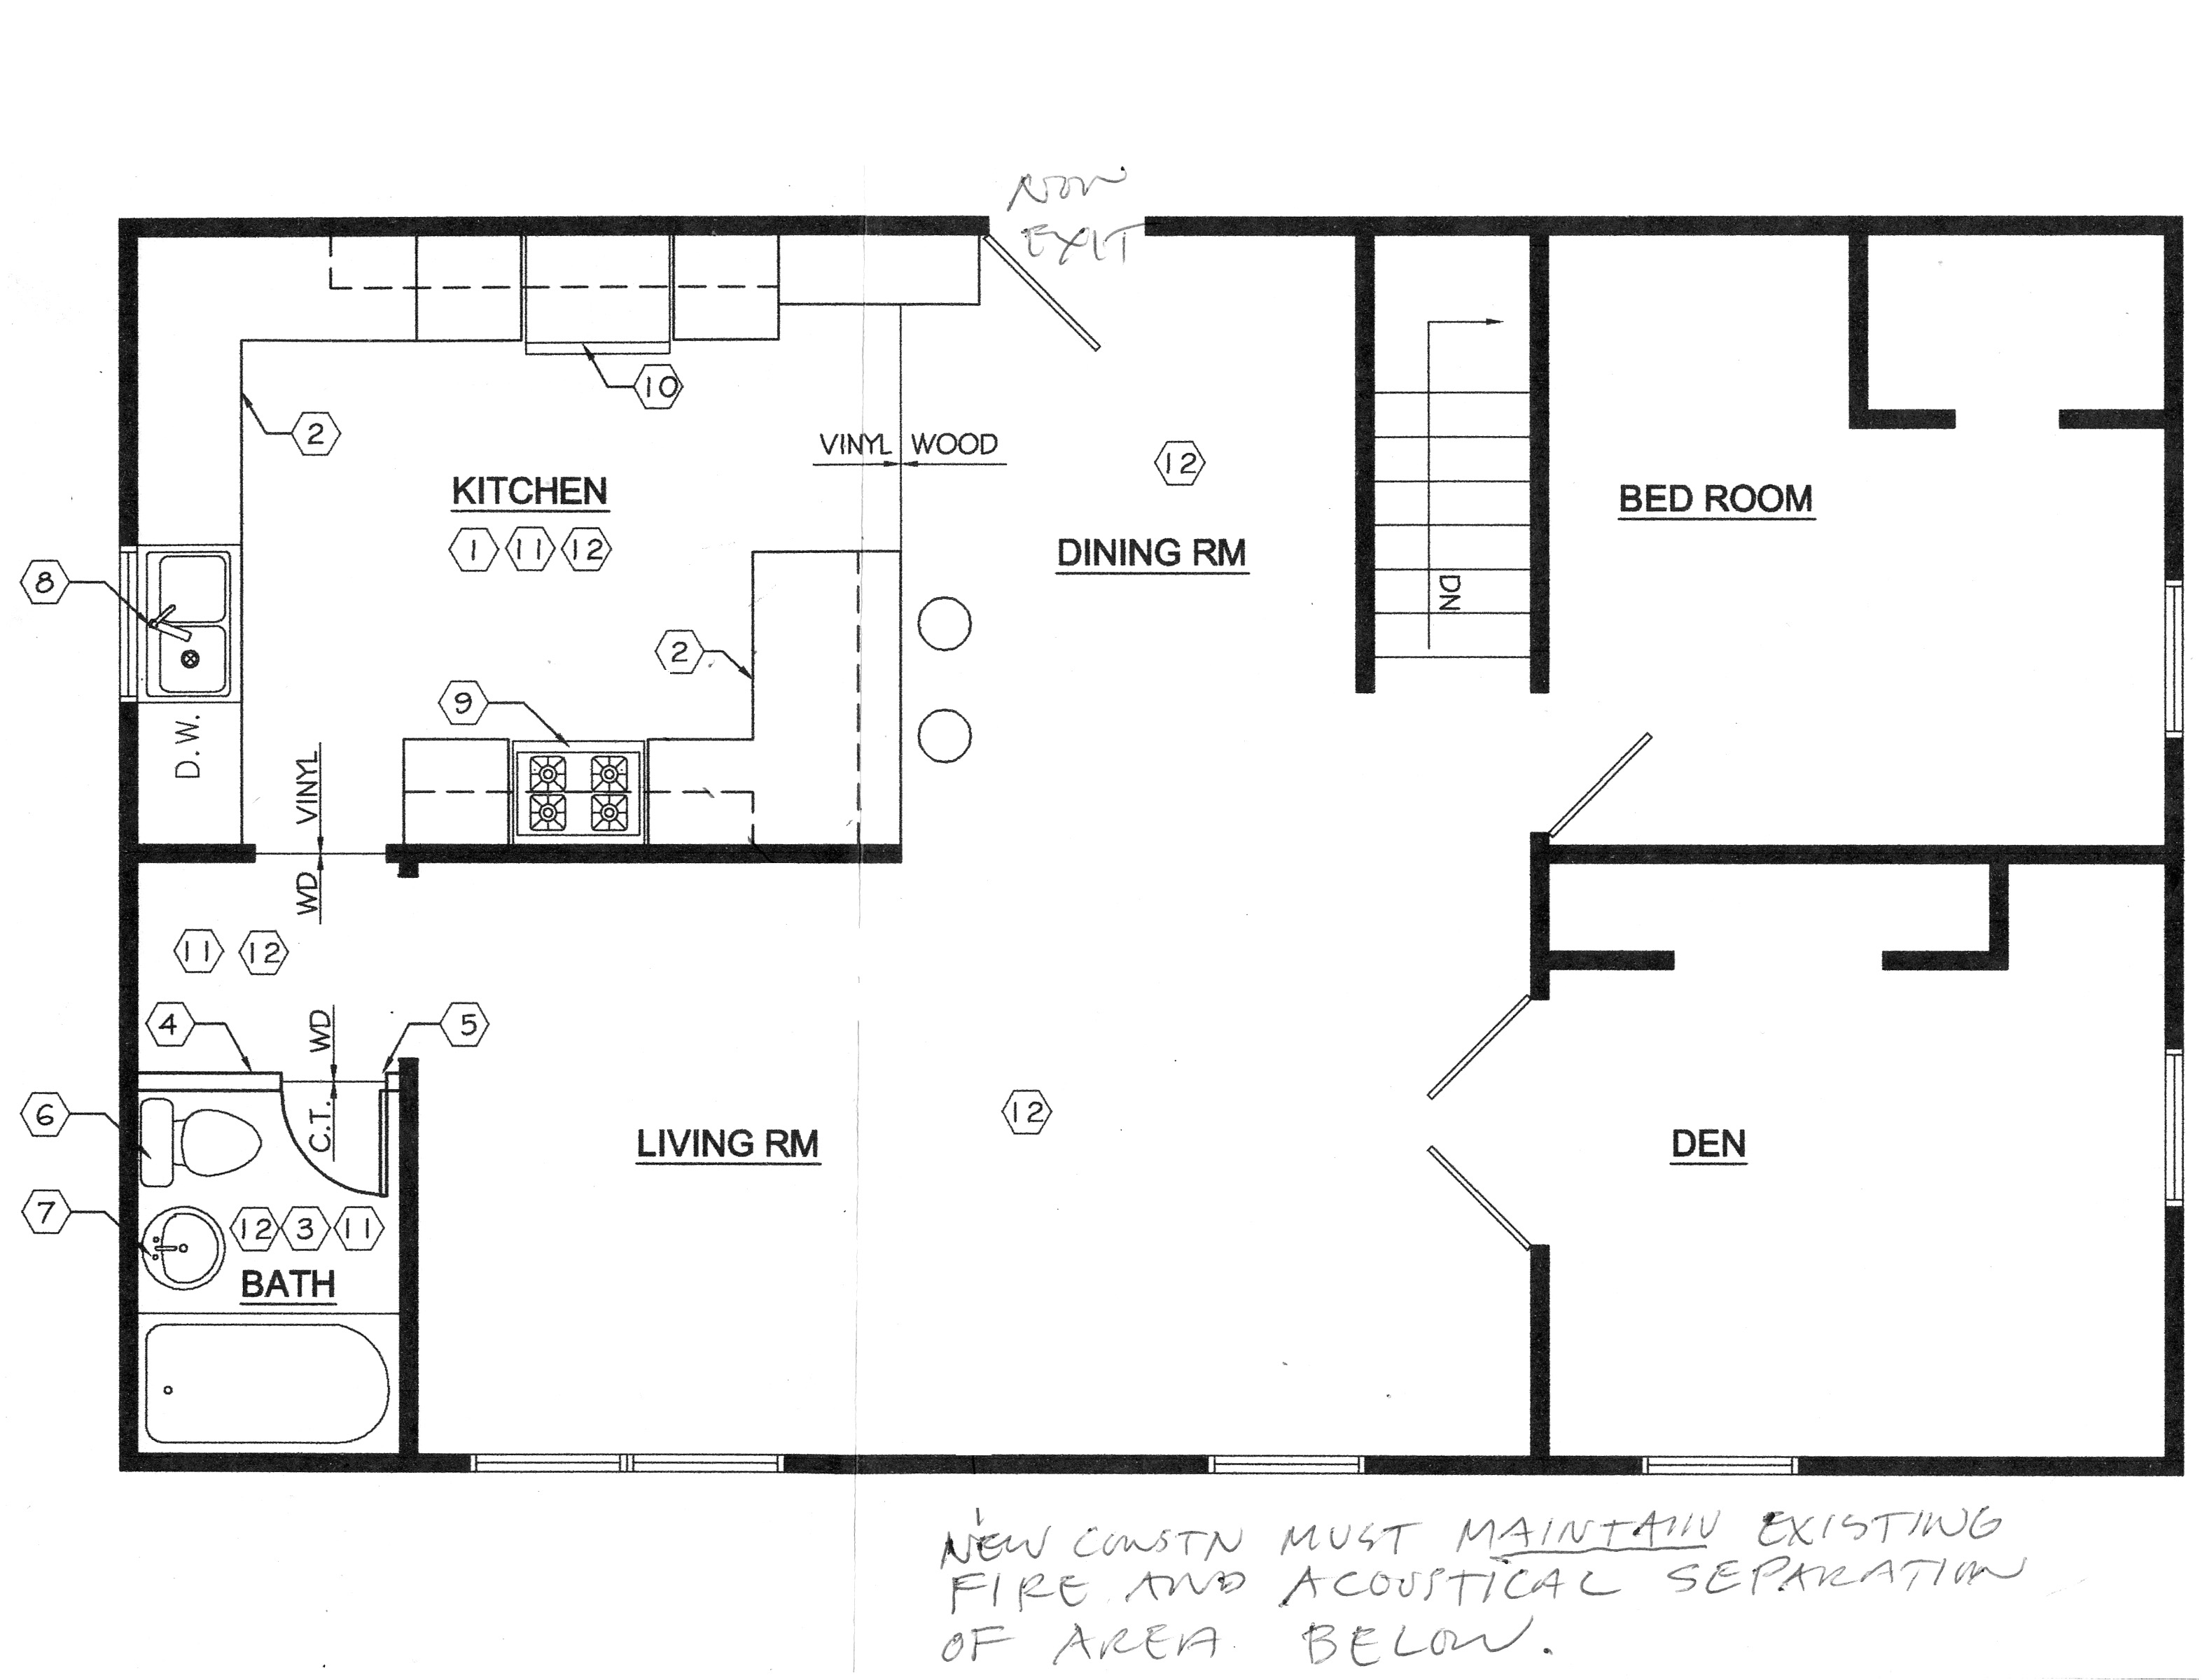
I’ve been requested to provide some floor plans of this renovation and remodeling project to gain a bit of context for what is happening where.  Here is a plan view of the second floor that the city required in order to obtain a building permit.  It shows the “as built” and “proposed” items.

A summary of the changes:

–       remove pantry walls and bookshelves

–       replace cabinets, countertops, appliances, sink

–       remove wall section to living room, provide access to kitchen

–       bathroom revised, access no longer via kitchen

–       skylights installed (kitchen and bathroom)

–       dining room floor restored to original wood

–       new flooring in kitchen and bath

–       windows replaced, entire second floor

In the end, much more was done as we encountered various prior structural work.  Walls were replaced with sheetrock, the ceiling was leveled, insulation replaced, plumbing and wiring brought up to code, etc.  All the things documented on these blog pages and more.

The proposed changes.  The pantry (originally a stairwell) is opened; access to the kitchen and bath is provided from the living room.

The proposed changes. The awkward pantry (originally a stairwell) is opened; access to the kitchen and bath is provided from the living room.  The kitchen sink will now be under the window (very important to the dishwashing person in the home).  Not shown:  skylights in kitchen and bath.

Posted in Uncategorized | Comments Off on Floor Plans

The Economist picks up the theme

The Economist picks up the theme

This issue just caught up with my new address, I couldn’t resist linking it to my earlier essay.


Posted in Uncategorized | Comments Off on The Economist picks up the theme

Ikea gallery-2

This gallery contains 12 photos.

Despite what WordPress claims, there is more than a single photo in this gallery.

More Galleries | Comments Off on Ikea gallery-2