Re-wiring checkpoint

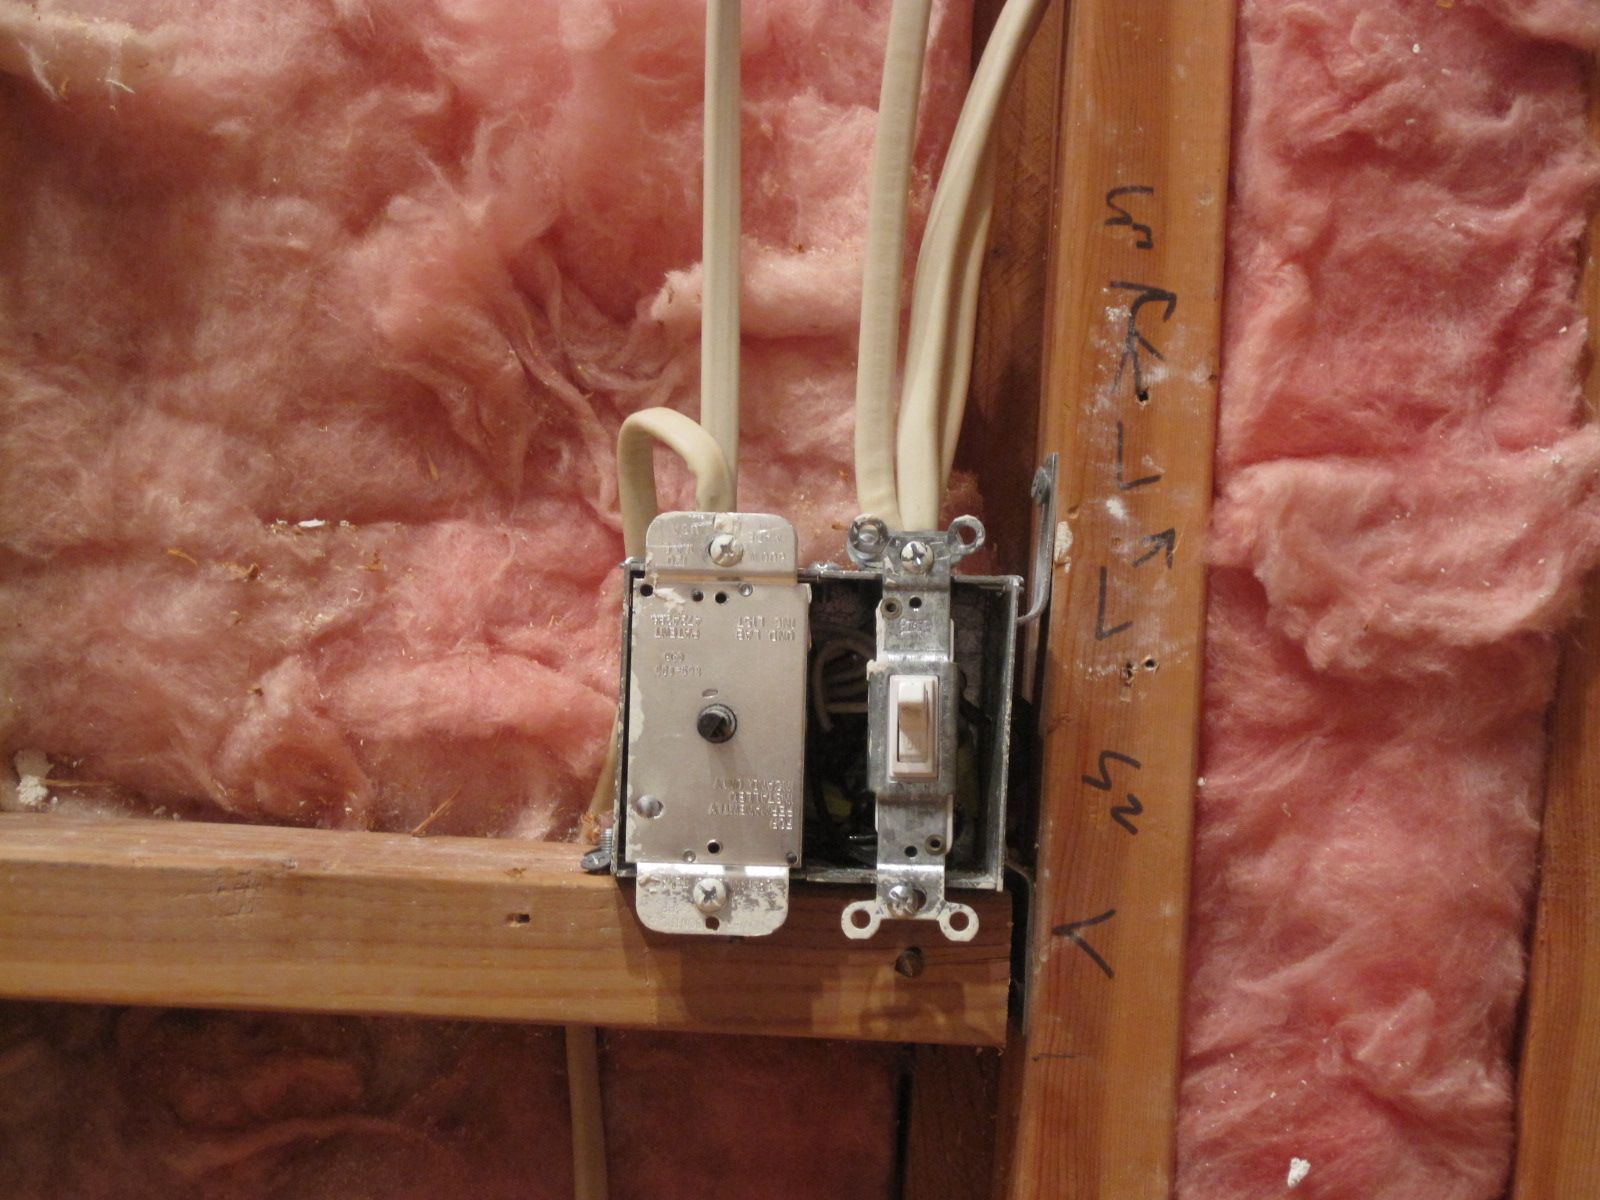
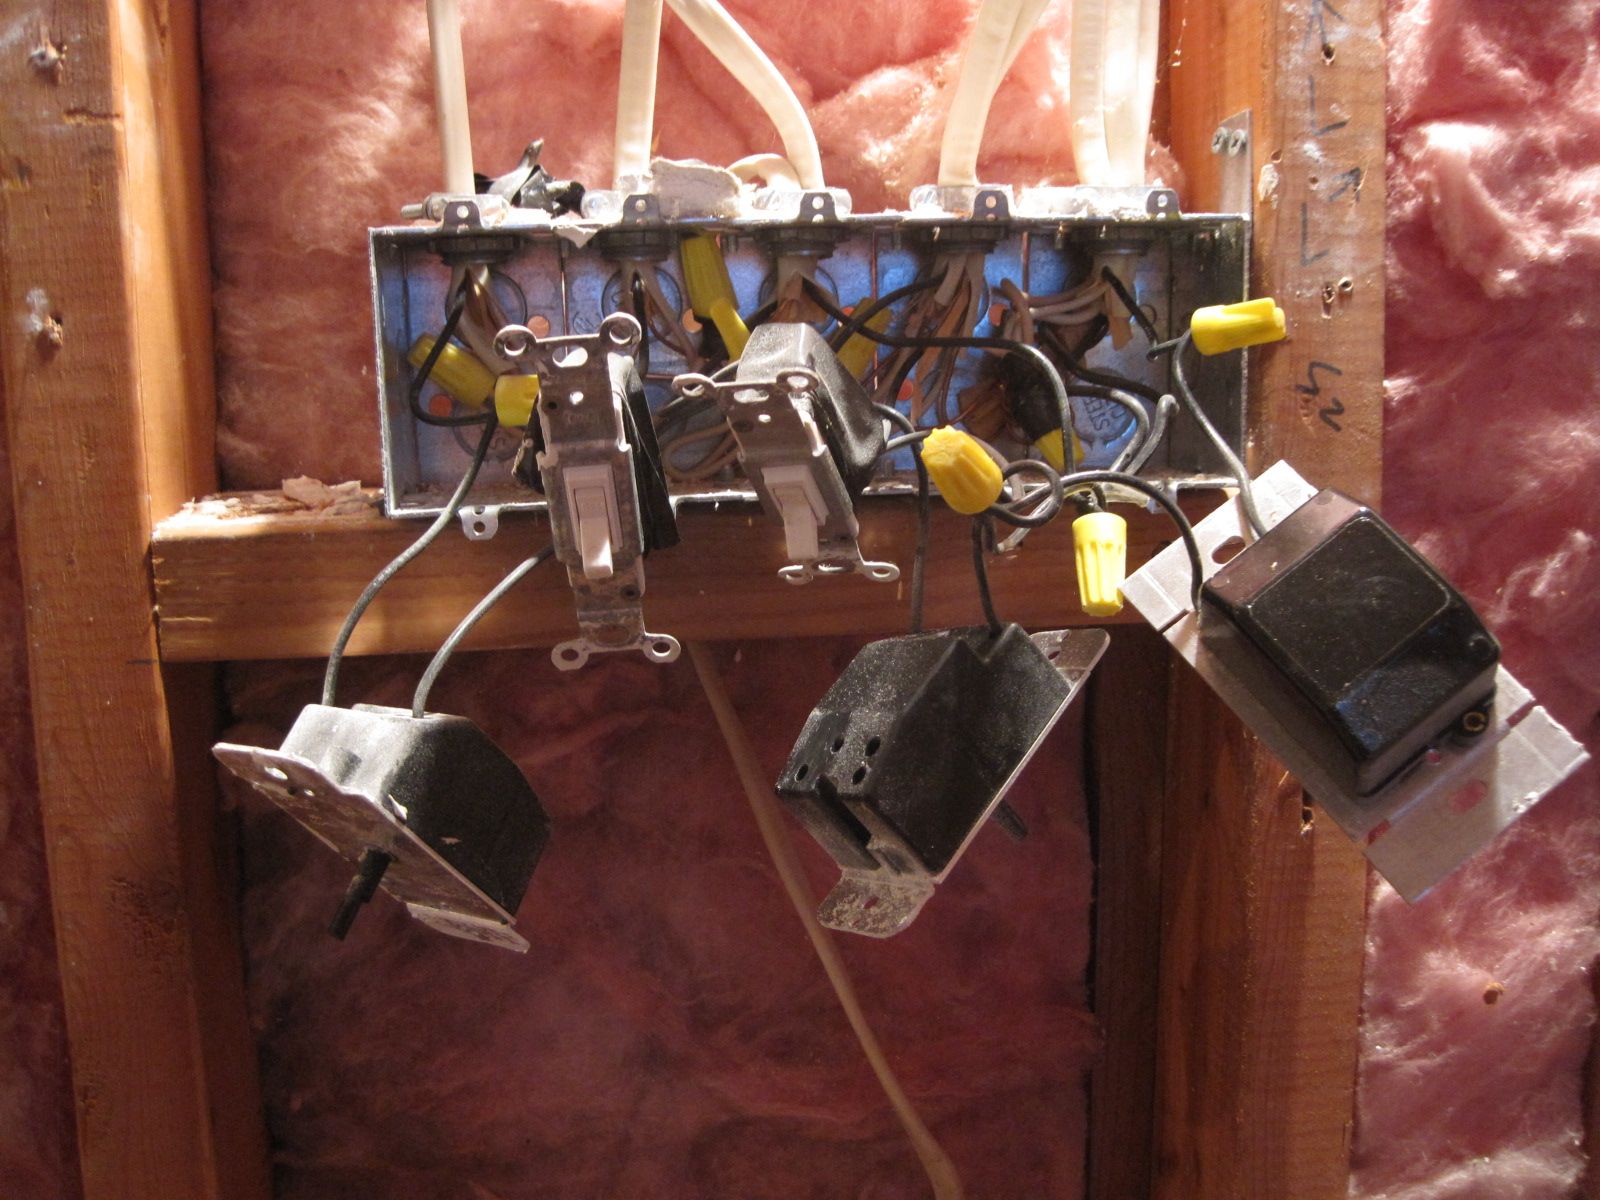
Behind one of the “master control panels”. These switches and dimmers controlled the lights in the back hall. It was not clear to me why I needed a dimmer on the closet light.

I have written about some of the oddities of the wiring before.  I have managed to simplify and “naturalize” (place the fixture where one would expect it) several switches, outlets, and lights, but at the expense of leaving behind scars in the walls.  With the other un-remodeling efforts of removing the tunnel to the bedroom, removing the chimney, and installing a new closet door, there was enough restoration work that I sought help from sheetrock and carpentry experts.

And now they were coming to do the work!  I needed to finish my electrical un-wiring and re-wiring before they could proceed.  So here are the highlights of my getting the electrons to flow where I wanted them.

–       Move the shower room light switch from behind the door to where it can be reached as one enters.

–       Replace the bathroom fan and its broken switch, also in an accessible location.

–       Move the light from above the bathtub to the opposite side of the wall where it won’t be an electrocution hazard.

–       Combine the bathroom lights; there is no need for them to each be on their own individual dimmer switches.

–       Move the bedroom light switch from the bathroom to the bedroom (duh).  Connect it to the other lights in the bedroom and remove the excess switches.

–       Move an outlet from where the closet door is to be installed.

–       Add an outlet to meet the code requirements for bedrooms.

–       Move the closet light so that it illuminates the contents of the closet.

–       Add a closet light to the new closet space.

–       Remove light switches and wiring that now go nowhere (the tunnel ceiling and party lights that were demolished).

–       Install outdoor flood light to see the path to the garage from the back yard.

–       Replace the hidden GFI outlet behind the refrigerator.

–       More…

There is a mix of emotional results from this work.  I am pleased that the lights and switches are now more “natural”, but as I become accustomed to their new locations (quite easy for the very reason that they are now where you expect them), I am rapidly forgetting the awkwardness of how they once were.  This is one of those investments that will be entirely unappreciated by some future owner of TOH.

No matter.   Before that future owner takes possession, I will have enjoyed years of being able to turn the lights on without cursing and searching in the dark for the switch.

After simplifying the wiring, only two switches remained.

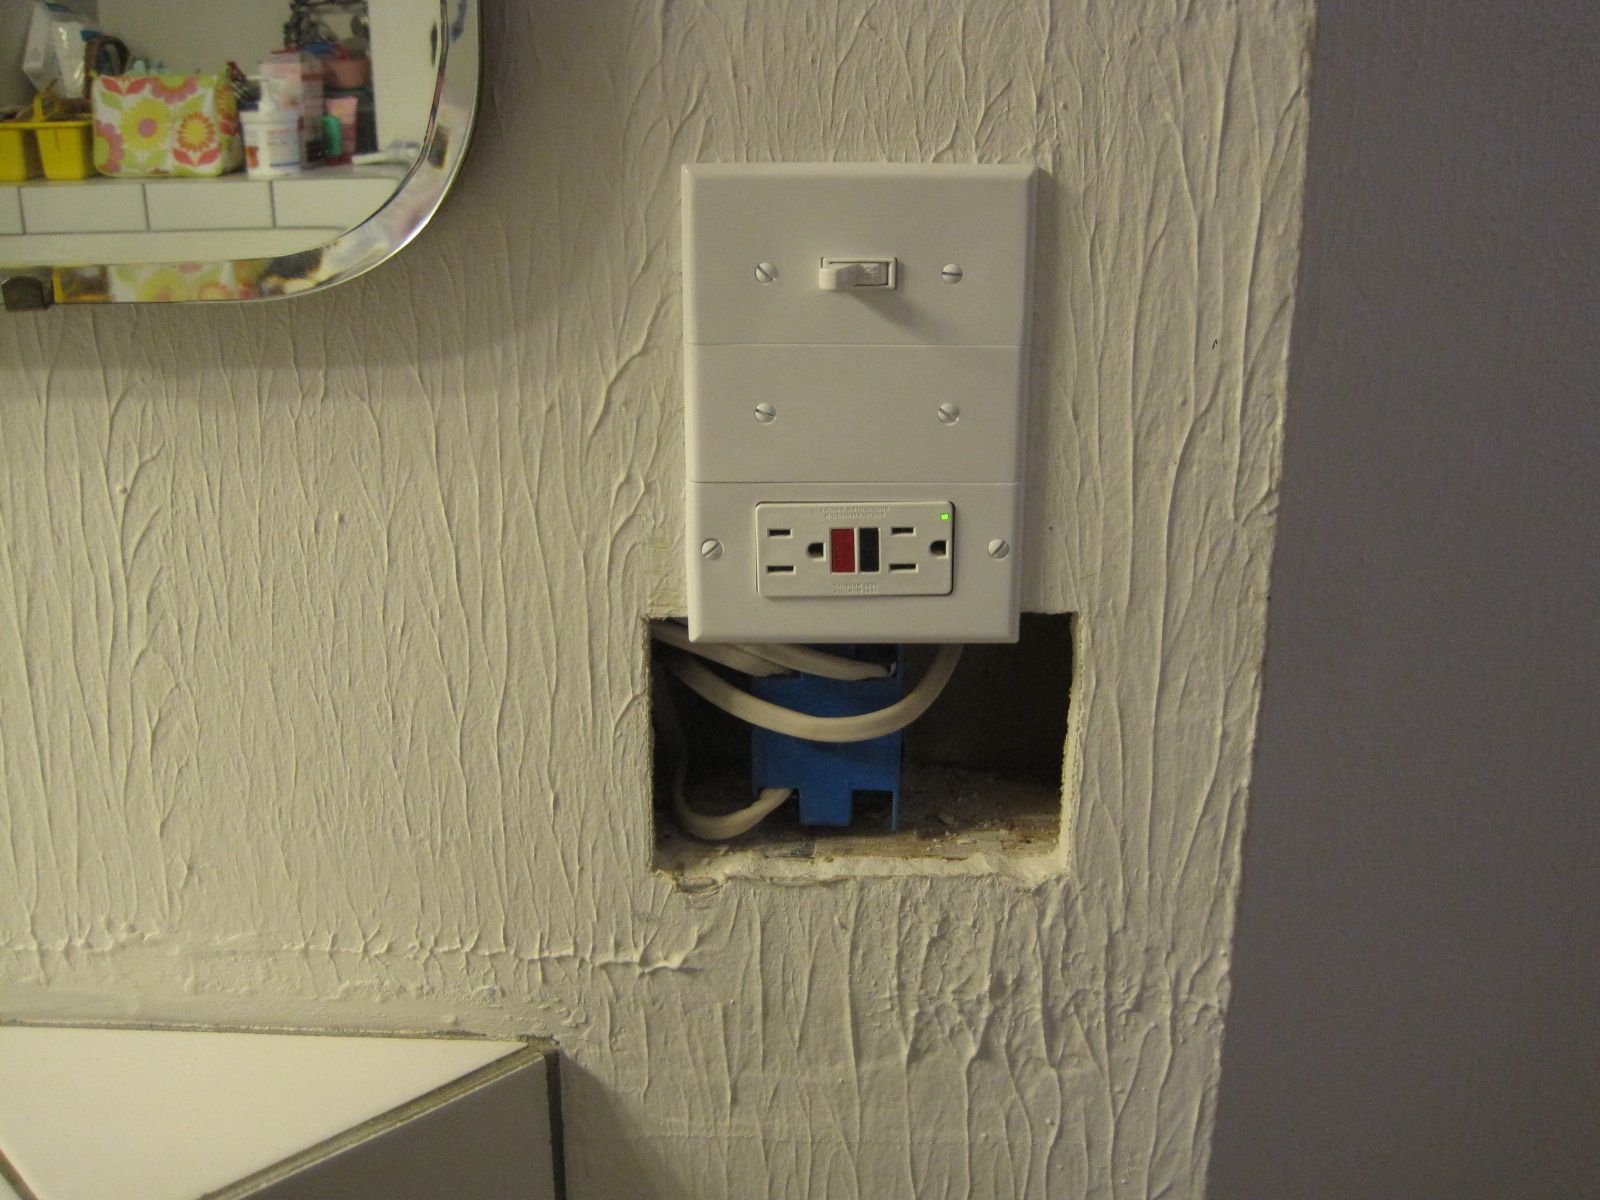
Another switch simplification. This was previously a bank of five. Now a single switch and an outlet. This remaining gap in the sheetrock, and others, now needed to be patched.

Posted in Uncategorized | Comments Off on Re-wiring checkpoint

Outdoor work (get it done before winter)

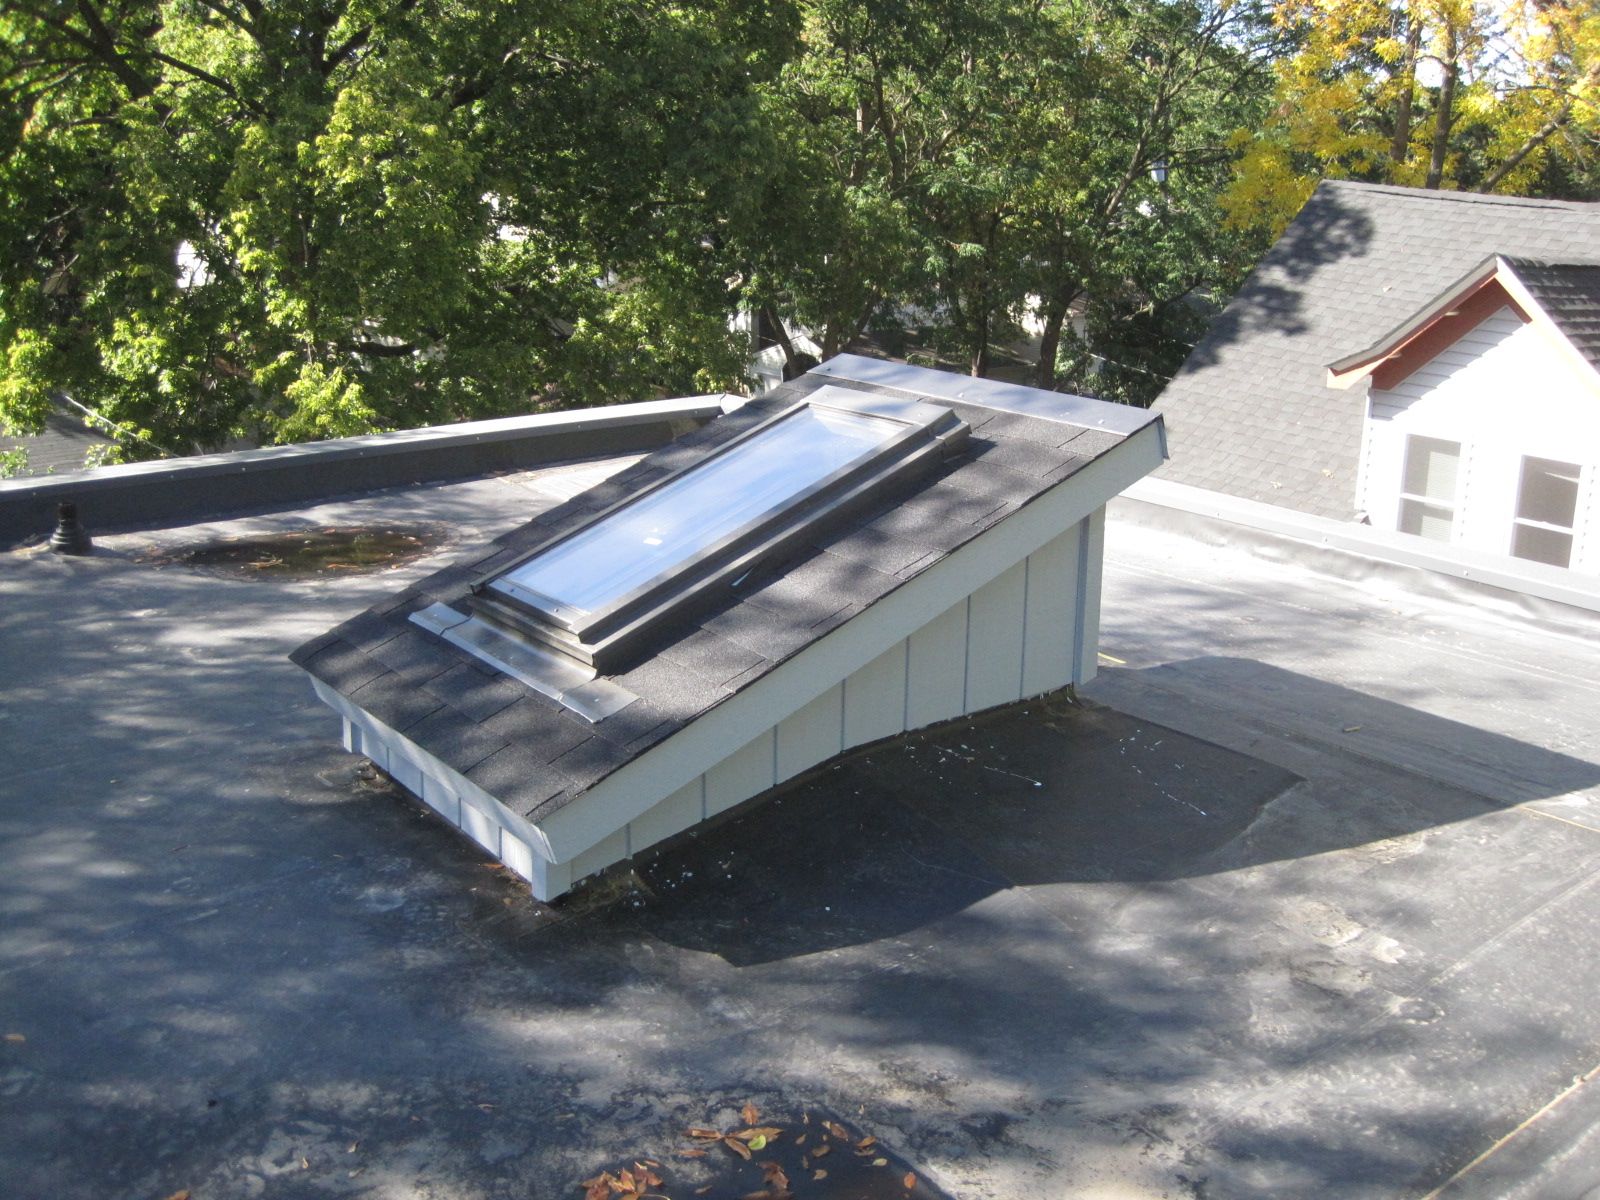
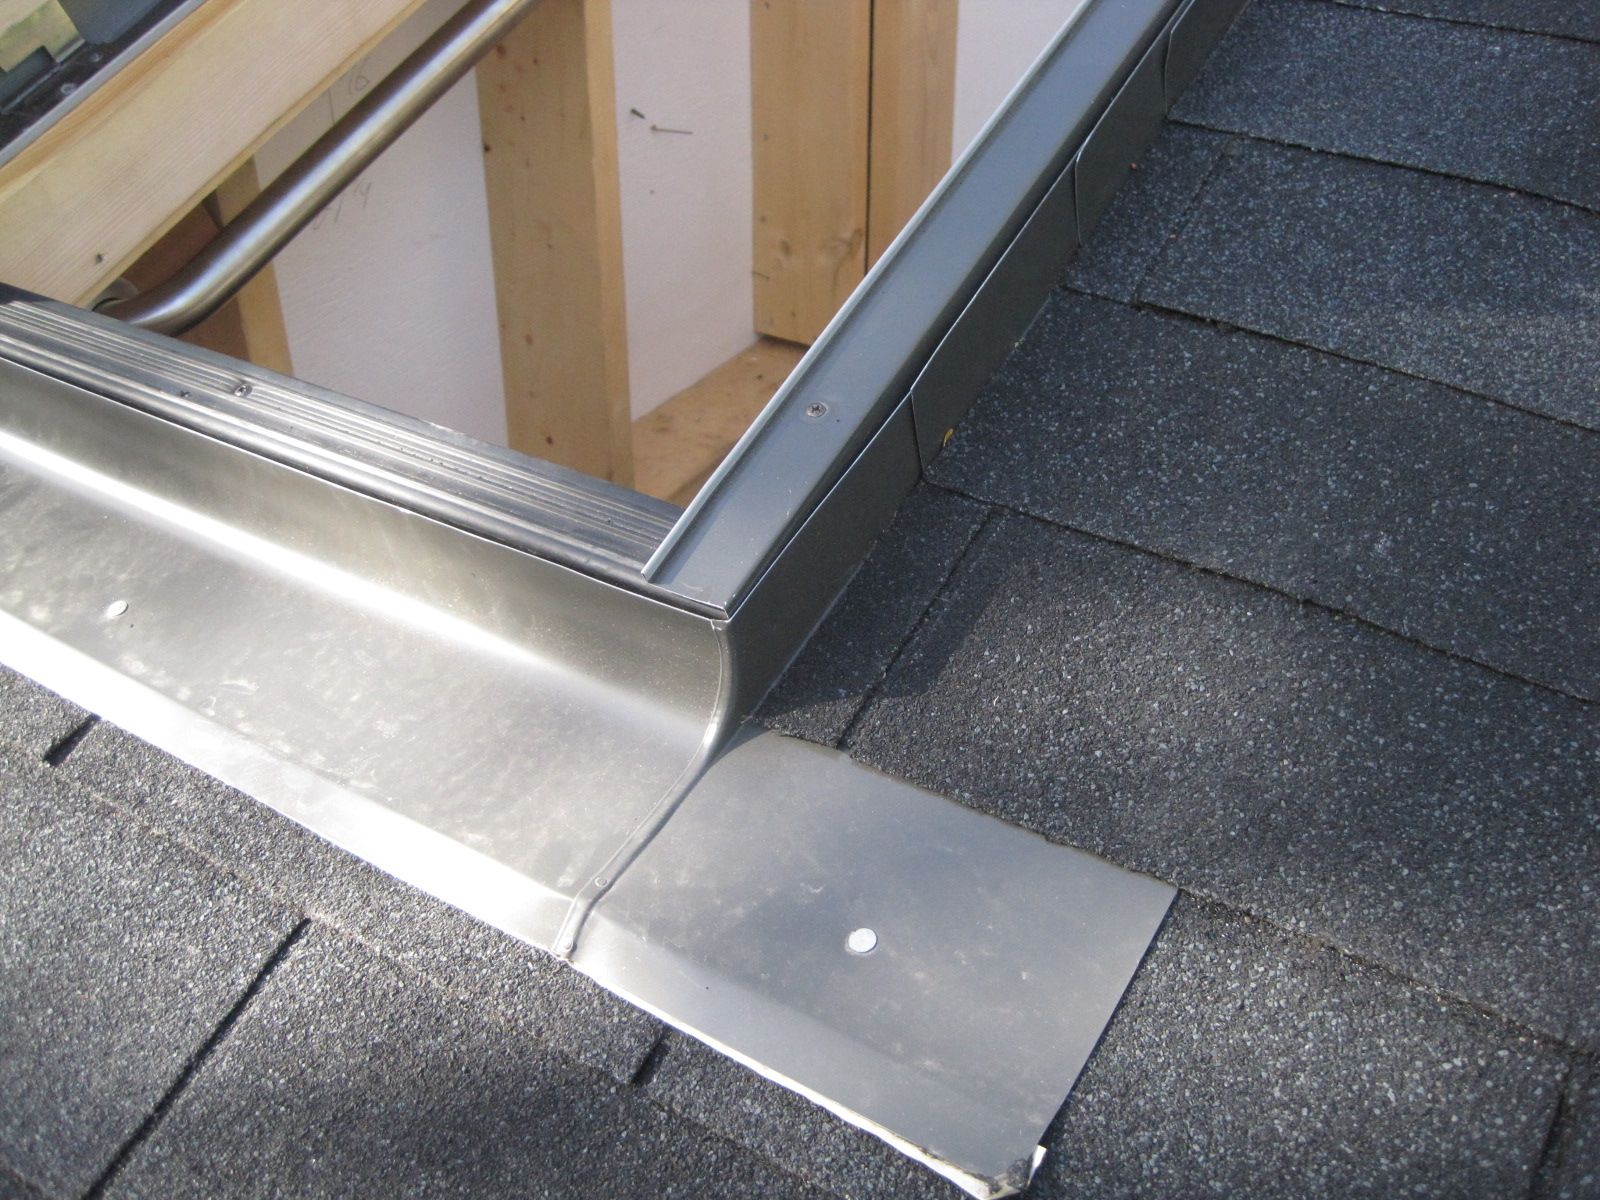
The skylight hatch on the roof, painted and ready for winter.

My weekend goal was to install lights in the newly reconfigured closets, but the weather was beautiful and I realized I needed to make priorities.  The skylight hatch needed painting, and I wanted to install outdoor lights during non-freezing weather.

So during a gorgeous fall day, I spent the afternoon outside on the roof, priming and painting the skylight window box.  As I did, I was able to appreciate details of the construction that would have eluded me if I had made an attempt to build it myself.  The seals, the exterior panels, the flashing, the overhangs, were all features designed to prevent water (and snowmelt) intrusion.

Some projects are labor-expensive compared to the materials.  I think this is one of them, which makes it a strong candidate for a do-it-yourselfer to take it on.  What isn’t factored in to that decision is the know-how that you get when hiring someone that has done this type of work a hundred times before.  In the absence of that expertise, the amateur makes mistakes, or misses some important step, or ends up with a product that doesn’t meet its requirements.  In the worst case (when the homeowner can recognize and admit it), the entire project needs to be redone, this time by a professional.

That’s not to disparage those brave and skilled do-it-yourselfers that take on such projects; I admire them immensely.  I am simply acknowledging and recognizing the limits of my own skills and patting myself on the back for knowing how to make the “build versus buy” decision on this one.

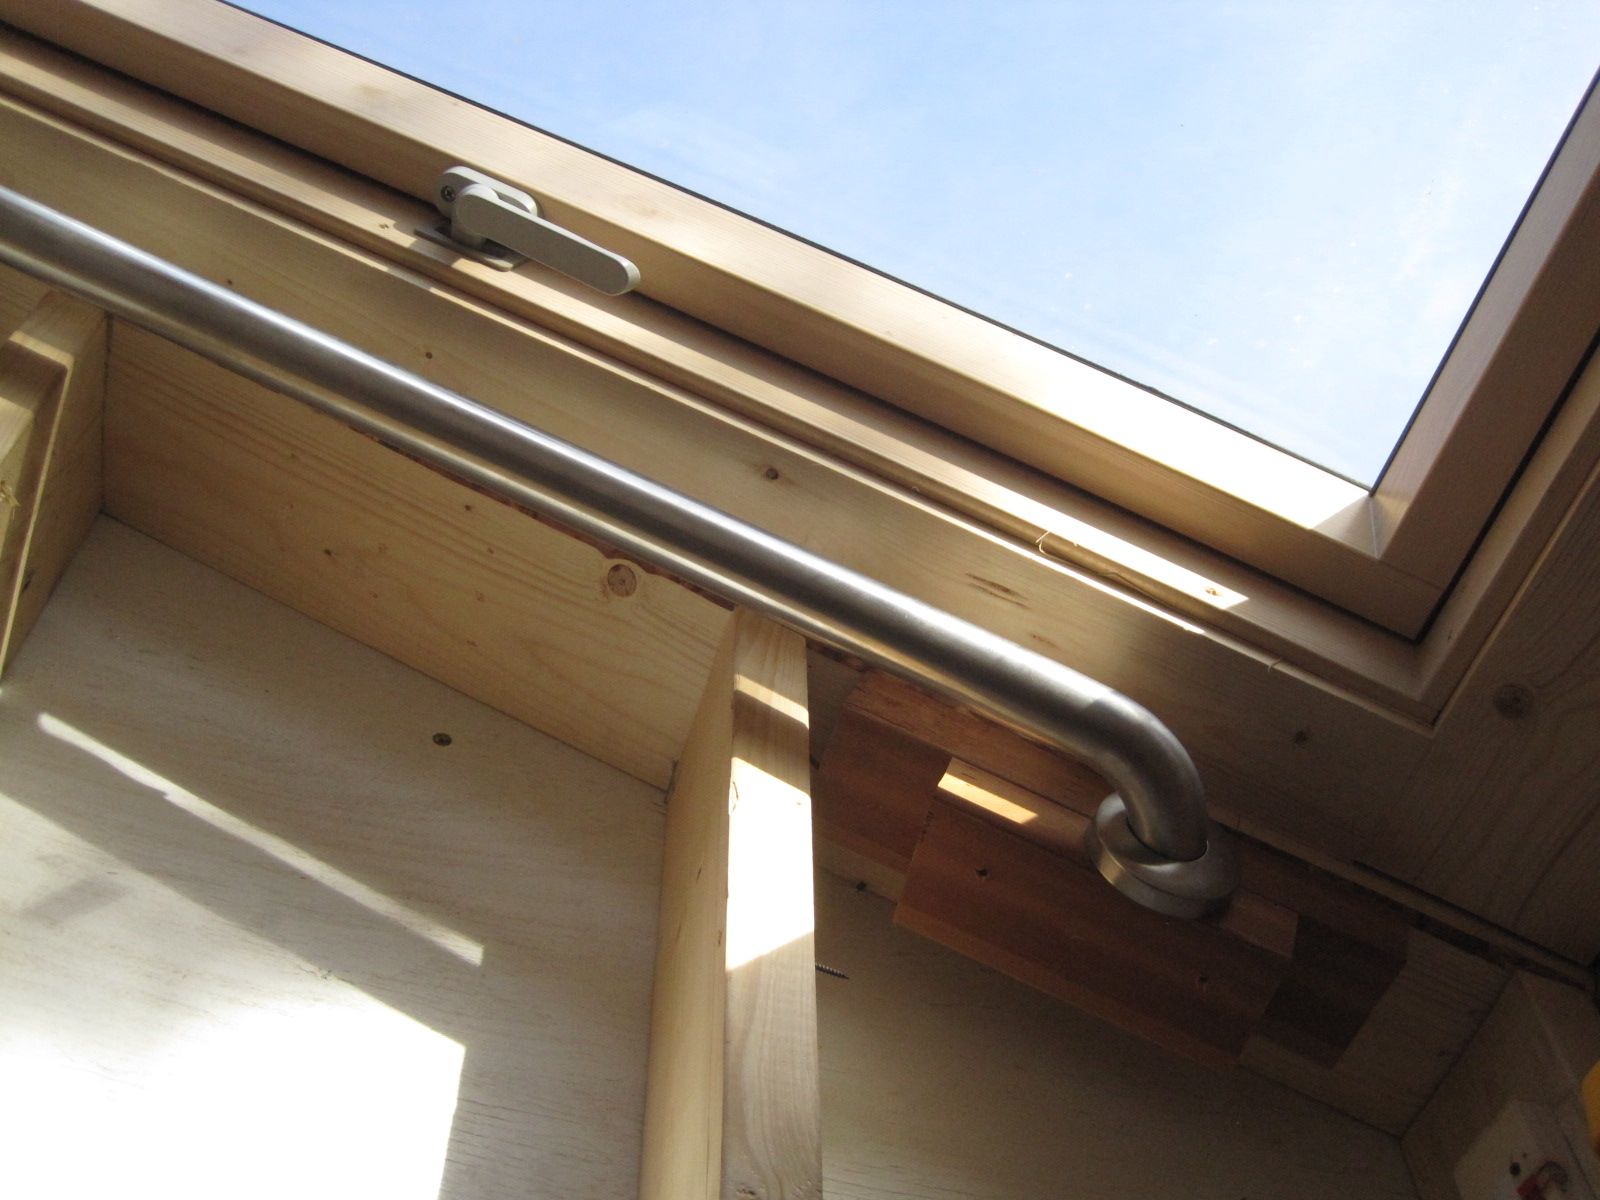
Access to the skylight now includes handgrip bars, one of which is seen here (stainless rail below and inside the skylight window).

Flashing and shingles. I would not have known how to do this.

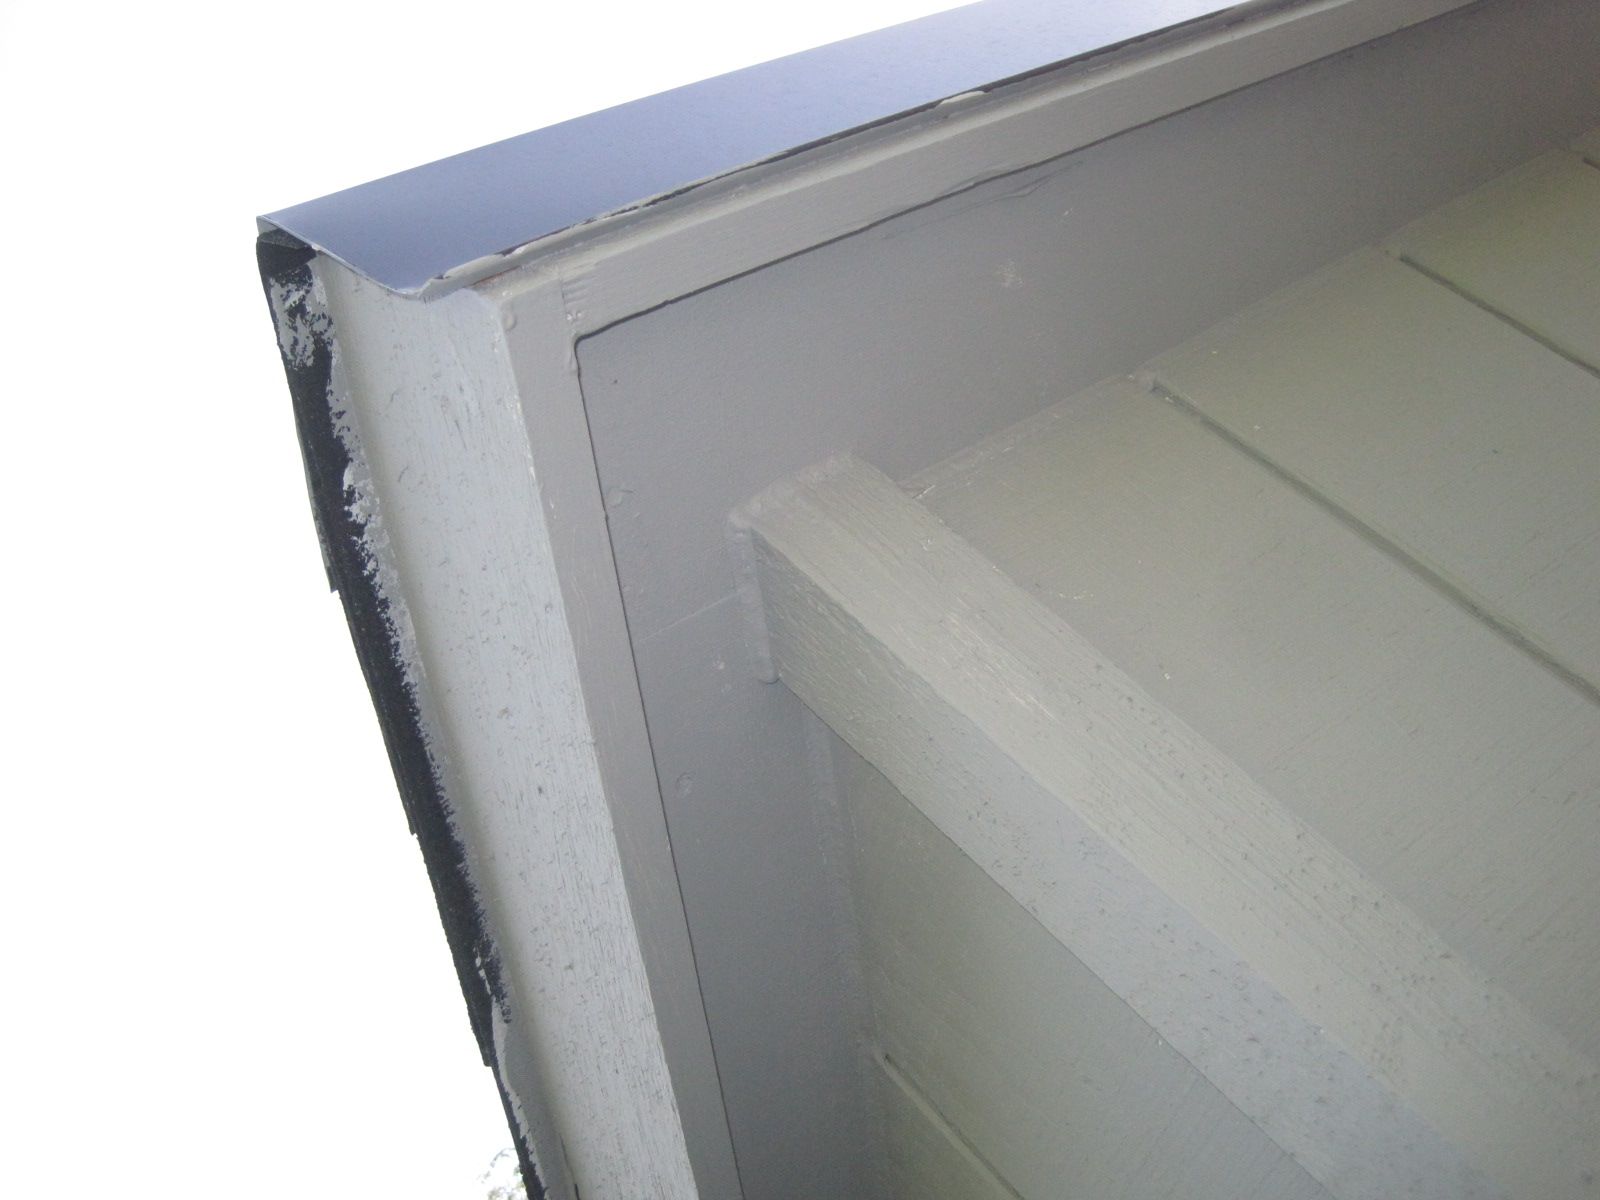
Mini “eaves”, with drip edges, part of the water management of the hatch.  All of the intersects were caulked and sealed.  And now they are painted.

Posted in Uncategorized | Comments Off on Outdoor work (get it done before winter)

A Spoiled Homeowner (closets)

I had the great good fortune in my life to design and build  a “dream home”.  And I lived in it for twenty years.  After first moving in to that newly constructed house I felt like I was staying at a high-class hotel that had all the features to pamper its occupants.  It didn’t feel quite right that I should live in such luxury, but somehow, over the years, I got accustomed to it.

Of course over twenty years, even in a newly built house, there are things to fix and update and revise.  But many features designed into it were a response and solution to having lived in older South Minneapolis houses.  I could now enjoy expansive rooms, walk-in closets, multiple bathrooms, upstairs laundry, built-in bookshelves… the list goes on.  As a result, moving back to a South Minneapolis house, and into a small bedroom with its tiny closet was an adjustment.  My wardrobe had expanded over the years and now there was not space for it.  Not that I needed so many clothes; I only wear a few items over and over in the course of a year anyway, so part of the solution is to downsize them.

But still, I wanted some additional storage, so I invented the “two-sided closet”.  On the other side of the bedroom wall, was my study, a room for my books, computers, printer, and archives.  It has a closet on that shared wall, in which I store tripods, camera gear, and whatever project materials and tools I am currently working on.  By opening up the back of the study closet, I could access it from the other side, and have an additional closet in the bedroom too!  Brilliant eh?

Now I know this is just the equivalent of stupid accounting tricks.  I’m not really getting any more storage space.  But depending on what was more important at any given time, it could shift from storing clothes and linens to storing printer supplies and telescopes.  This flexibility appealed to me, but to be truthful, prior to moving in, I was mostly thinking about the closet space I had become accustomed to.  So at the demolition party I asked one of my nephews to pull the sheetrock off and open the wall.  I was now committed to the two-sided closet.

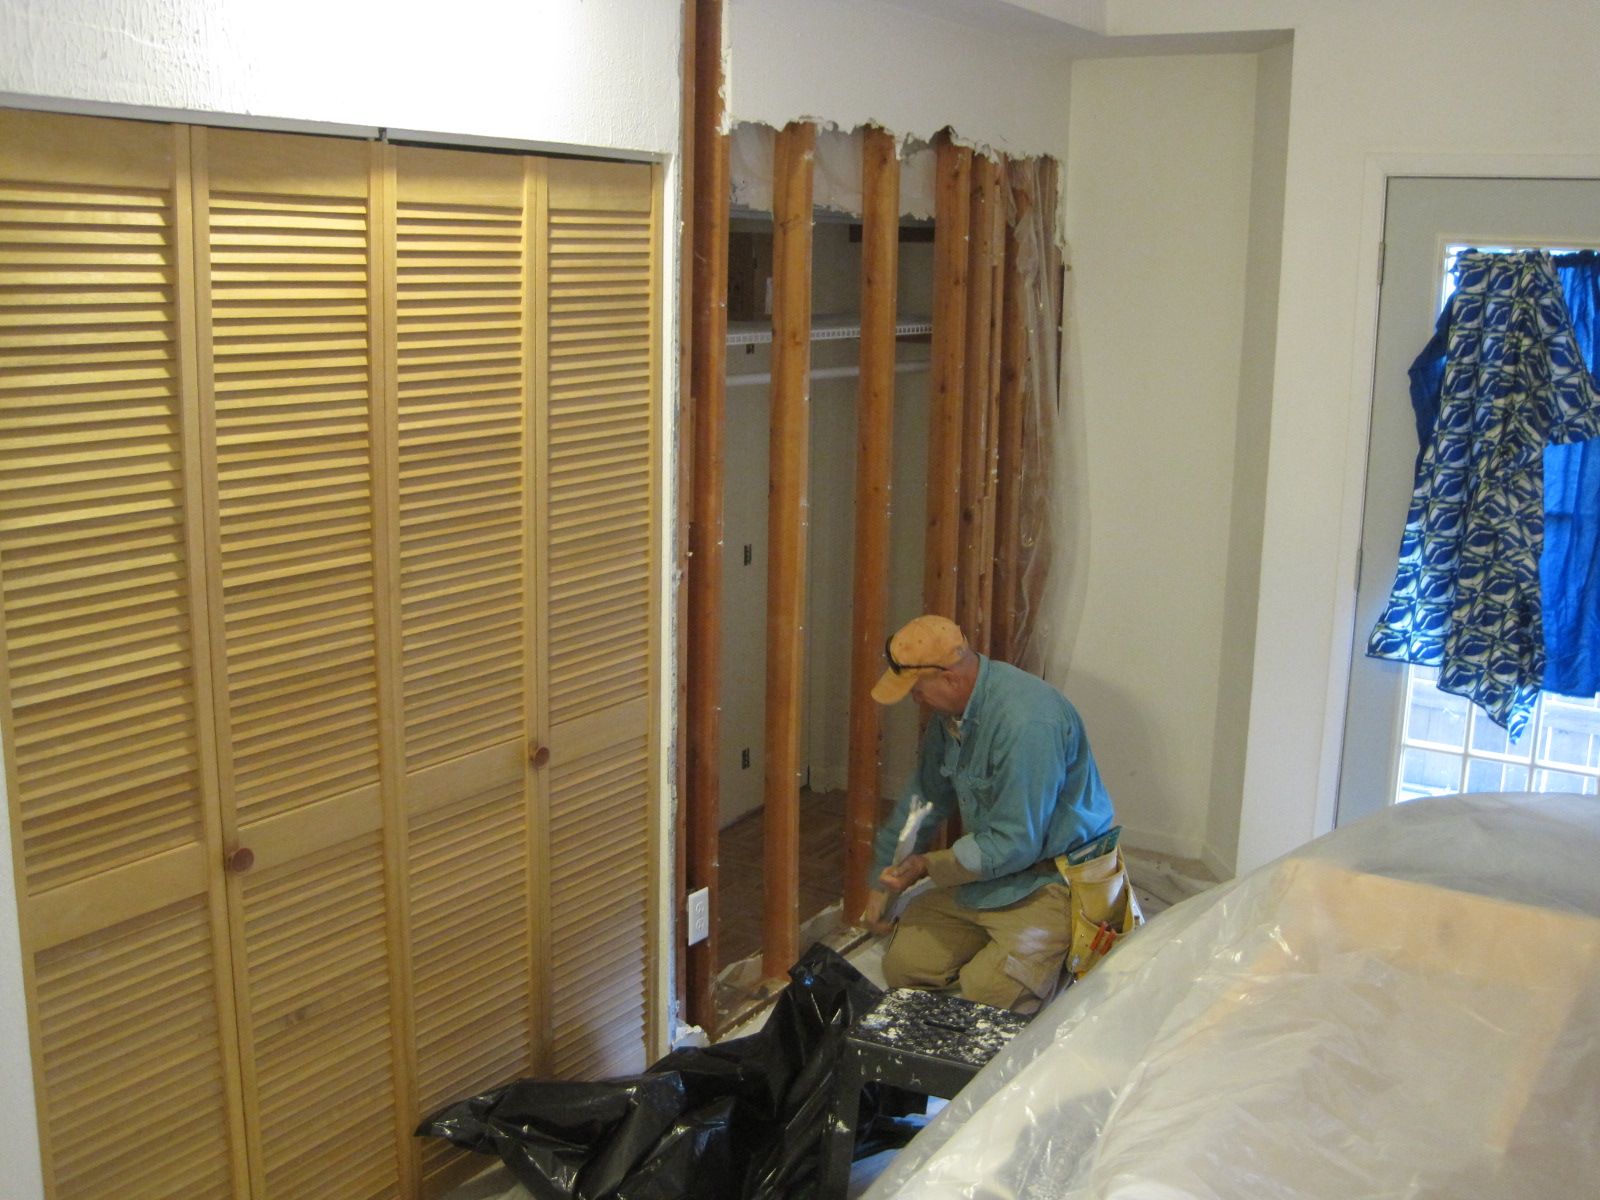
Tom the carpenter, working on the wall opening for the two-sided closet.

Some modifications were needed, the closet shelves and clothes pole had been supported by angle brackets from the back of the closet.  With those gone, the wooden shelves and pole sagged.  The solution was to replace them with heavy duty steel equivalents that could handle the full six-foot span.  I was beginning to find the drawbacks to my great invention.

I also needed a closet door.  It made sense to try and match the existing bedroom closet, to have the new closet look like it belongs there, but I was unable to find a match in door style (louvered bifold varnished wood).  I would need to obtain two sets of doors and replace the existing set.  Not cost-optimal, but at least there was a solution.

I hired a carpenter to finish the wall removal and install them.  He measured the height of the new doors, cut the wall studs and installed a header to create the closet opening.  At this point it became clear that the existing closet was a different height, and not only did it look architecturally inconsistent, the new door would simply not fit.

This bit of news might have been a serious blow to a normal homeowner.  But to me, it seemed almost natural.  Why would I expect a closet door in This Odd House to meet modern construction standards and conventions?

Fortunately, I had a carpenter at hand.  He was able to modify the original closet opening to match the new closet and accommodate the new door.  He was pleased to have the additional work.

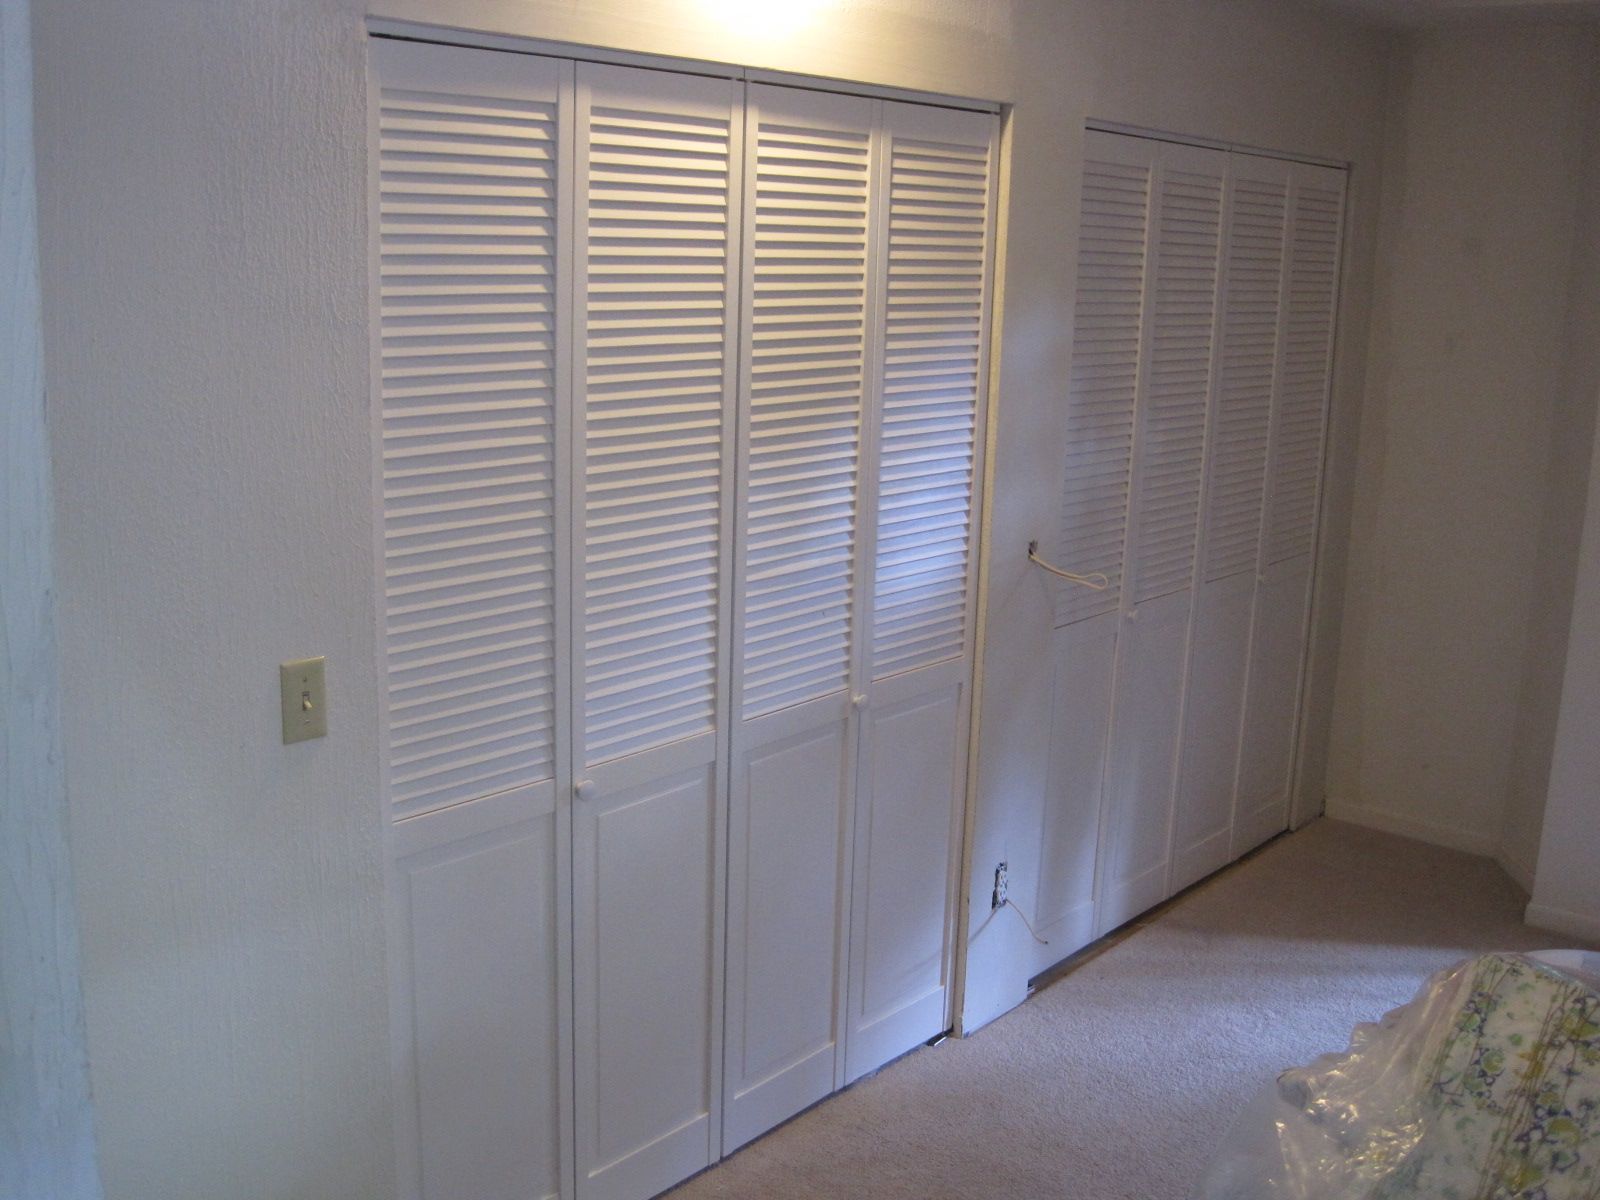
The closets are now newly sheet-rocked and trimmed, and the doors are installed and functioning.  They look nice and give the illusion of expansive closet space in the bedroom.  I will have to wait and report later on the balance of power between the rooms that each store stuff in the two-sided closet.

The illusion of an entire wall of closet space.

Posted in Uncategorized | 1 Comment

Electrons: an uphill flow

It was a troubling concept that my classmates and I encountered in Electrical Engineering 101.  We were being told that electrons flow in the opposite direction from the electrical current in a circuit.  Yes, electrons move “uphill” from low voltage to high, but the “current” goes from positive to negative.

I suspect that the individual who wired This Odd House may have been a classmate who didn’t quite get it.  I have heard of cases where a homeowner, confident in his skills, connects the wires to the right places and successfully makes the lights turn on, but is oblivious to the codes and conventions that make the wiring safe and maintainable.

In this house I have witnessed it firsthand.  Whatever plan was behind it, and its execution, was entirely done by amateurs.  I am confident that no electrical inspector has ever seen these wires.

I was recently spooked by an outlet in the kitchen, the outlet in the kitchen, the outlet critical for making coffee each morning.  It suddenly became inactive, dead– no voltage, no electrons.  It had been working fine, but now it had no power.  What had changed?

I had been examining the wiring in a crawl space elsewhere in the house (and had observed more scary naked splices), and the kitchen had just been painted, which involved taking off outlet and switch plate covers, but these actions seemed benign.

I confirmed that no fuse had blown, no circuit breaker had tripped.  I got advice that maybe it was downstream from a GFI outlet (ground fault interrupter) commonly used in bathrooms and kitchens, so I searched the entire house and checked and reset them all.  The outlet remained dead.

I was preparing to do remote camera inspection of the wiring to see how the outlet got its power, and thinking about cutting holes in the walls and ceiling in order to do this.  As I reviewed my options, I wondered why the refrigerator, sitting right next to the dead outlet, was still running.  Why were they on different circuits?

I pulled the refrigerator out from its home position.  Like most refrigerators, it was plugged into an outlet directly behind it.  I noticed that the outlet was upside down from the usual orientation, with the ground pin on top.  This isn’t a problem, the electrons still know which way to flow, but it did require that the plug on the power cord had to be connected from above rather than from below.  The cable ran across the other half of the duplex outlet, and when I unplugged the refrigerator I discovered test and reset buttons that uniquely identified it as a GFI outlet!

As an EE, I understand the purpose for GFI outlets and how they work.  They protect me from accidental short circuits to ground when I am using an appliance that is plugged into it.  They work like a local fast-acting circuit breaker.  Whenever they sense that the current is improperly flowing elsewhere (like through your body into the water of a sink or bathtub), the circuit breaker inside the outlet trips and you avoid being electrocuted.  This is a very nice feature to have.

But the risk of a short circuit from my refrigerator seems very remote.  I don’t know of anyone accidentally dropping one into a sink.  And if the GFI actually were to trip, how would I know it?  Ok, the refrigerator light wouldn’t go on, and eventually my ice cubes would melt.  How would I then know to pull out the refrigerator and access the outlet to reset it?  I think I would first go searching for the fuse in the service panel that had blown.

Yes, eventually after finding no blown fuses, I would figure it out.  And that is what was happening now.  But it wasn’t the refrigerator that was dead, it was a completely different outlet.  What I discovered was that the refrigerator plug and its power cord had touched the GFI “test” button just enough to disable all downstream outlets, but still keep the GFI outlet itself fully powered (I don’t actually see how this is possible– it seems like a faulty design to me).

My reconstruction of what happened is this:  the painter pulled out the refrigerator to paint the kitchen walls.  When it was pushed back into place, the GFI outlet was semi-triggered.  The refrigerator continued running, but the downstream outlet was cut off.  It was a week until I figured this out.  A week of making coffee at a remote outlet.

The fix was to replace the outlet behind the refrigerator.  I installed a standard outlet, right side up, to replace the GFI that should never have been there in the first place.

I am now able to enjoy my morning coffee in the kitchen and contemplate what next uphill battle I will face at This Odd House.  I suspect it will involve electrons.

Posted in Uncategorized | 2 Comments

To take a shower, part 2

Having solved the shower faucet control issues, I now wanted to install the modern energy-saving, water-saving, shower head that the CEE energy team had provided me.  They could not install it during their energy audit, because of some sort of shower head incompatibility.  But they left it with me, and I was sure I could figure out how to connect it.

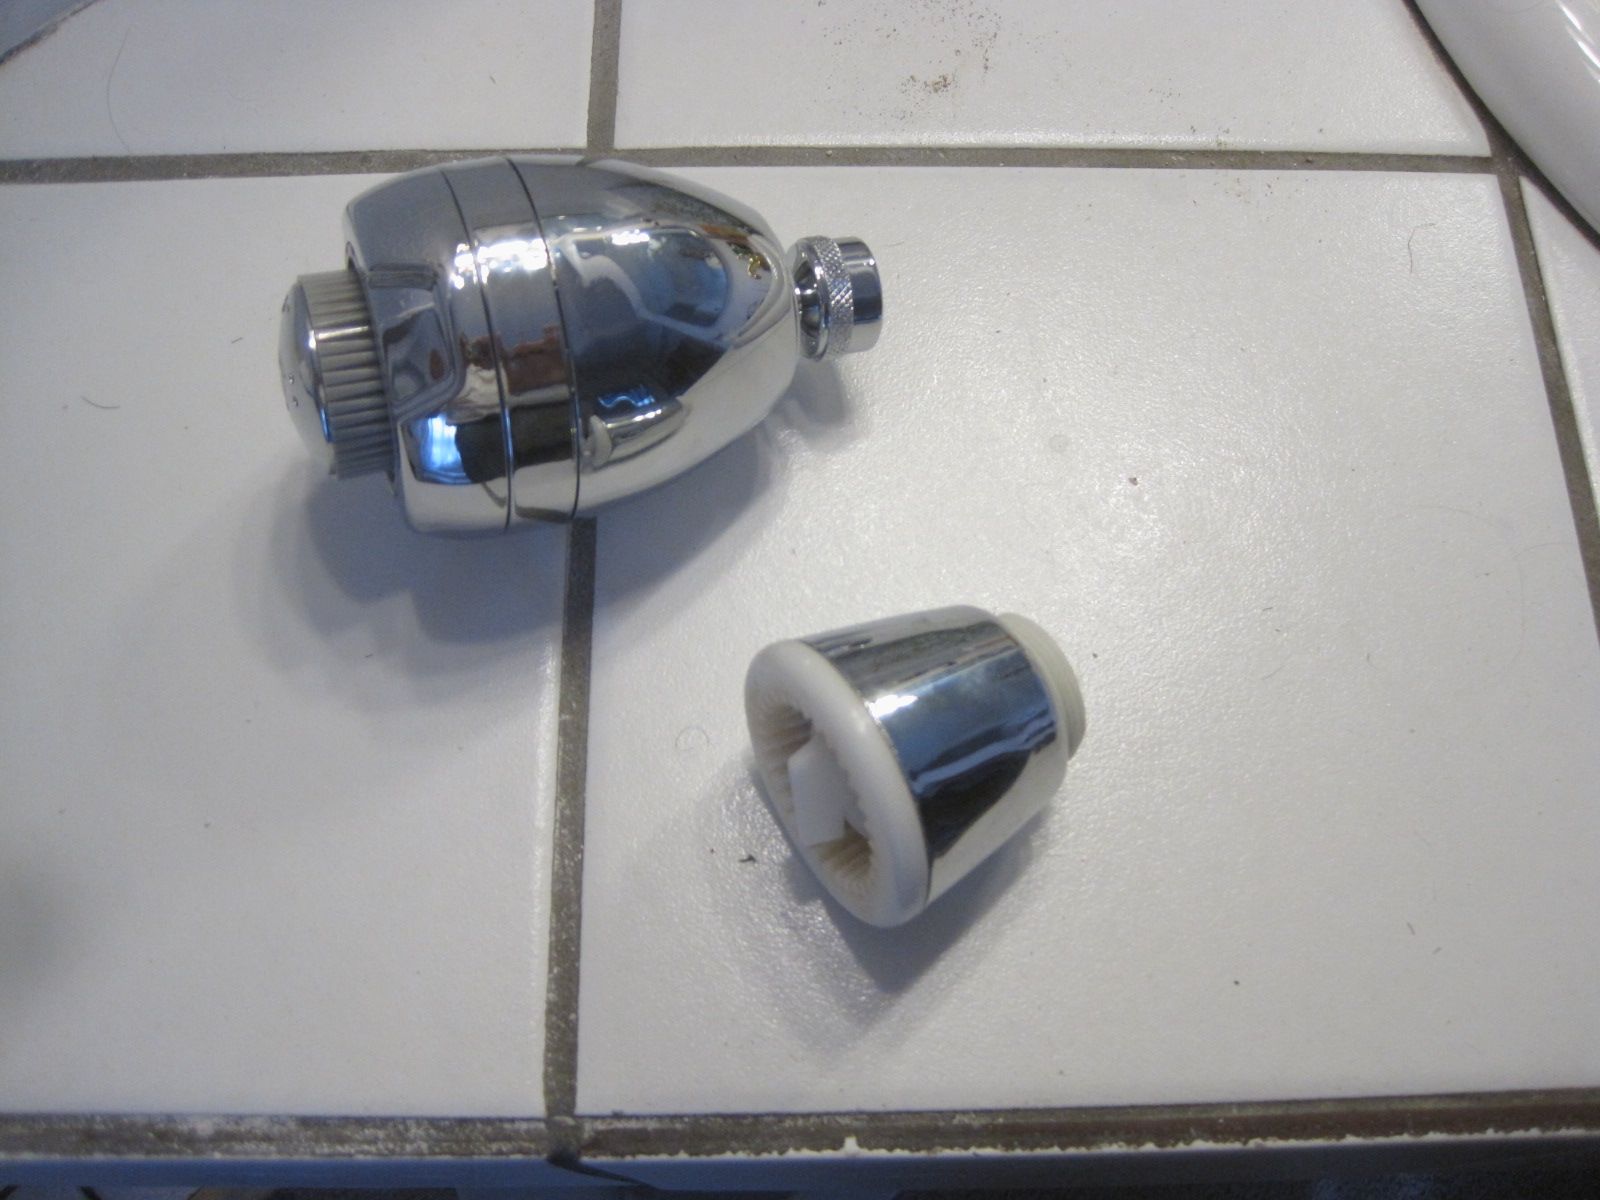
The old shower head was failing, a lopsided stream of water that did not respond to its primitive flow control lever.  I unscrewed the head and expected that I could just screw the new one right in.  This was a bad assumption.

Modern shower heads have a standardized thread.  My shower head was from an earlier era, a time when one company attempted to capture the market by the sheer power of its technology: a ball joint welded to the end of the shower stem.  They promoted it everywhere and provided compatible shower heads on the cheap.  Unfortunately, this concept lost in the marketplace to a simpler shower stem, where the complexity of the ball joint was integrated inside the shower head instead of being part of the stem.

So that leaves me with figuring out how to put a modern shower head onto an obsolete shower stem.  The answer (as revealed by a “how to replace…” Google search), is to simply unscrew the shower stem from its feed pipe and replace it with a new one.

This seemed a little scary at first, because the shower stem is a pipe, one end of which connects to the shower head, the other end dives into the wall and disappears.  How do I remove it from the invisible supply pipe?

The answer is simple—just unscrew it.  These shower stems are designed to fit into a standard pipe fitting and are just a (cosmetically appealing) extension of the plumbing, a last little section of exposed pipe to feed the main attraction, the shower head.

So I proceeded with the advice I found on the do-it-yourself plumbing forums, and purchased a “universal shower arm” knowing that all I had to do was unscrew the old one and install the new one.
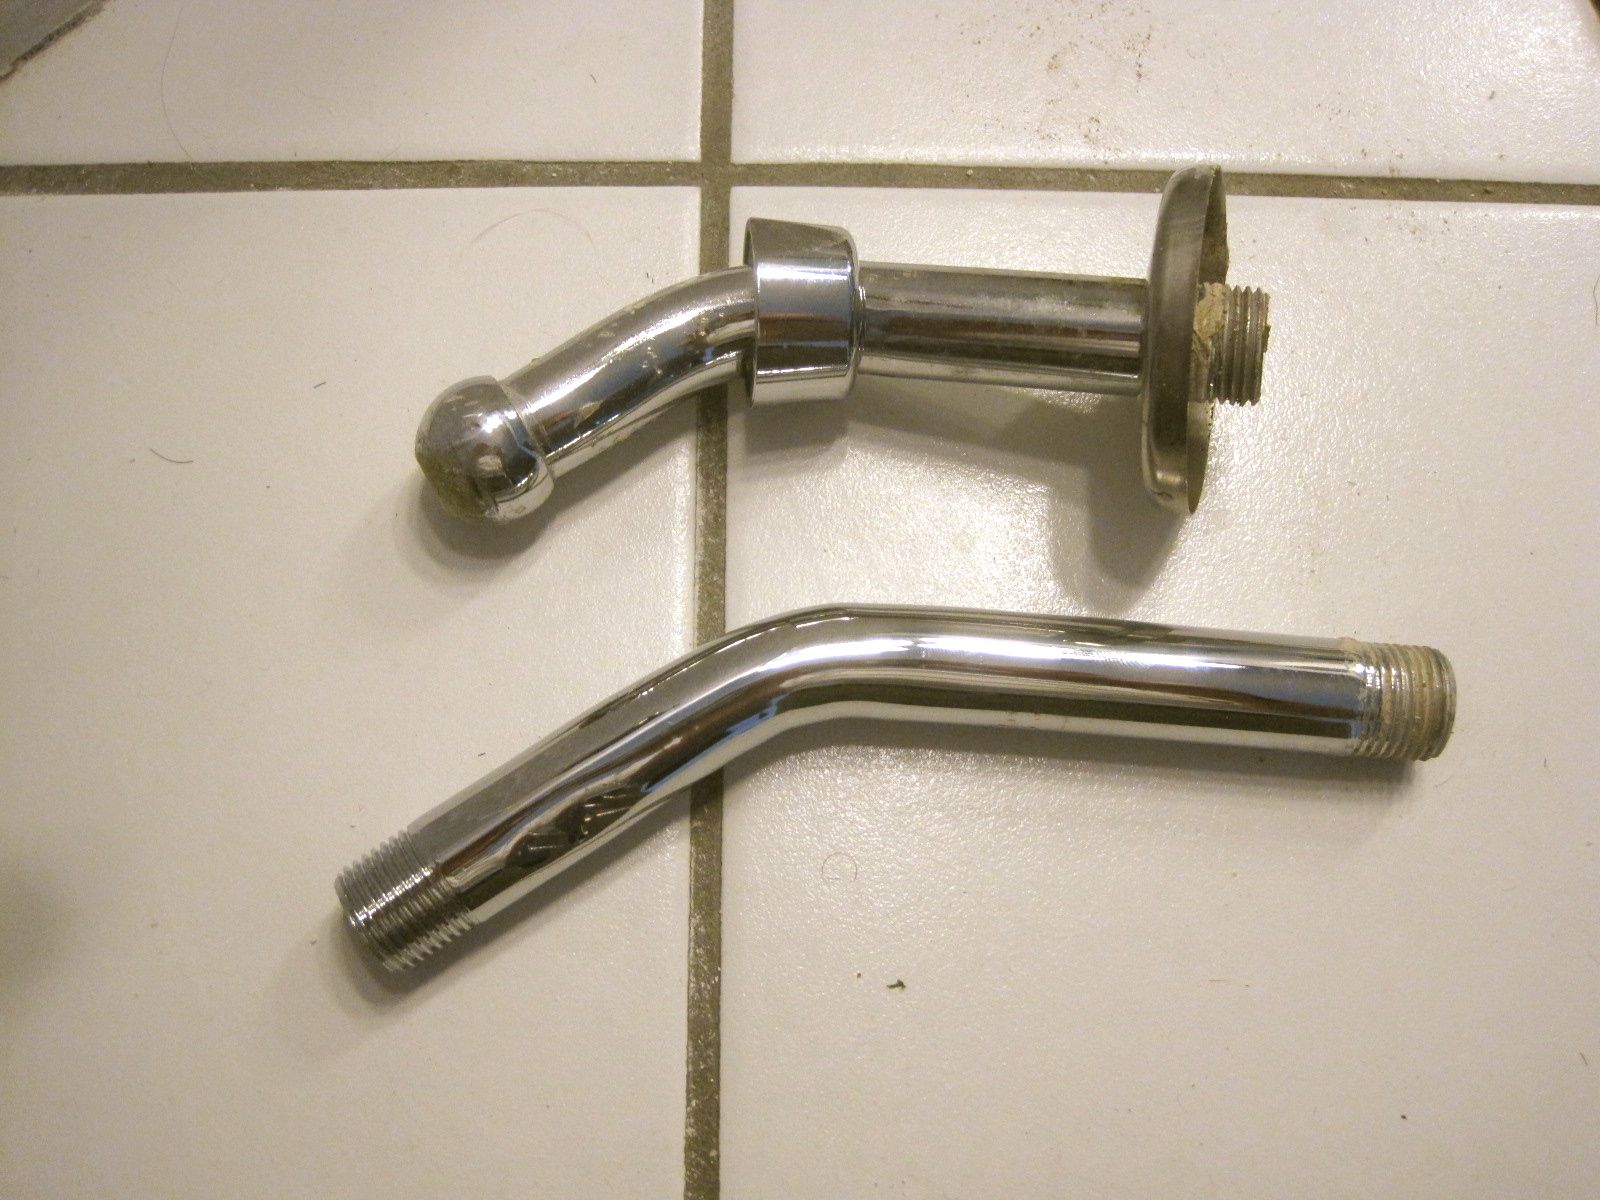
The old shower arm with the obsolete welded ball head (above), the modern shower arm below.

This is a measure of the supreme confidence of everyone returning from a foray to the local Home Depot, Lowes, or Menards stores, armed with their new parts and tools to install them.  I enjoyed the same certainty, knowing it would be a simple shower arm transplant.

Unfortunately, the old shower arm could not be removed.  It screwed into the main supply as usual, but rotating the arm brought it into contact with the shower ceiling, and there it stopped.  It could not go further, the ceiling prevented it.
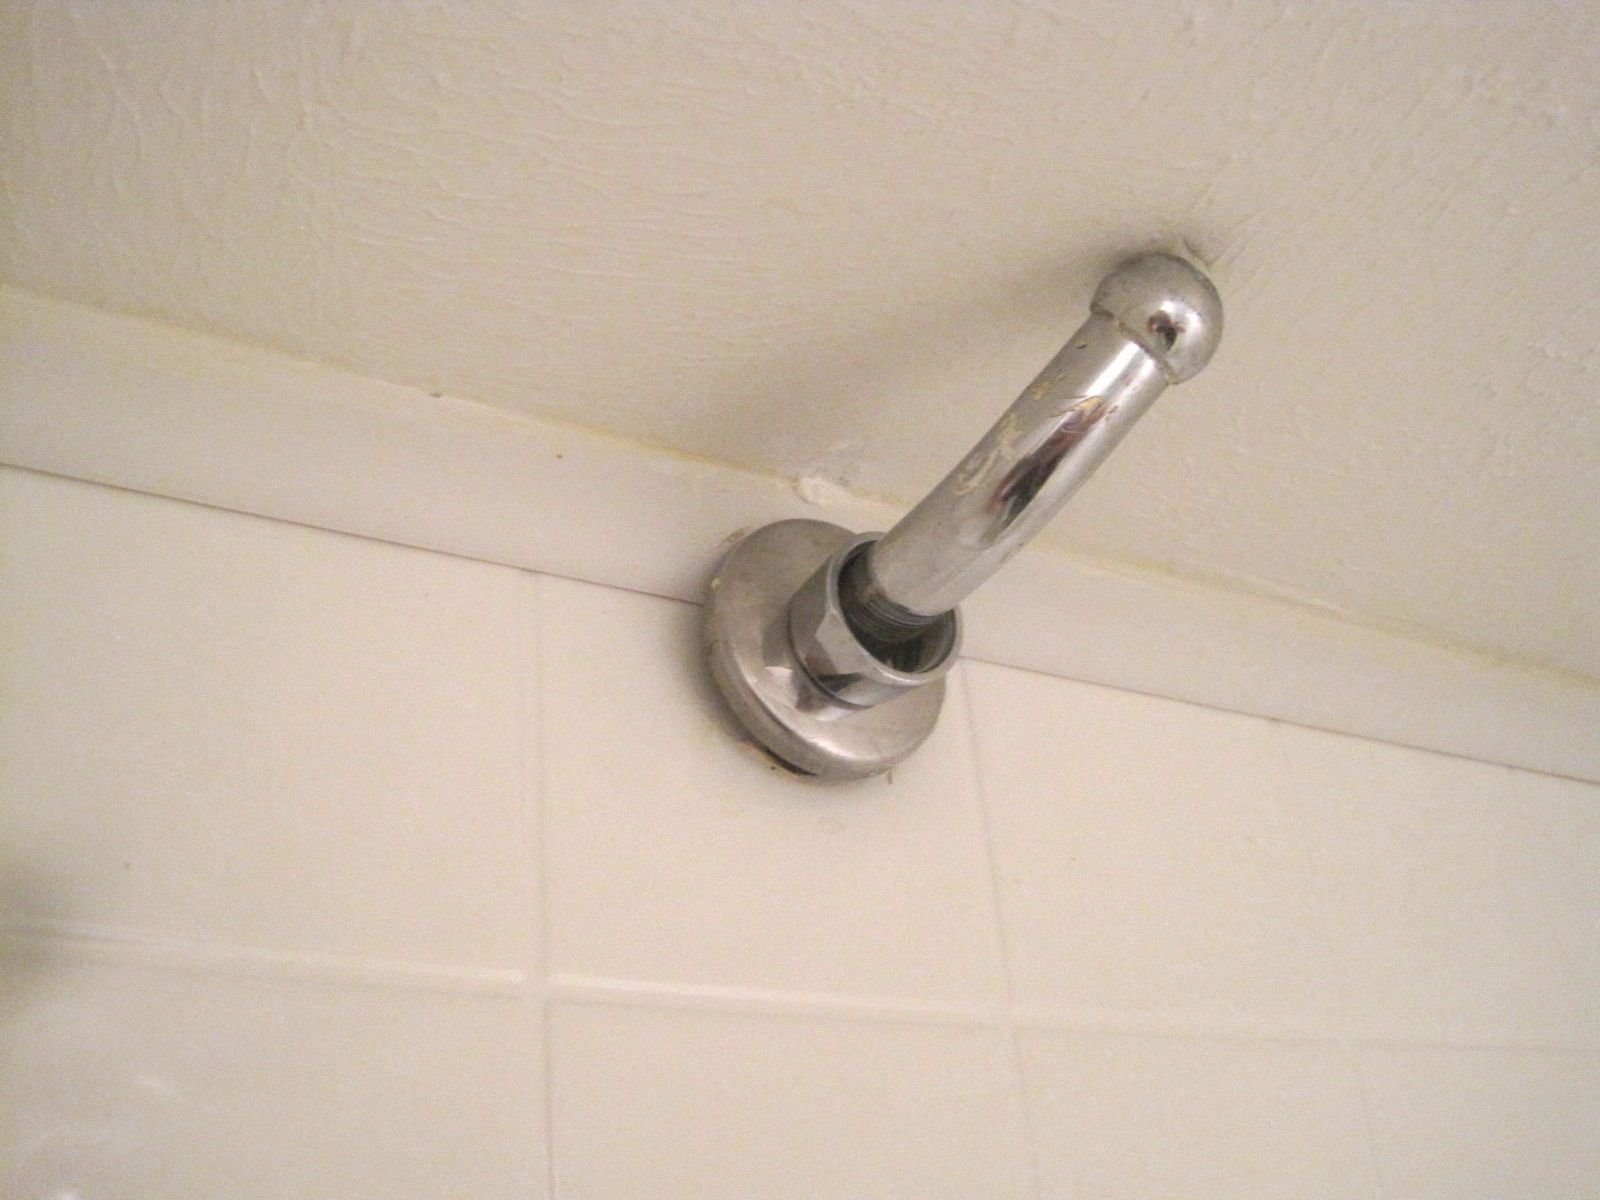
The old shower arm being removed. In less than a half-turn it was blocked by the ceiling; it could unscrew no further. How did this shower arm get installed in the first place?

I wondered about how this shower had been created.  Somehow, the shower arm had been installed by threading it into the main supply.  It had turned multiple times around to seat itself, finally aiming down with its showerhead installed.  How could this happen if the ceiling prevented the shower arm from being screwed in?

I don’t know.  I will guess that the shower head was installed, and then later, a ceiling was lowered into place, sealing all plumbing connections permanently into position.  I think these construction techniques were first pioneered in Egyptian pyramids.

To remove the shower arm therefore required removal of the shower ceiling.  Removing the entire ceiling seemed excessive, so I attempted to cut away a section so that the old shower arm could be rotated and removed.

Unfortunately, the sheetrock that made the shower ceiling was anchored to wooden furring strips.  One of these planks was directly above the shower head.  It could not be easily removed.  The shower arm was now trapped by structural wood, not just plaster.
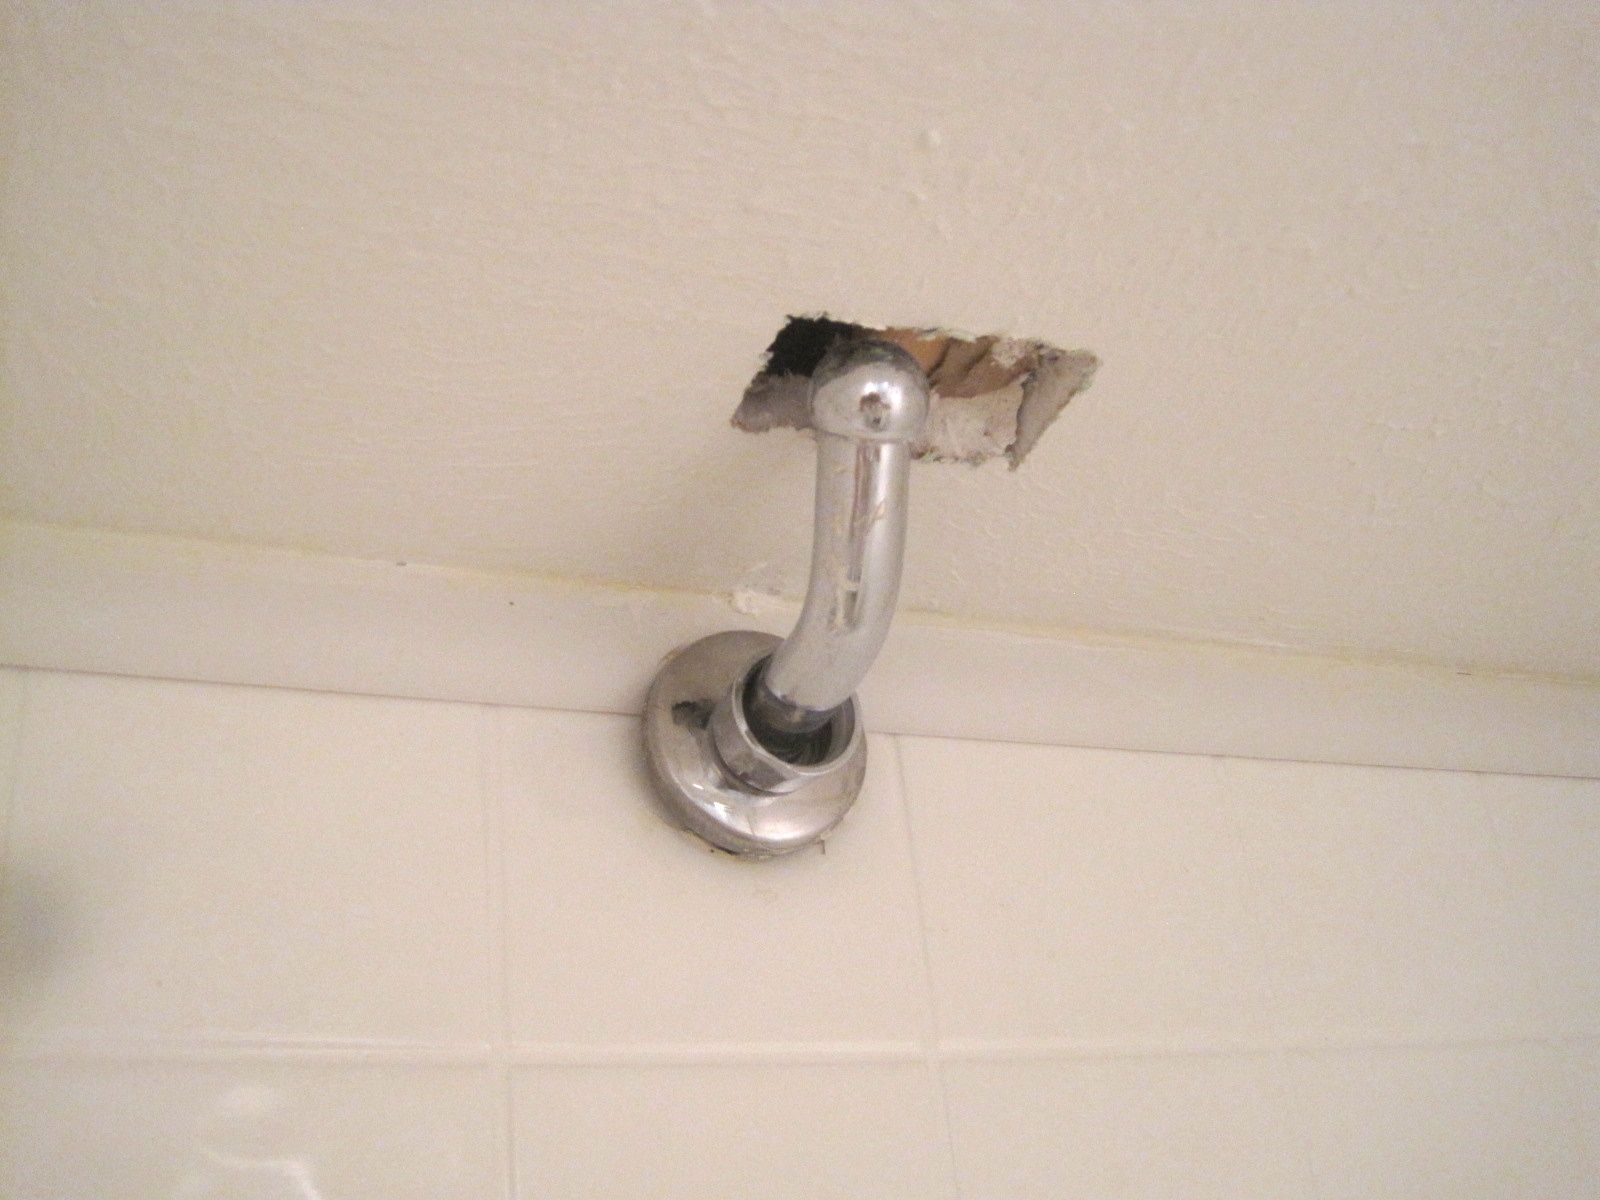
A hole in the ceiling provides clearance for the shower arm to rotate. If only there were not a wooden stud at top dead center!

I cut away everything else, and with a force that distorted the proper alignment of the plumbing behind the walls, I managed to remove the obsolete shower arm.

Now for the replacement.  I had purchased a “Universal 8-inch Shower Arm”, but I was initially unable to install it because the ceiling did not have enough clearance.  I cut away more of the ceiling and with the same un-recommended plumbing force, managed to screw it into the main shower pipe.  The pipe seated solidly at the end of its threads, it could turn no further, and successfully brought the shower arm to aim directly UP at the ceiling.  I would have preferred it to aim down, toward me.
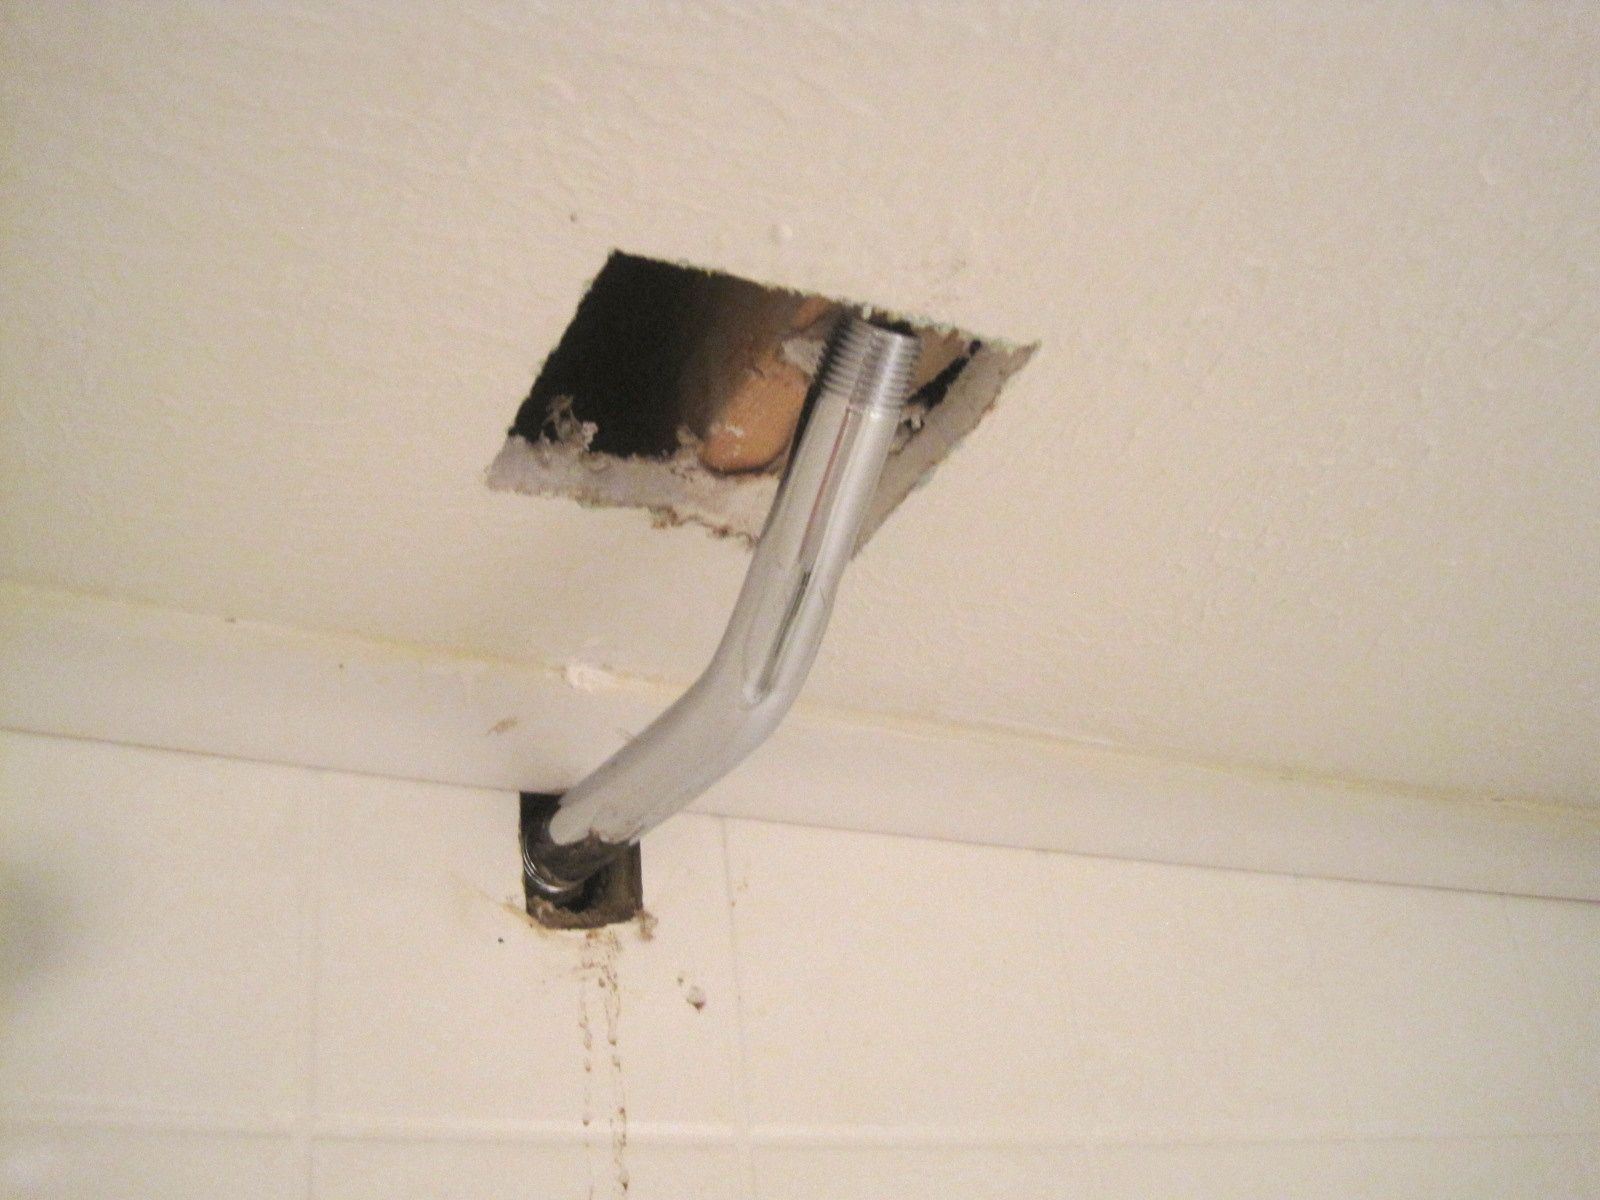
The universal shower arm in its final seated position.

It has always been a warning flag to me when some product claims to be “universal”.  And sure enough, I learned that part of the problem I was struggling with was that I was trying to install the 8-inch universal shower arm.   Clearly I should be using the 6-inch universal shower arm.  In my opinion, neither of these, simple as they were (bent pipes with threads at each end), deserved the moniker of “universal”.  How is it that one can market two versions of anything that is called “universal”?

I had bent, scratched, and defaced the 8-inch shower arm, trying to install it.  I now abandoned it and went out to obtain the shorter version.  This time I carefully applied the pipe tape and tried to install from the right starting position.  After a few retries, I finally got it to screw in tightly and end up in the down-aiming position.

I could now attach the new shower head.  This was the first uneventful step I encountered.  The head screwed on to the Universal Shower Arm, and I was finally ready to give it a full system test, with live water.

My shower is narrow and deep.  The head and faucets are at the far end.  There is no place to the side or behind, not enough of a pivot to aim it away.  So turning on the water means getting wet.  Filled with confidence after this last successful installation of the shower head, I removed my tools from the shower, then my clothes from me, and with hands on both faucets, boldly turned on the water.

It was a cold immersion, but the faucets worked and the shower head worked.  I spent the next 15 minutes balancing the hot water and trying every setting and every position on the shower head, celebrating my victory over the perversity of inanimate objects.

As I finished this cleansing experience, I took a look at the connection of the shower stem to the main pipe.  The pipe tape looked clean and tight, but sure enough, after a few seconds a small water drop formed.  It grew, then dripped, another one slowly followed.  I was not the victor in this contest.  I will have to re-seat that shower stem yet again.   But that battle will wait for another day.
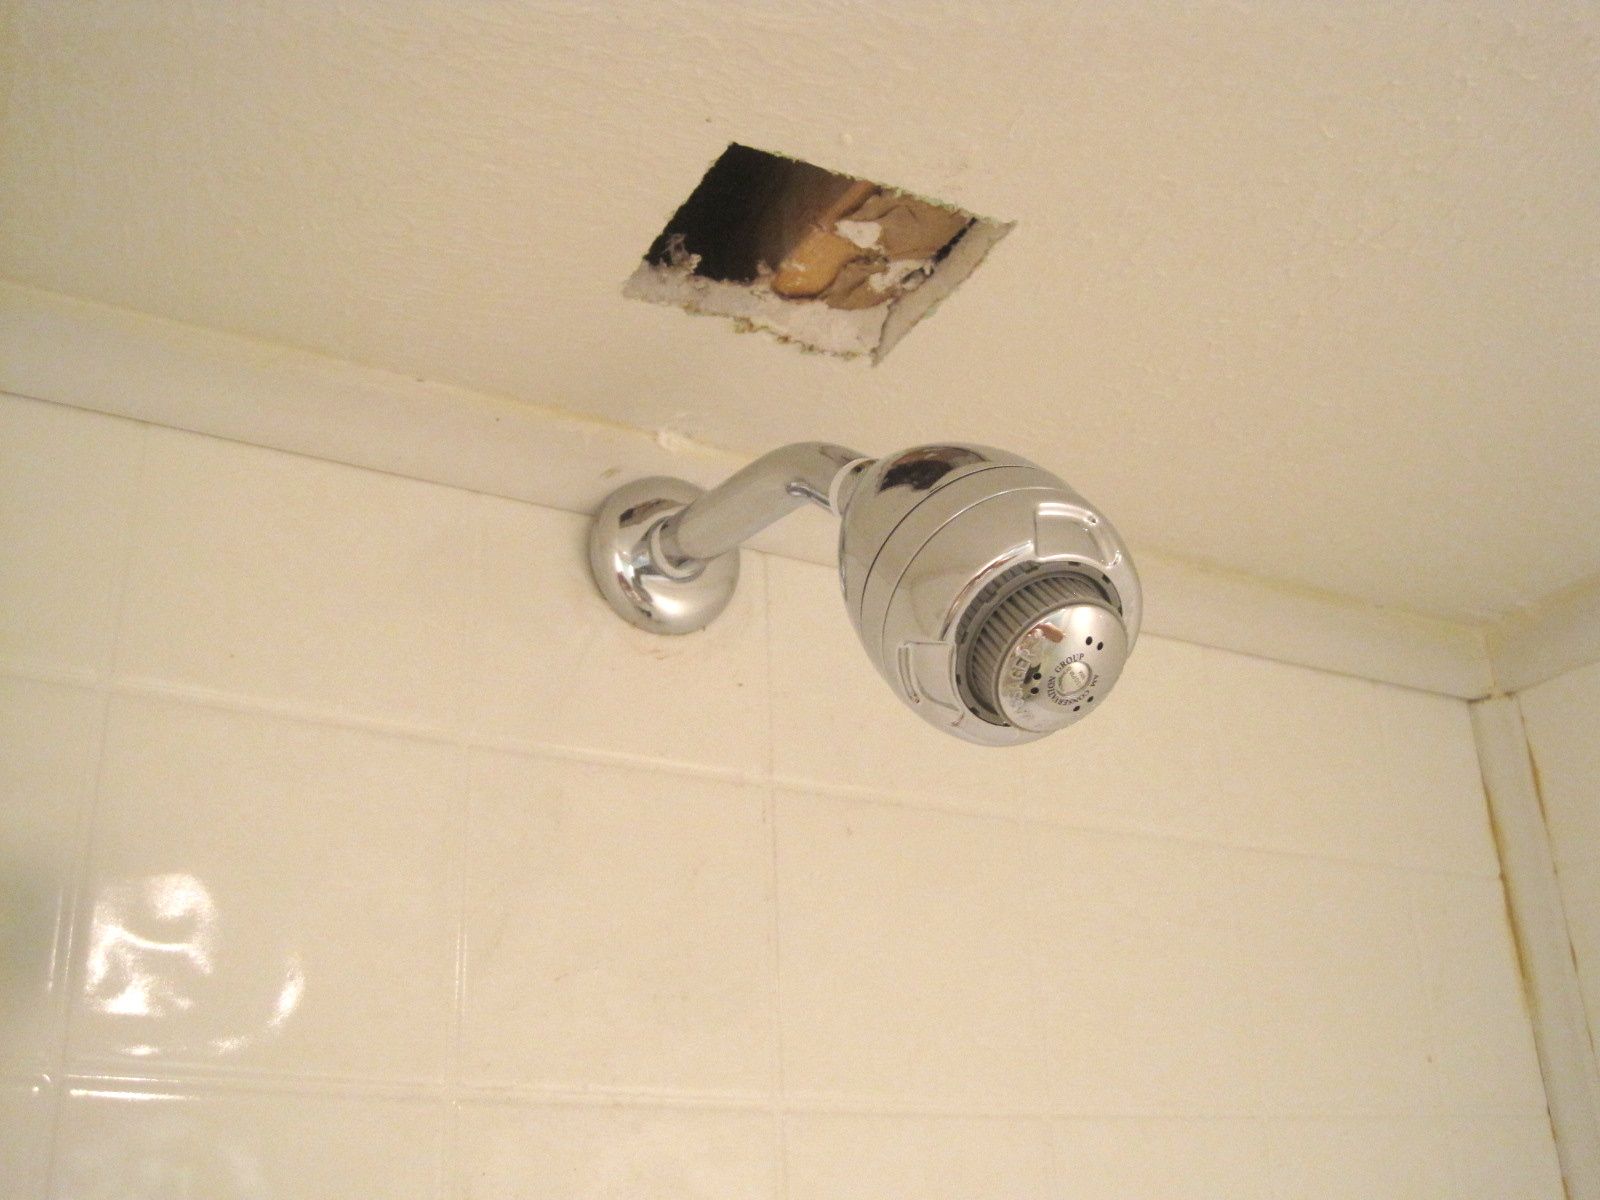
The new shower head, on its universal 6-inch arm, ready for full system test.
Posted in Uncategorized | 5 Comments

To take a shower

Or:
On The Perversity of Inanimate Objects

The day after moving in to This Odd House I looked forward to taking advantage of its many features, one of which was a deep shower off the master bedroom.  I woke up and entered the shower chamber, a commitment to getting wet, since there is no way to turn on the water that is not in its direct and immediate path from the showerhead.

I had two surprises.  First, after turning on the cold water faucet, the handle came off in my hand.  With the cold water streaming down on me, and with no control on its flow, I tried to temper the shock by turning on the hot water.  The second surprise was that there was no hot water.

The week earlier, planning for the upstairs kitchen renovation, the demolition party team had removed a sink and dishwasher.  This required that the water supply to the second floor be shut off, an easy task once the shutoff valves in the basement were located.

For whatever reason, the hot water to the master bathroom was on that same line. The cold water was not.  So with no hot water, I endured a frigid dowsing as I frantically tried to re-attach the faucet handle and turn off the blast of cold.

This was my induction to This Odd House.

I had to abandon my desire for hot showers when a while later, the hot water to the entire house was shut down, a consequence of removing the chimney.   During this time I “couch-surfed” at friends and relatives homes, taking advantage of their hospitality and hot water.

Eventually the hot water supply to TOH was restored, and now I could refocus my attention to the master shower.  First, why did that faucet knob come off?  I tried to press it back onto the valve stem, but there was no traction.  I examined the plumbing and could not figure out the mechanism.

Fortunately, I have (intermittent) access to the internet, and I was able to do Google searches on “how to…”  This was often productive, because the next search word would auto-fill in the remainder of the request:  “how to repair shower…” There were several options; I selected “faucets”.  Earlier, I had wanted to know how to remove wallpaper.  There were other interesting options offered after typing in “how to strip…”.

My faucet repair search did not immediately solve my problem, but the results hinted at the search terms I really needed.  Eventually I found my exact plumbing configuration:  Modern faucet knobs, it turns out, are incapable of reliably turning on and off the hot and cold water.  This is because the water valve is controlled by a “spline” fitting, a small gear-like metal extension that fit into a conventional metal knob (think of those four-winged metal or ceramic handles that your parents or grandparents had in their sink marked “H” and ”C”).

The metal handles fit the spline gear perfectly, and reliably turned the water on and off millions of times.  The modern acrylic handles on the other hand, looked nice, but were easily “stripped”, their matching spline teeth rounded off by the pressure required to open and close the water valve.

The industry solution to this was not to abandon plastic faucet knobs in favor of the more sturdy metal models of yore, but to invent an adapter.  If the modern plastic could not provide the required torque for an 8- or 12- tooth spline, maybe it could cope with a simple stem head that was square.  So the solution was to add an intermediate part, a mechanical gear “shim”, that would convert the spline stem to a square stem.

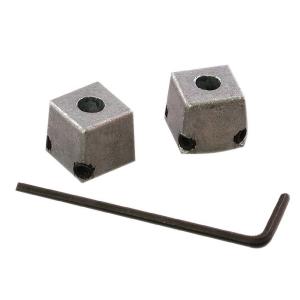
And this is what I was facing in the shower.  I had no idea how to fix this until seeing the “universal handle adapter” on a web page.  Once seeing it however, I knew instantly what to do: use the appropriate Allen-wrench to secure the square adapter to the spline stem, and then place the faucet knob over it.

I could now turn the cold water on, AND OFF.

Universal Handle Adapters. You probably didn’t know that you need them.

Posted in Uncategorized | 1 Comment

Small steps

Sometimes it is a bit overwhelming when I contemplate the scale and scope of the project I have undertaken.  I did not recognize it when I made this house purchase and more has been revealed in the months since.  There is so much to fix, so much to change, how will it ever get done?

In those moments I shift my focus from the long view to the short one.  There are small things I have accomplished recently.  None are worthy of awards or special recognition; they are the things that all homeowners take on while maintaining their personal castle.

I can, with varying amounts of pride, share with fellow homeowners some recent small accomplishments:

–       The basement lights are now on a single switch at the top of the stairs; no more running back down to turn off those lights!

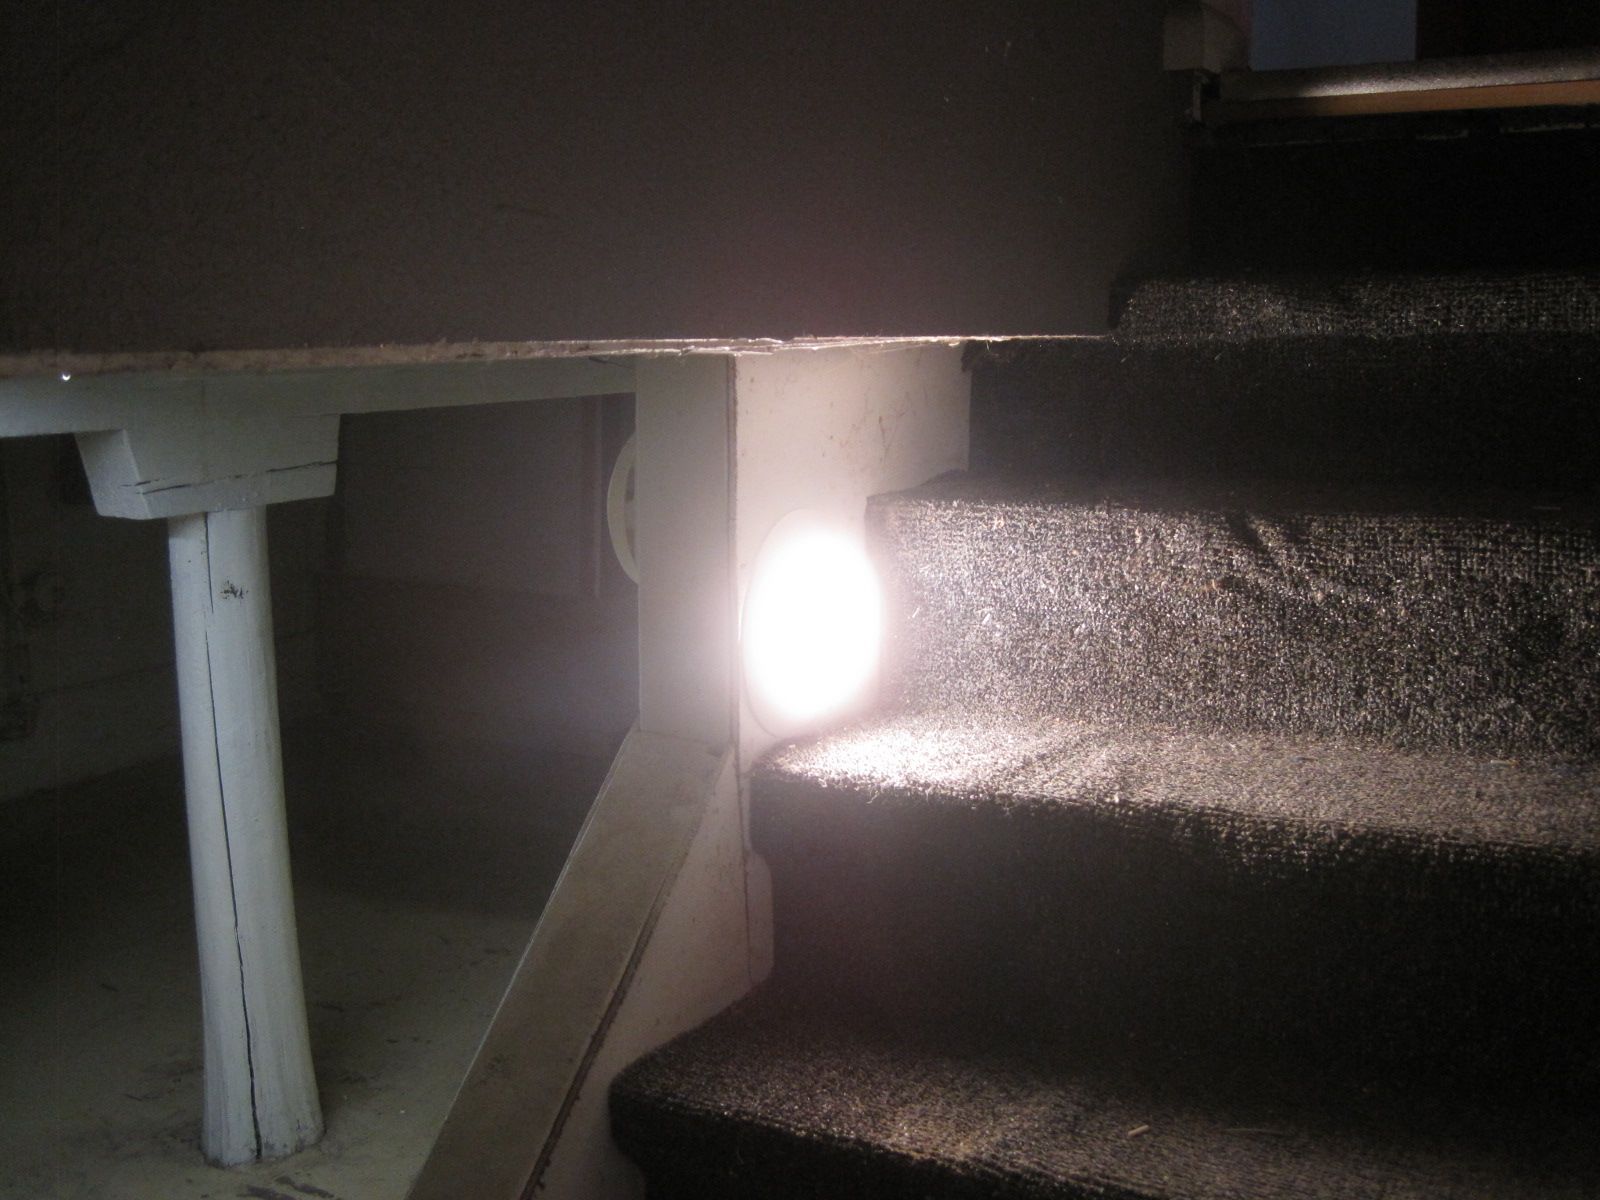
–       The naked light bulb on the basement stairs was replaced with a covered LED fixture.

An encapsulated LED light provides illumination where previously a (code-violating) bare incandescent bulb existed.

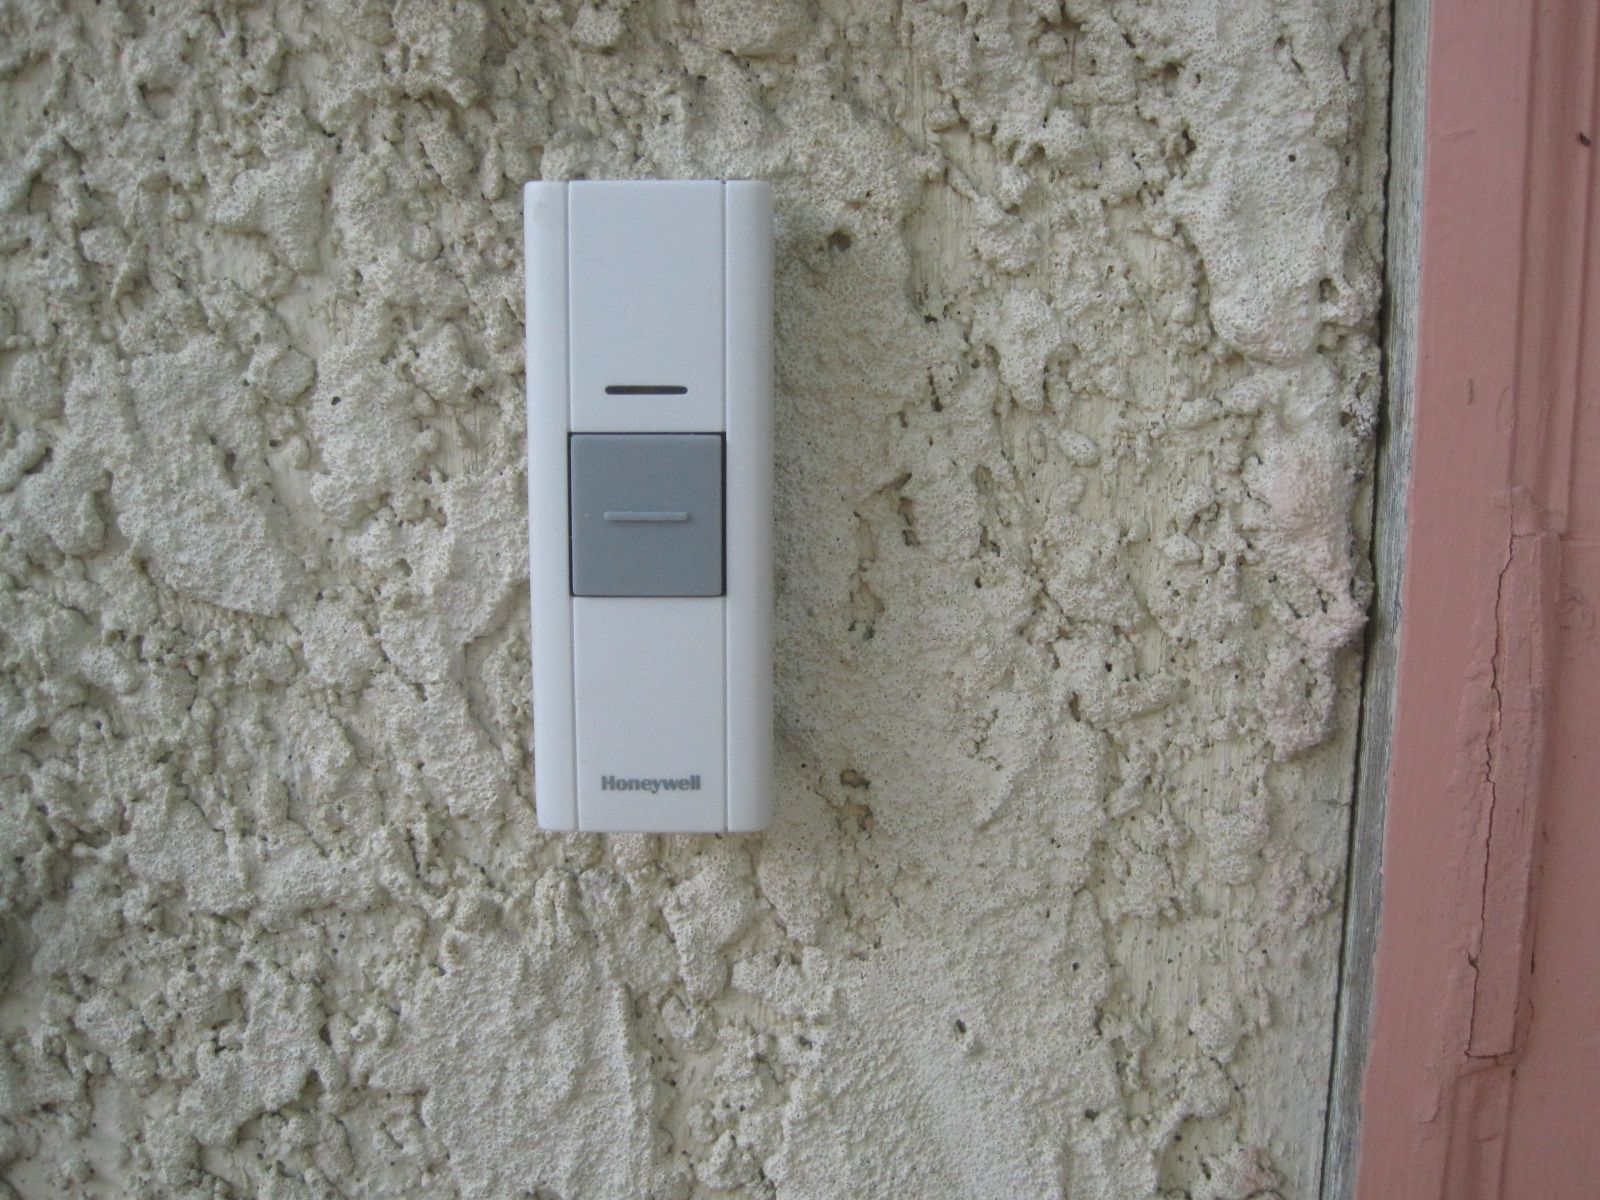
–       Wireless doorbells installed (doorbell wiring was disrupted by demolition).

Modern doorbells need no wires, and no hidden transformers. I can select “ding-dong” or one of five other chimes. I really wish there had been a “knock-knock” option (or a downloadable ring tone).

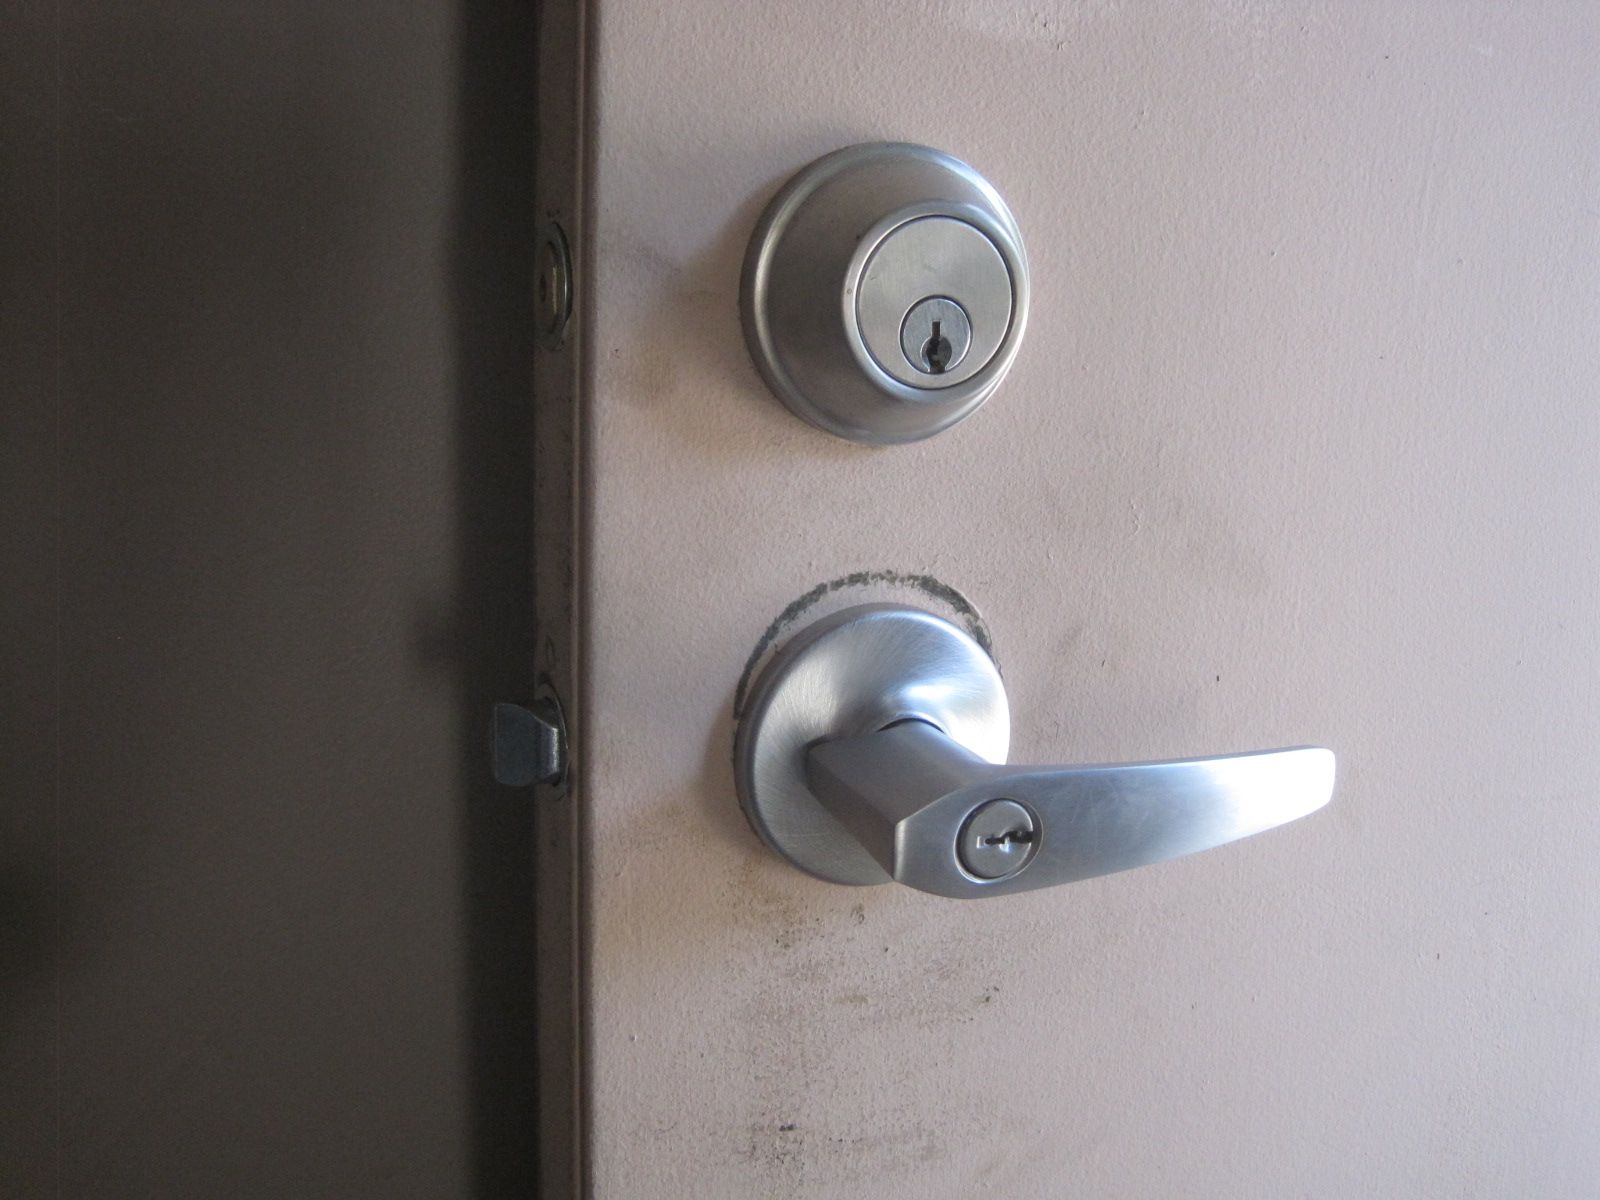
–       Outside door handles replaced with new brushed stainless levers.

Matching deadbolt, matching handle, one key.

–       Obsolete and dysfunctional shower head replaced with modern one.

Bigger does not always mean better, but in this case the larger head is the modern replacement for the smaller one, which was delivering water in dribbles. Unfortunately, this meant also converting the arm that holds the shower head.

–       Seventeen years of dust removed from vertical blinds.

–       Another dark room, previously painted gray, gets converted to white.  High albedo walls rule!

What was once the color of entropy, 18% gray, is now a functional color, reflecting light from everywhere and to everywhere, and enhancing the mood of the room’s occupants.

Posted in Uncategorized | 3 Comments

Tear the roof off!

This gallery contains 18 photos.

At long last the roof was ready for its replacement.  The old roof was torn off and shoveled into a dumpster positioned at street level to catch (most) of the debris pitched over the edge. A roofer’s life is a … Continue reading

More Galleries | 1 Comment

“The head is quicker than the hand”

This gallery contains 12 photos.

An observation frequently expressed by my dad, it’s an apt warning for those of us who can readily imagine how we want things to be different than they are, but dismiss or minimize the physical requirements of making it happen.  … Continue reading

More Galleries | Comments Off on “The head is quicker than the hand”

To Draw a Bath

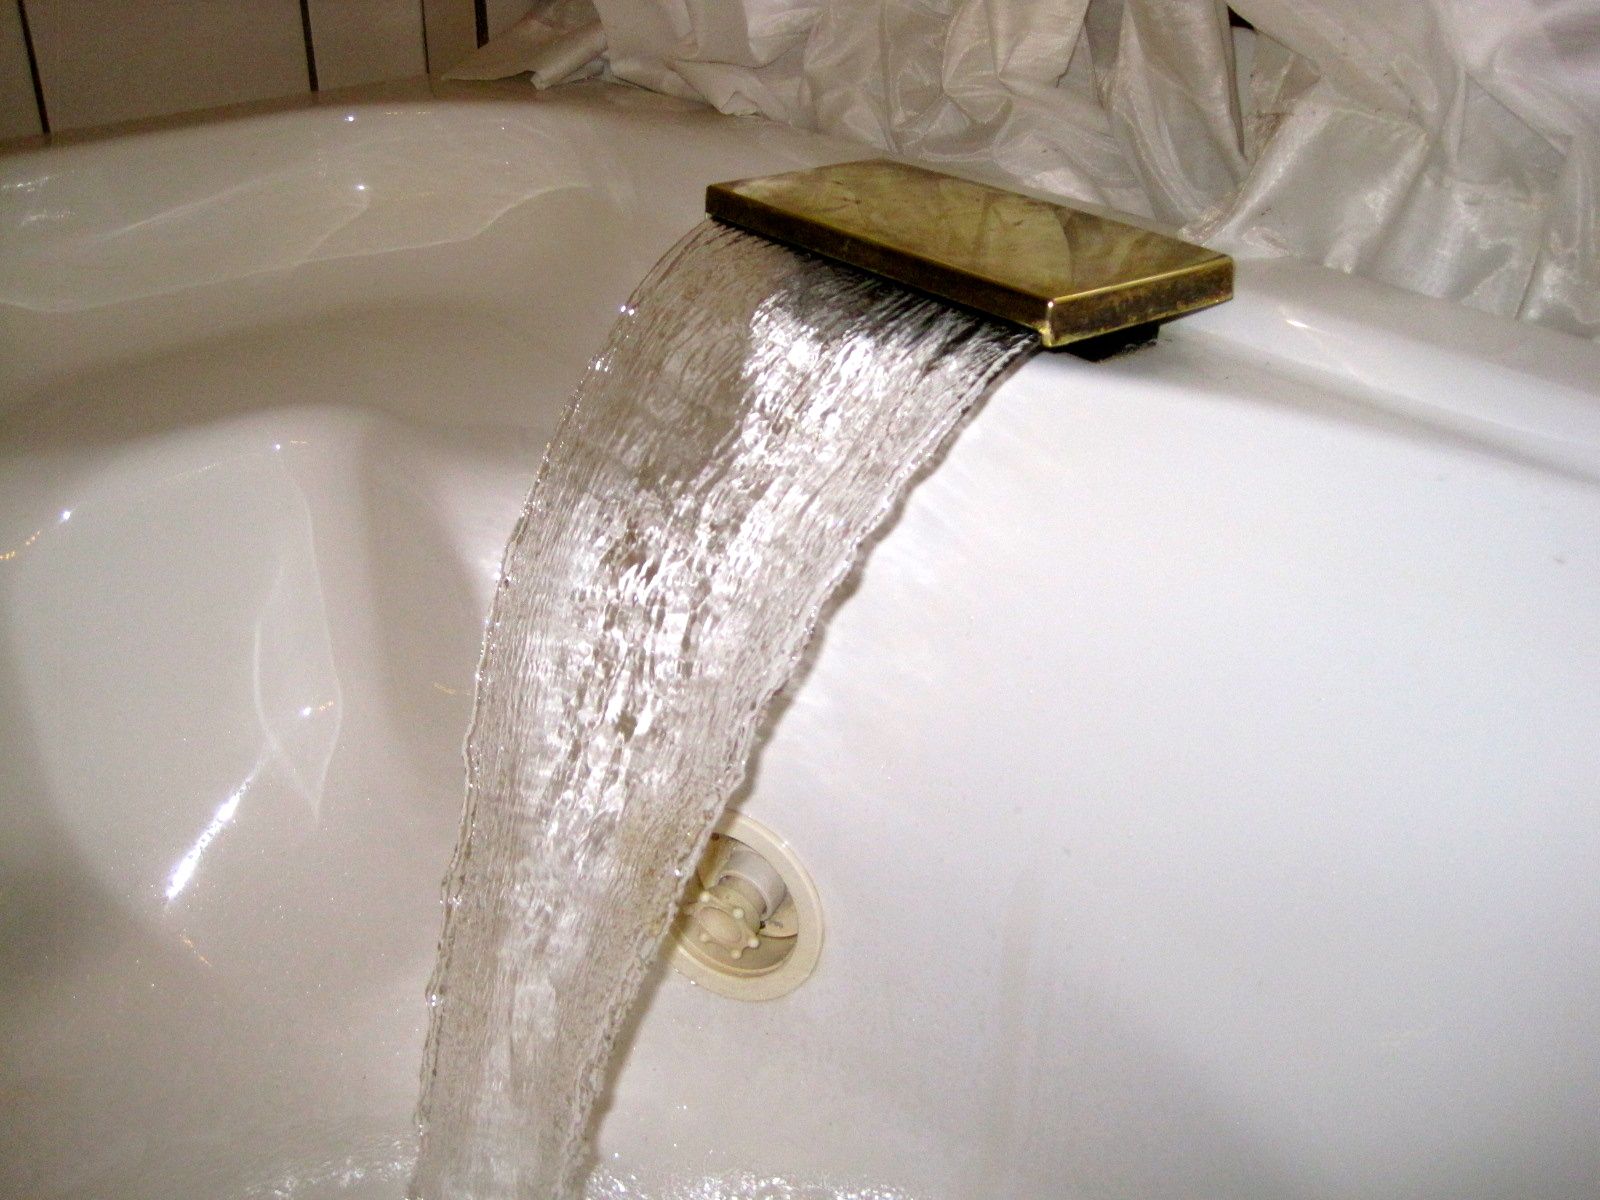
The “Water Rainbow Fill Spout” delivers hot water for the inaugural bath test.

First, acquire a home with a large Jacuzzi tub. Turn off the water supply.  Remove kitchen sink for eventual replacement.  Remove aging water heater.  Remove chimney.  Abate asbestos-wrapped pipes.  Replace heating plant and hot water tank.  Seal off the open water pipes exposed after sink removal.  Remove electrical hazards (lighting over the tub).

Two months after house purchase, turn on the hot water, fill the tub, turn on the jets and contemplate the path taken to get here.  Soak until saturated.  Progress is marked by moments of quiet celebration.

*****

I had an inaugural bath and hot water supply test last night.

Inside an access port to beneath the tub, I found its specifications and installation instructions.  Capacity: sixty-five gallons.  Minimum recommended hot water tank: 50 gallons.  Maximum water temperature: 140 degrees (to prevent discoloration of finish).

I had considered an on-demand water heater, but wanting to never run out of hot water whether in a shower or a bath, under any conditions of laundry or dishwashing demand, and under the advisement of the heating contractor, I installed a boiler-mate heat exchanger hot water tank.  It had the house-typical capacity of 40 gallons.  The temperature control was set to the recommended non-scalding setpoint of 120-degrees.

My experiment involved filling the tub with hot water only.  My instrumentation recorded the low, high, and current temperatures of the water in the tub.  I had been warned that a tub could have cooling losses that would exceed the heat input of the incoming hot water.  I found that the water warmed up to a high point of 110 degrees, but then tapered down to 104 as the tub filled to the critical jet-level height.  This was plenty warm.

It took six minutes to reach this point.  I then displaced a slightly-larger-than-standard-issue human volume as I slid into the tub, raising the level even further.  The hot water supply was turned off, the jets were fired up, and the temperature seemed to stabilize at 99 degrees.  I expected it to drop steadily, but it remained at that level for the next half-hour– perhaps the jet pumps were providing heat to the water flow that kept it there.  It was still plenty warm.

I am declaring this portion of the renovation successful.  I don’t normally indulge in lengthy baths, but at those times when the anxieties and setbacks of day-to-day life pile up, I have found the comfort of a warm energetic tub to be therapeutic.

Posted in Uncategorized | 5 Comments